A normal picture, when edited, makes the photo more attractive. In the editing process, if you add more color to the photo or change the brightness and darkness, it can be more appealing. When you change the color of the photo or invert colors iPhone photo, it will look perfect. If the photo is too bright, you may also make the iPhone picture negative or change the darkness. This article will guide you on how to invert colors on iPhone Photos on iOS 14. Let’s get started!
How to Invert Colors on iPhone Photos
So, Can You Invert Photos on iPhone? Yes, you can with the Classic Invert option from Settings. Keep reading further to find the steps explaining how to invert colors on iPhone Photos in detail with useful illustrations for better understanding.
Quick Answer
You can invert a picture into a picture negative on iPhone by these simple steps:
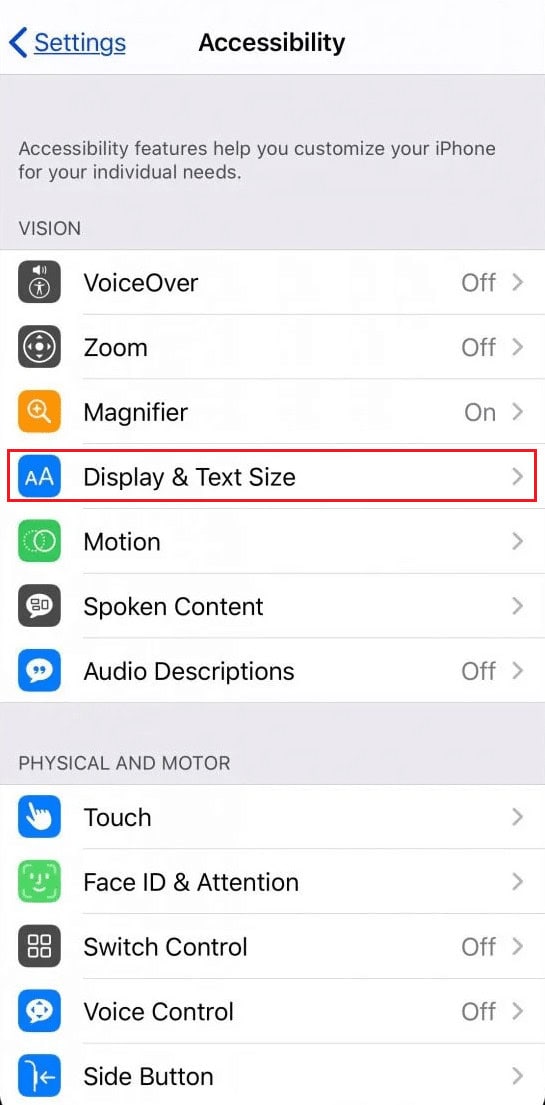
1. Open the iPhone Settings and go to Accessibility.
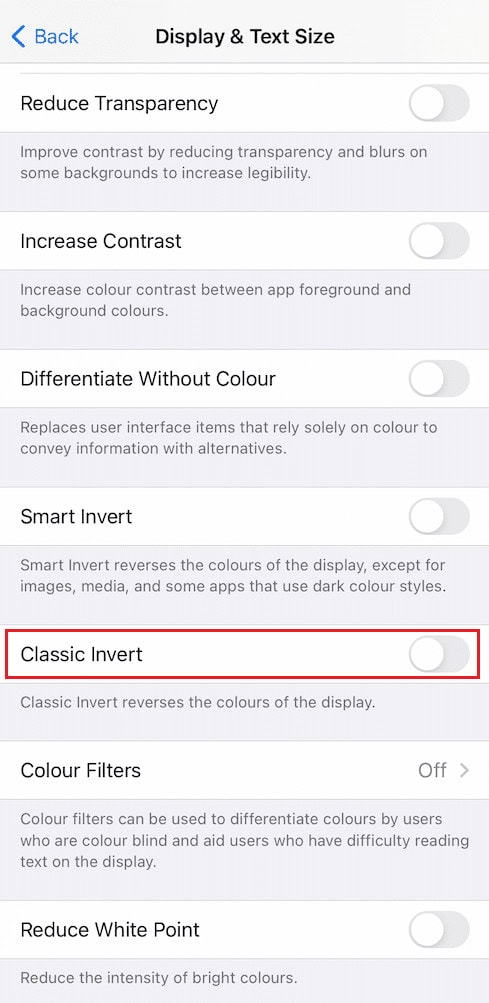
2. Go to Display & Text Size option and Turn the toggle ON for Classic Invert option.
How Do You Make a Picture Negative on iPhone 11?
If you only want to see a picture in the negative without actually editing, you can use the Classic Invert feature on your iPhone. Let’s see how to enable that picture to see all your pictures in negative.
Note: The entire iOS UI color will get inverted, adding the inverted color layer on your iPhone screen. You can disable this feature whenever you want.
1. Open the Settings app on your iPhone.

2. Tap on Accessibility.

3. Then, tap on the Display & Text Size option.
4. Turn on the toggle for the Classic Invert option.
Also Read: How to Fill Color in Procreate
How Do You Make a Picture Negative on iPhone 12?
You can follow the steps mentioned above to make your picture negative without editing it on your iPhone.
How Do You Make a Picture Negative on iPhone 13?
You can also use the Photoshop Express app on your iPhone 13 to permanently edit the photo and turn it negative.
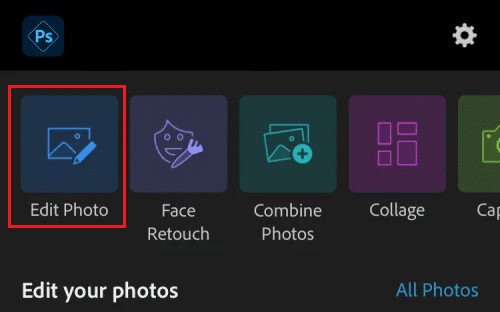
1. Open the Adobe Photoshop Express app on your iPhone.
2. Tap on Edit photo from the home screen of the app.
3. Choose the desired photo from the iPhone storage.
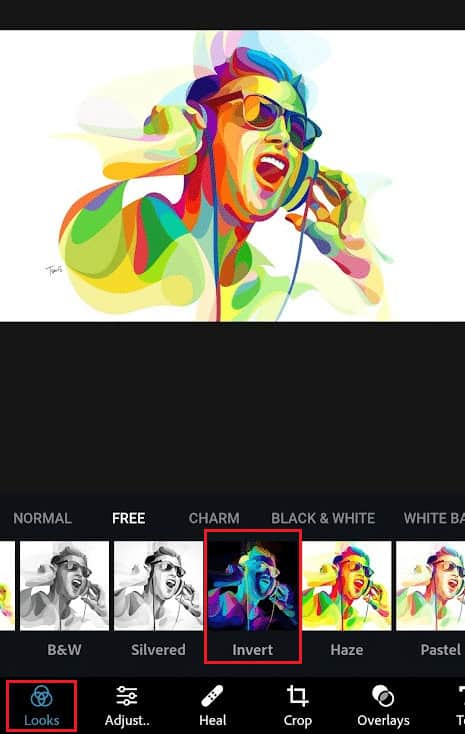
4. Then, tap on the Looks tab from the bottom panel and swipe through the looks options.
5. Locate and tap on the Invert tab to convert the selected photo as a negative.
6. Tap on the Share icon > Save option.
Note: You can access the inverted photo in the Photos app > Albums > PSExpress folder.
Also Read: How to Make Sticker from Photo on iOS 16
How to Invert a Picture on iPhone iOS 14?
The steps to invert a picture by editing it on an iPhone with iOS 14 are mentioned in the above heading. Read and follow those steps to achieve the same on your iPhone.
Recommended:
- What are the Advantages of Copper Cable over Fiber Optic?
- How Do I Cancel My Picsart Subscription
- How to Replace Color in GIMP
- 12 Best Face Merge Online Apps for iOS
We hope that you learned about how to invert colors on iPhone Photos. Feel free to reach out to us with your queries and suggestions via the comments section below. Also, let us know what you want to learn about next.