iCloud Private Relay is a part of iCloud+ that protects your privacy online. It encrypts your IP address and browsing data, making it harder for others to track you. This feature is free for iCloud+ subscribers. If you want to learn how to enable iCloud Private Relay, continue reading our article to gain insight into it.

How to Enable iCloud Private Relay
Imagine having a shield for your online activities, just like a VPN. iCloud Private Relay is one such privacy-centered feature that keeps your internet traffic safe from ad trackers, your Internet Service Provider, and potential hackers. It adds an extra layer of protection to safeguard your online privacy. If you haven’t enabled iCloud Private Relay yet, don’t worry! Our guide will walk you through the steps to activate it.
To learn how to enable iCloud Private Relay, follow the below-mentioned steps:
1. Navigate to the Settings app on your Apple phone.
2. Then, tap on your Apple ID.

3. After that, tap on iCloud.

4. Next, tap on the Private Relay and then toggle on the Private Relay slider.
How to Disable iCloud Private Relay on iPhone
To make yourself familiar with how to disable the iCloud Private Relay iPhone, read the steps discussed below:
1. In the Settings of your Apple device, open your Apple id.
2. Next, open iCloud and tap on Private Relay.
3. Now, toggle off the Private Relay slider.
4. Then, you can choose:
- Turn off Until Tomorrow: This option would toggle off the service for the next 24 hours.
- Turn off Private Relay: This option would turn off the service until you turn it on again.
Also Read: How to Enable Voice Isolation on iPhone
What are the Advantages of Private Relay?
After becoming aware of how to enable iCloud Private Relay, now let’s talk about the advantages of Private Relay. Read the points given below to learn about them:
- Turning on the Private Relay feature on your device will encrypt your internet traffic. So, this prevents third parties to track your activities online thereby ensuring your privacy.
- This feature helps to protect your data. After you have turned this on, then your iPhone would make use of the iCloud IP address automatically when connecting to the internet.
- This feature supports various Apple devices without any extra charges.
What are the Disadvantages of Private Relay?
The disadvantages of Private Relay are as follows:
- The Private Relay feature is still in the initial phase.
- There are various websites and services that still have to adopt Private Relay.
How To Turn off Private Relay for Specific Network
To turn off Private Relay for a specific network, adhere to the steps given below:
1. For Wi-Fi
1. Launch the Settings app and then tap on Wi-Fi.

2. After that, tap on the i icon located next to the connected Wi-Fi network.
3. Finally, toggle off the Limit IP Address Tracking slider.
![]()
Also Read: How to Enable Live Activities on iPhone (iOS 16)
2. For Mobile data
To turn off Private Relay for specific locations using your mobile data, follow these steps:
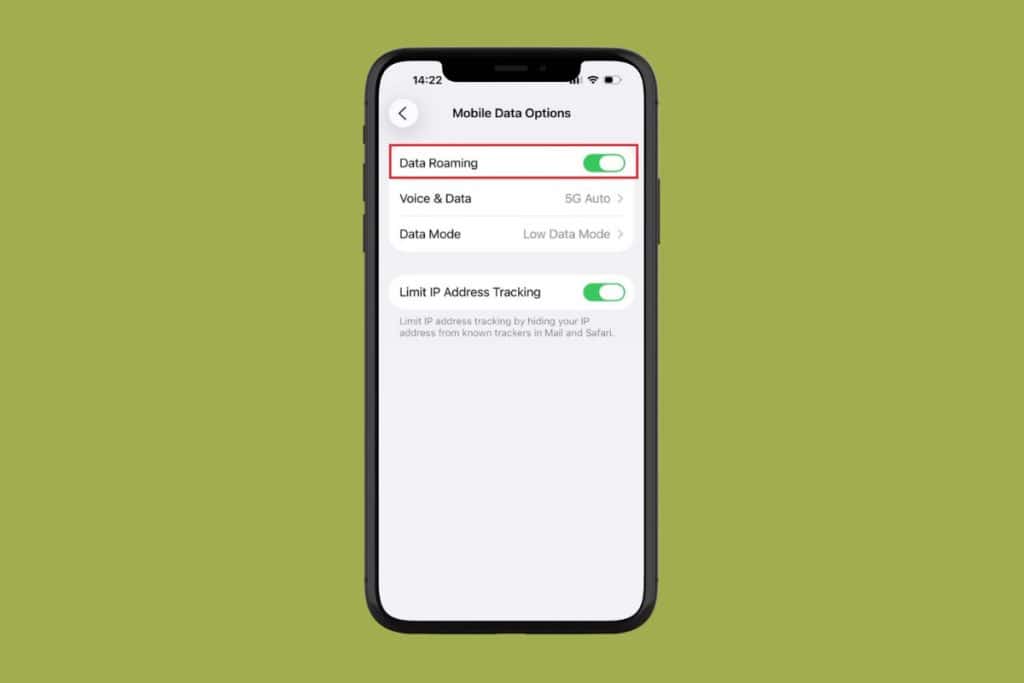
1. Navigate to the Settings app and tap on the Mobile data option.
2. Then, tap on Mobile Data Options.

3. Here, toggle off the Limit IP Address Tracking slider.
![]()
How to Set the Specificity of Your IP Address Location
To do so, check out the steps mentioned below:
1. In Settings, open your Apple ID and tap on iCloud.
2. Then, tap on the Private Relay option.
3. After that, tap on IP Address Location and select one of these:
- Maintain general location: This feature lets websites know your location roughly while using Private Relay.
- Use country and time zone: This shares your country and time zone and not the exact location data.
This wraps our article on how to enable iCloud Private Relay. You can reach out to us with your suggestions and queries via the comments section below. Also, let us know what topic you want to gain insights on in our next article.