
Fix Can’t adjust screen brightness in Windows 10: If you have recently upgraded to Windows 10 then you may be facing this annoying issue where you can’t adjust the screen brightness, in short, screen brightness settings stopped working. If you try to adjust the brightness using Windows Settings apps, you won’t be able to change anything, as dragging the brightness level up or down will do nothing. Now if you try to adjust brightness using the brightness keys on the keyword then it would display the brightness level going up and down, but nothing would actually happen.
![Fix Can't Adjust Screen Brightness in Windows 10 [SOLVED]](https://techcult.com/wp-content/uploads/2017/09/Fix-Cant-adjust-screen-brightness-in-Windows-10.png)
Why I am unable to adjust screen brightness on Windows 10?
If you have enabled automatic battery management then if the battery starts to become low the brightness will be automatically changed to dim settings. And you won’t be able to adjust the brightness again until you will change the battery management settings or charge your laptop. But the issue can be a number of different things for example corrupted drivers, incorrect battery configuration, ATI bug, etc.
This is quite a common issue which a lot of Windows 10 users are facing right now. This issue can also be caused because of the corrupt or incompatible display driver and thankfully this issue can be easily resolved. So without wasting any more time let’s see how to actually fix can’t adjust screen brightness in Windows 10 with the help of below-listed steps.
Fix Can’t Adjust Screen Brightness in Windows 10
Make sure to create a restore point just in case something goes wrong.
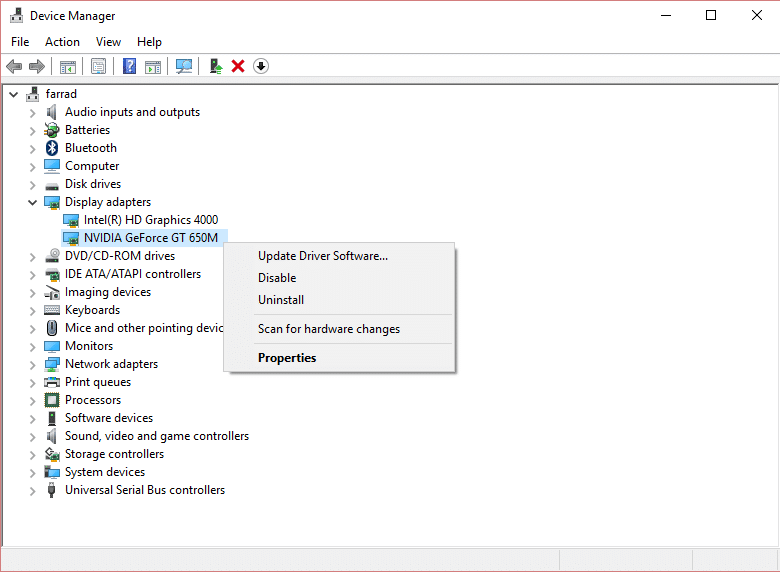
Method 1: Update Display Adapter Drivers
1. Press Windows Key + R then type devmgmt.msc and hit Enter to open Device Manager.

2. Expand Display adapters and then right-click on the integrated graphics card and select Update Driver.

Note: The integrated graphics card would be something like Intel HD Graphics 4000.
3. Then click Search automatically for updated driver software and let it install the driver automatically.
Note: Make sure you have a good internet connection in order for Windows to automatically download the latest drivers.

4. Reboot your PC and see if the issue is resolved or not.
5. If not then again select Update Driver and this time click on Browse my computer for driver software.
6. Next, click on Let me pick from a list of available drivers on my computer option at the bottom.

7. Now checkmark “Show compatible hardware” then from the list select Microsoft Basic Display Adapter and click Next.

8. Let it install the basic Microsoft display driver and reboot your PC to save changes.
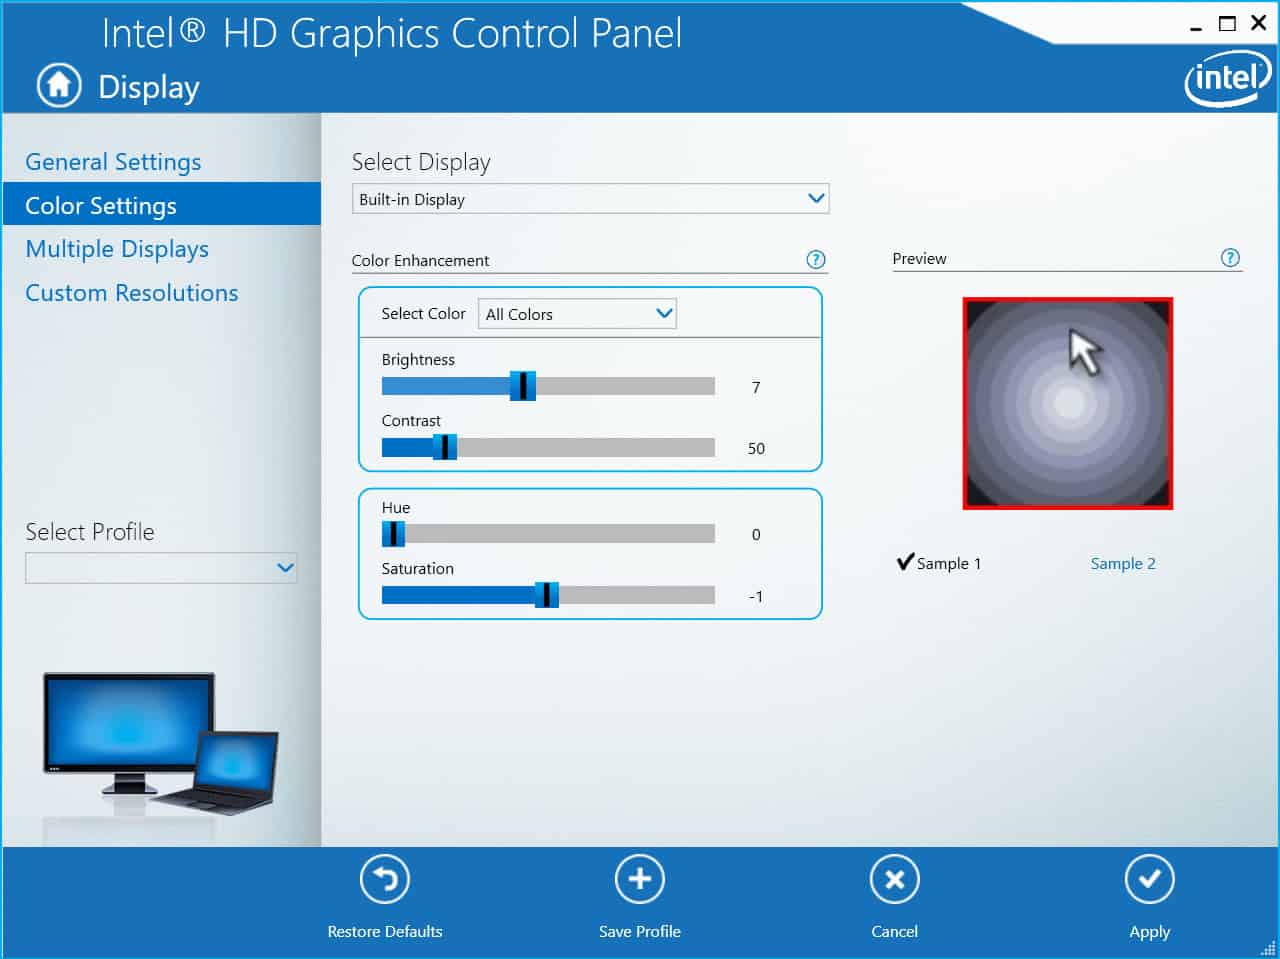
Method 2: Adjust the brightness from Graphics Settings
1. Right-click in an empty area on the desktop then select Intel Graphics Settings.

2. Now click on Display from the Intel HD Graphics Control Panel.
3. From the left-hand menu, select Color Settings.
4. Adjust the Brightness slider according to your liking and once done, click Apply.
Method 3: Adjust screen brightness using Power Options
1. Right-click on the Power icon on the taskbar and select Power Options.
![]()
2. Now click Change plan settings next to currently active power plan.

3. Click Change advanced power settings at the bottom.

4. From the Advanced settings window, find and expand Display.
5. Now locate and click each of the following to expand their respective settings:
Display brightness
Dimmed display brightness
Enable adaptive brightness

5. Change each of these to the settings you wish, but make sure “Enable adaptive brightness” is turned off.
6. Once done, click Apply followed by OK.
7. Reboot your PC to save changes.
Method 4: Enable Generic PnP Monitor
1. Press Windows Key + R then type devmgmt.msc and hit Enter to open Device Manager.
2. Expand Monitors and then right-click on Generic PnP Monitor and select Enable.

3. Reboot your PC to save changes and see if you’re able to fix can’t adjust screen brightness in Windows 10 issue.
Method 5: Update Generic PnP Monitor Driver
1. Press Windows Key + R then type devmgmt.msc and hit Enter.
2. Expand Monitors and then right-click on Generic PnP Monitor and select Update Driver.

3. Select Browse my computer for driver software.

4. Next, click on Let me pick from a list of available drivers on my computer option at the bottom.
5. Now select Generic PnP Monitor and click Next.

6. Reboot your PC to save changes and see if you’re able to fix unable to adjust screen brightness on Windows 10 issue.
Method 6: Update Graphics Card Driver
If the Nvidia Graphics drivers are corrupted, outdated or incompatible then you won’t be able to adjust screen brightness in Windows 10. When you update Windows or install a third-party app then it can corrupt the video drivers of your system. In order to resolve this issue, you need to update your graphics card drivers in order to fix the underlying cause. If you face any such issues then you can easily update graphics card drivers with the help of this guide.
Method 7: Delete hidden devices under PnP Monitors
1. Press Windows Key + R then type devmgmt.msc and hit Enter.
2. Now from Device Manager menu click View > Show hidden devices.

3. Right-click on each of the hidden devices listed under Monitors and select Uninstall Device.

4. Reboot your PC to save changes and see if you’re able to adjust screen brightness in Windows 10.
Method 8: Registry Fix
Note: This method is only for users who have ATI graphics card and have Catalyst installed.
1. Press Windows Key + R then type regedit and hit Enter to open Registry Editor.

2. Navigate to the following Registry key:
HKEY_LOCAL_MACHINE \ SYSTEM \ ControlSet001 \ Control\Class \ {4d36e968-e325-11ce-bfc1-08002be10318} \ 0000
3. Now double-click on the following Registry keys and set their value to 0 then click OK:
MD_EnableBrightnesslf2
KMD_EnableBrightnessInterface2
4. Next, navigate to the following key:
HKEY_LOCAL_MACHINE \ SYSTEM \ CurrentControlSet \ Control \ Class \{4d36e968-e325-11ce-bfc1-08002be10318} \ 0001
5. Again double-click on MD_EnableBrightnesslf2 and KMD_EnableBrightnessInterface2 then set their value’s to 0.
6. Close everything and restart your PC to save changes.
Recommended for you:
- Fix BackgroundContainer.dll error on Startup
- How To Fix Windows Cannot Connect to the Printer
- Fix Network Adapter Error Code 31 in Device Manager
I hope the above steps were helpful and you were able to fix Can’t Adjust Screen Brightness in Windows 10 but if you still have any questions regarding this post feel free to ask them in the comment section.


None of this has worked and I do not even have the display brightness or dimmed display brightness options in the workaround method? J just bought a brand new Asus gaming laptop and the screen is so bright I cant even look at it!!! 🙁
I have tried all of this but still it doesn’t work! I can’t do anything to change the brightness level of my laptop. The screen is so bright it hurts my eyes :(((
What you have to do is to update your graphic driver guys.
i have tried every single thing here and on every other website i’ve found that gives tips multiple times and nothing has working. 30% of the stuff that was shown on these windows never even showed up on mine. HELP.
THANK YOU!!!
I thought my computer was biting the dust because I couldn’t brighten the screen. This fixed it.
My problem was caused by Teamviewer.
It had installed a driver that overrode the generic PNP. You just need to go to device manager > Monitors. If it is not generic PNP monitor then uninstall the device and driver and then scan for hardware changes.
That was the fix for me.
Thank you for sharing this, it might help other users.
Thanks so much. Second time I have encountered this issue, was easy to fix this time thanks to your post.
non of this work for my laptop.
pls help
My display adapter is not Intel graphics it is showing me Microsoft basic display and am using hp 15 what do u tink I can do to adjust my brighteners
i just can’t believe this utterly basic feature can disappear. what are those clowns in Redding doing with their lives
I have tried all those stuffs and my screen is still way bright that i cant even look at it
i have a trouble with brightness adjuster ,i have cleared my problem by u r information thank you
Still the problem hasn’t solved
Am facing the problem right now. I have tried all the above meantioned methods, but can’t work. it seems to have only altered the screen resolution. please help.
thankyou ! its worked !
Is it safe to select “Microsoft Basic Display Adapter” if it doesn’t show up under “Show compatible hardware”? (It only appears if I uncheck that box)
Thank you so much, this actually worked in the first attempt.
Yes !! this fixed it on my MSI U270-215.
Installed the Microsoft basic display adapter and it immediately came back to maximum brightness.
Then I let it search for updated drivers on the internet and it installed the required AMD driver but kept the brightness ok and adjustable !!.
Furthermore I also had a problem with the AMD AHCI sata driver.
Did the same trick; installed the generic Microsoft AHCI driver, let it search for updated driver on the internet et voila; also that problem solved.
Always nice to learn something new 🙂
Method 1 was worked for me . Now i am able to see the brightness bar to adjust brightness.
Method 1 definitely worked!!! It might take some time, but trust me, it’s REALLY gonna save your eyes from the pain.
Worked after deleting the hidden devices, thank you!
Hey! So I tried method 1, and while it worked for me, I would say it’s a temporary fix because I couldn’t play games when using Microsoft Basic Display Adapter (graphics was laggy). And after long search on how to actually correct it, I found a way. Sharing it here so that it could benefit others who have similar problems:
1. If you’re using Intel HD Graphics 4000 like me, try going on their website and download independent driver so that you could update it. (you can also try this if you’re using different ones)
2. After everything is running accordingly, your brightness can be adjusted.
3. If it still doesn’t work, try clicking on this link and follow the instructions
https://answers.microsoft.com/en-us/windows/forum/all/intel-hd-graphics-4000-brightness-fix-solved/488d4baf-ab85-46ad-be78-2fde7ec8522c
This definitely worked for me and now I could adjust my brightness level while using Intel graphics display. Hope it helps!
Thanks For thi \s Its working
I solved my problem using the fifth method.
Thank you very much!
This is a very useful article and I’ve bookmarked it – since I need to do these steps every month or so when Windows decides that I shouldn’t be allowed to adjust my own brightness. Two years on, and the bug still hasn’t been fixed.
Disabling and enabling right after the generic PNP monitor works for me, in device manager. You have to restart the laptop after doing that.
Thank you 😊 its working
i cant be more thanksful! thanks a lot. its been a long time of suffering and now its over!
Thank you. Your very clear instructions and options helped.
haring it here so that it could benefit others who have similar problems
https://www.bleepingcomputer.com/forums/t/728576/problem-downloading-updates-error-code-0x80070002/