If you have been a Windows user for long, chances are, you must have crossed paths with a chrome icon look-alike but without the traditional red, yellow, green colors surrounding a blue dot. This doppelganger application, known as Chromium, has a similar icon to chrome but with different shades of blue and is often mistaken for malware and why wouldn’t it be?
The app has a comparable icon and name as that of the legendary chrome application but also manages to sound like a cheap Chinese rip-off.
To surprise one and all, the application is actually made by Google themselves and forms the basis for many popular web browsers including chrome but sometimes the application allows viruses to hitch-hike on it and enter our PC. This often gets Chromium mistakenly classified as malware.

How To Remove Chromium Malware From Windows 10?
What is Chromium and is it really Malware?
Chromium is an open-source project launched by Google upon which many browsers such as Chrome, Microsoft Edge, Opera, and Amazon Silk are built. On its own, Chromium is a simple web browsing application, similar to chrome but without a couple of features and possesses no harm to your PC.
However, being an open-source project, Chromium’s code is available to all coders and app developers out there. While the honest ones make appropriate use of the code and develop useful and legitimate applications, some take advantage of the open-source nature and use it to plant viruses in our PCs.
There are multiple ways in which a malware version of Chromium may find its way into your PC. The most common being bundling, wherein malware applications are bundled and secretly installed with regular applications. Other points include download from a malicious website, a fake update/reinstall prompt, any illegitimate browser extension or application, installation of freeware or any sharing application, etc.
What happens when Chromium Malware enters your PC?
The Chromium malware makes its presence felt in a multitude of ways. The most common way to identify if your PC is indeed infected with the malware is to open the task manager (CTRL + SHIFT + ESC) and check the number of Chromium processes and their disk usage. If you find multiple instances of Chromium with each using a lot of disk memory, your PC is definitely poisoned by the malware. Other ways in which Chromium may affect your PC include:
- High CPU usage and hence a decrease in PC performance
- Increased number of adverts and pop-ups coupled with irrelevant search results when surfing the web
- Browser’s default home page and search engine are different
- Sometimes you may also be restricted from using certain applications on the PC
- If your PC is home to Chromium malware, your personal data such as browsing history and saved passwords may also be at risk.
5 Ways to remove Chromium malware from Windows 10
Hey, you didn’t come over here to know the particulars about Chromium right? You came here to know how to get rid of the application/malware and get back to peacefully surfing the web.
So, without further delay let’s get right to it. We have five different methods (just in case one isn’t enough) to bid adieu to this dubious little application.
Method 1: End the Running Chromium Process and then Uninstall the Chromium Malware
We start by ending all Chromium processes that are currently running on our computers. To do so, we will need to open the task manager.
1. The easiest way to open the task manager would be to press the Windows icon on your keyboard and searching for Task Manager in the search bar. Once found, a simple left-click of the mouse should open the application.
Note: Other ways to open task manager include: pressing the keys Ctrl, Shift & ESC simultaneously or ctrl, alt & delete followed by a left click on the task manager.

2. Kill all Chrome.exe and Chromium.exe processes from the task manager. Select the process by left-clicking on the name and click ‘End Task’ at the right bottom corner of the task manager.

3. Now that we ended all Chromium processes, we move forward to uninstalling the application from our PC.
4. To uninstall Chromium, we will need to navigate to the Programs and Features menu. Press the Windows key on your keyboard and type ‘Control panel’ and hit enter.

5. From the items listed in the control panel menu, look for Programs and Features and click on it to open.

6. Clicking on the program and Features will open a list of applications installed on your personal computer. Look for Chromium, right-click on the name and select Uninstall.
7. If you do not find Chromium in the list of installed applications, there are high chances the malware may have come bundled with another bogus application you installed recently.
8. Scan the list of installed applications for other suspicious and illegitimate applications (browsers like Olcinium, eFast, Qword, BrowserAir, Chedot, Torch, MyBrowser, etc. are some Chromium-based browsers that act as malware) and uninstall them too.
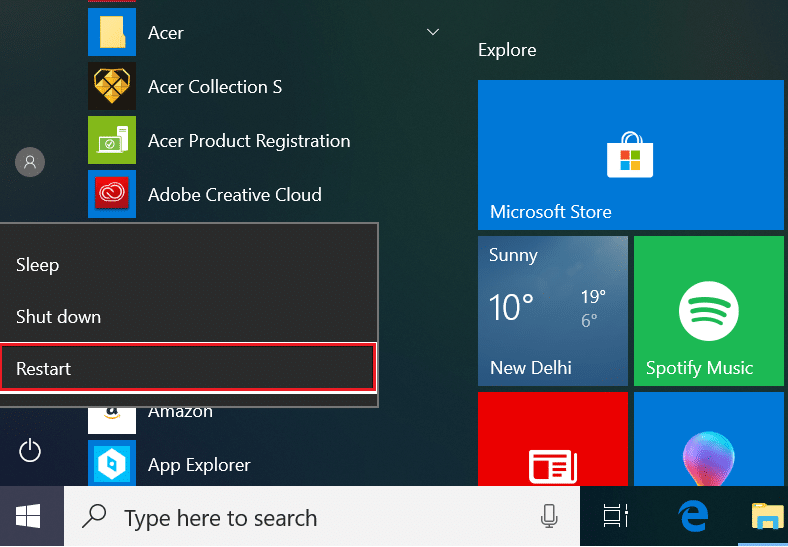
9. At this point, a restart shouldn’t hurt so go ahead and restart your personal computer for good luck. Right-click on start and then hover over ‘Shut down or sign out’ to find ‘Restart’.
The first method should do it for most folks out there but if you are the chosen one and the method didn’t work for you, don’t worry, we got 4 more to go.
Also Read: How to See Recent Downloads in Google Chrome
Method 2: Uninstall Chromium Malware by Deleting the AppData Folder
In this step, we cleanse our PC from the devil by manually deleting all Chromium data including bookmarks, browsing history, cookies, etc.
1. All Chromium data is actually hidden from the user. So first we will need to enable hidden files, folders, and drives.
2. Start by pressing the Windows key on the keyboard or Start button at the bottom left corner and search for Folder Options (Or File Explorer Options) and press enter.

3. Once inside Folder Options, switch to the ‘View’ tab and enable hidden files, folders, and drives. This should let us see all the hidden content on our PCs.

4. Open File explorer by either clicking on its icon on your desktop or press ‘Windows key + E’.
5. Go down the following path: Local Disk (C:) > Users > (your username) > AppData

6. Inside the AppData folder, there will be three different subfolders named Local, LocalLow, and Roaming respectively.
7. Open the ‘Local’ folder first and delete any subfolder named ‘Chromium’ from it.
8. We will also need to check the folder ‘Roaming’, so head back and open the Roaming folder and delete any subfolder that is labeled Chromium.
Method 3: Remove Suspicious Extensions
Apart from bogus and illegitimate applications, the malware may also enter and stay on your PC via a shady browser extension. So let’s go ahead and remove any and all such extensions.
1. Launch Chrome (or the web browser you use) by clicking on its icon.
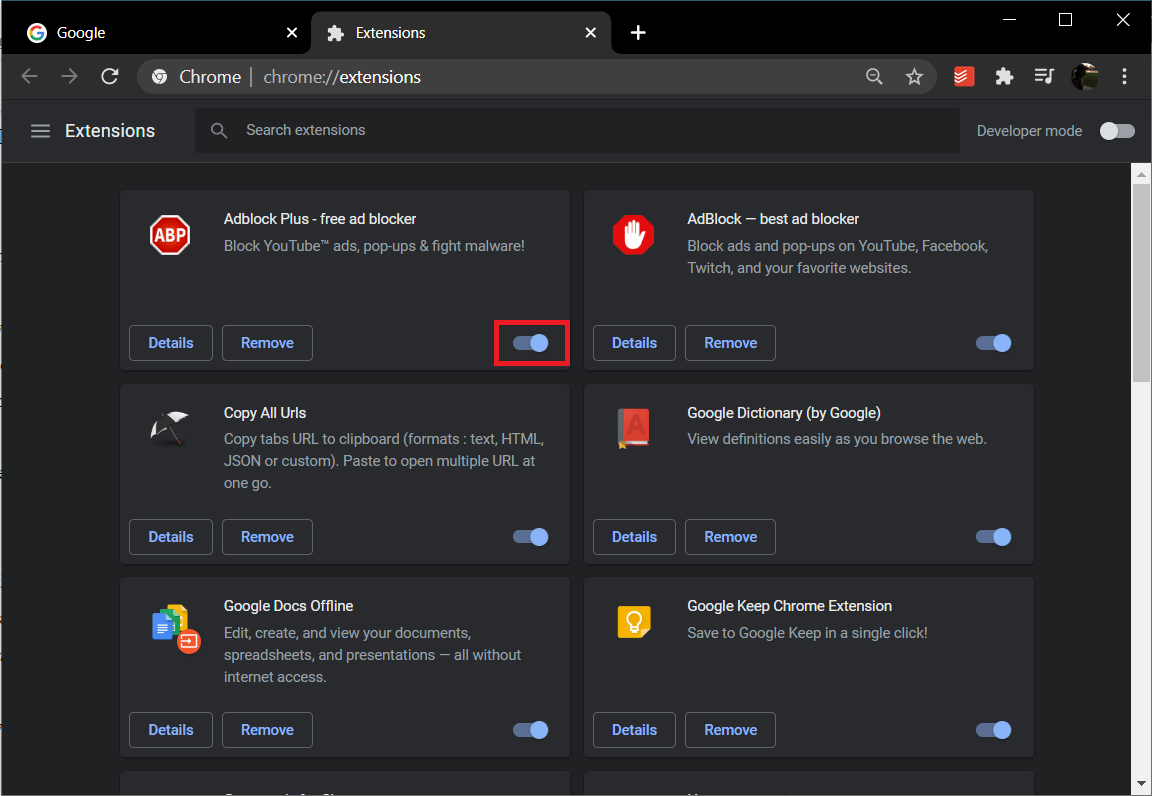
2. Click on the three vertical dots at the top-right corner to open the options menu and click on ‘More Tools’ followed by ‘Extensions’ (For those using Mozilla Firefox, click on the horizontal lines at the top right corner and click on Add-ons. For edge users, click on the three horizontal dots on the top right corner and open ‘Extensions’)

3. Scan the list for any recently installed extension/add-on that you may not be aware of or the ones that look suspicious and remove/delete them.
Also Read: How to Recover Deleted History On Google Chrome?
Method 4: Use Malwarebytes to Remove Chromium Malware
For the penultimate method, we will take the assistance of a reputed application called ‘Malwarebytes’ that protects against malware and virus.
1. Head over to the Malwarebytes website and download the installation file.
2. Double click on the .exe file to start the installation processes. If a user account control message asking for permission to allow changes pop up, simply click yes to proceed.

3. Next, follow the onscreen prompts to install Malwarebytes.

4. After the installation process is finished, open the application and click on ‘Scan Now’ to commence an antivirus scan of your system.

5. Go make some coffee or watch a random youtube video because the scanning process may take some time. Although, make sure to periodically check on the scan.

6. Once the scan is completed, the application will display a list of all the malware and viruses detected on your computer. Locate the ‘Quarantine’ button on the bottom right corner of the application window and left-click on it to get rid of all the detected malware.

7. Malwarebytes will ask you to perform a Restart after it is done removing all suspicious files, go ahead and restart your PC to enjoy a malware-free experience on return.

Method 5: Using an Uninstaller Software
For the final method, we turn to uninstaller applications like CCleaner, Revo, or IObit to do the job for us. These applications specialize in removing/uninstalling malware completely from our PC and for a notorious malware like Chromium which comes in all sizes and shapes and through unknown routes, they might just be the best solution.
1. We will just be covering how to use IObit to get rid of Chromium but the process will remain the same for any other uninstaller software too. Start by downloading and installing the application IObit.
2. Once installed, launch the application and navigate to ‘All Programs’ under Programs.
3. Find Chromium in the displayed list of items and click on the green trash bin icon on its right. From the dialog box that appears next, choose ‘Automatically remove residual files’ to remove all files related to the malware along with the malware application.
4. Restart your PC.
Recommended:
- Difference Between Google Chrome And Chromium?
- Fix Mouse Cursor Disappearing in Google Chrome
- How to Show CPU and GPU Temperature on Taskbar
- Fix Retrieving Data. Wait A Few Seconds Error in Excel
We hope this guide on how to remove Chromium malware from Windows 10 was helpful and you were able to get back to safely surf the web. As a precautionary measure, avoid installing freeware or any application that seems illegitimate. Even if you do, check to see if it isn’t bundled with Chromium or not.