
Fix Service Host: Local System (svchost.exe) High CPU and Disk Usage: If you are facing this issue where a process called Service Host: Local System (svchost.exe) is using all of your system resources causing high CPU and Disk usage in Task Manager then don’t worry as today we are going to see How to Fix this issue with the help of this article. This post will help if you’re facing High CPU usage, Memory usage, or Disk usage because of Service Host: Local System process.
What is Service Host: Local System (svchost.exe)?
Service Host: Local System is itself a bundle of other system processes which run under it, in other words, it’s basically a generic service hosting container. So troubleshooting this problem becomes difficult as any process which runs under Service Host: Local System can cause the high CPU or disk usage problem. Service Host: Local System includes processes such as a User Manager, Group Policy Client, Windows Auto Update, Background Intelligent Transfer Service (BITS), Task Scheduler etc.
You can quickly see various processes under Service Host: Local System by pressing Ctrl + Alt + Del keys together to open Task Manager, then switch to Processes tab and find the Service Host related processes such as Service Host: Local Service, Service Host: Network Service, etc. When you will expand these service you will find various processes running under it.

As you see there are a number of process running under Service Host: Local System (svchost.exe) such as Windows Update which might take a lot of system resources but if a particular process is causing high CPU & Disk usage constantly then it can be a problem which needs to be taken care of. So without wasting any time let’s see How to Fix Service Host: Local System (svchost.exe) High CPU and Disk Usage with the help of the below-listed tutorial.
Fix Service Host: Local System (svchost.exe) High CPU and Disk Usage
Note: Make sure to create a restore point just in case something goes wrong.
Before continuing with the troubleshooting steps, you should first identify the root cause of the problem i.e which service or process under Service Host: Local System is causing the high CPU or Disk usage problem. To do this you will need a free tool by Microsoft called Process Explorer.
1.Download this program from the above link, right-click on the procexp64.exe file and select run as administrator.

2.Now click on the CPU column to sort the processes by CPU or memory consumption.
3.Next, find the svchost.exe process in the list and right-click on it & select Properties.

4.In the svchost.exe properties window, switch to Services tab where you will find a list of services running under this process.

5.Next, switch to the Thread tab where you will find all the threads that are executed within svchost.exe service.

6.Click on the CPU column & Cycles Delta column to sort the threads, and find the service or dll library causing high cpu usage.
7.Click on the particular service causing the issue and click on the Kill or suspend button.

8.Next, wait for few minutes and see if high CPU or Disk usage by Service Host: Local System (svchost.exe) is fixed.
9.If you are still facing the issue, follow the above steps for all the threads taking a large chunk of system resources.
10.Once you have zero-in on the particular culprit which was causing the issue, you need to disable the particular service from the services.msc window.
11.To do this you will need to map DLL names to service names, using step 4.

12.Press Windows Key + R then type services.msc and hit Enter.

13.Find the particular services causing the issue in the service.msc window, then right-click on it and select Properties.

14.If the service is already running, click on Stop then from the Startup type drop-down select Disabled.

15.Click Apply followed by OK to save changes and this would Fix Service Host: Local System (svchost.exe) High CPU and Disk Usage issue.
Method 1: Run SFC and DISM Command
1.Press Windows Key + X then click on Command Prompt(Admin).

2.Now type the following in the cmd and hit enter:
Sfc /scannow
sfc /scannow /offbootdir=c:\ /offwindir=c:\windows (If above fails then try this one)

3.Wait for the above process to finish and once done restart your PC.
4.Again open cmd and type the following command and hit enter after each one:
Dism /Online /Cleanup-Image /CheckHealth
Dism /Online /Cleanup-Image /ScanHealth
Dism /Online /Cleanup-Image /RestoreHealth

5.Let the DISM command run and wait for it to finish.
6. If the above command doesn’t work then try on the below:
Dism /Image:C:\offline /Cleanup-Image /RestoreHealth /Source:c:\test\mount\windows
Dism /Online /Cleanup-Image /RestoreHealth /Source:c:\test\mount\windows /LimitAccess
Note: Replace the C:\RepairSource\Windows with the location of your repair source (Windows Installation or Recovery Disc).
7.Reboot your PC to save changes and see if you’re able to Fix Service Host: Local System (svchost.exe) High CPU and Disk Usage.
Method 2: Delete SoftwareDistribution Folder
1.Press Windows Key + R then type services.msc and hit Enter.
2.Right-click on Windows Update service and select Stop.

3.Open File Explorer then navigate to the following location:
C:\Windows\SoftwareDistribution
4.Delete all the files and folders under SoftwareDistribution.

5.Again right-click on Windows Update service then select Start.

6.Now to try to download the updates and see if you’re able to Fix Service Host: Local System (svchost.exe) High CPU and Disk Usage.
Method 3: Disable Superfetch
1.Press Windows Key + R then type services.msc and hit Enter.
2.Find Superfetch service from the list then right-click on it and select Properties.

3.Under Service status, if the service is running click on Stop.
4.Now from the Startup type drop-down select Disabled.

5.Click Apply followed by OK.
6.Reboot your PC to save changes.
If the above method doesn’t disable Superfetch services then you can follow disable Superfetch using Registry:
1.Press Windows Key + R then type regedit and hit Enter to open Registry Editor.

2.Navigate to the following registry key:
HKEY_LOCAL_MACHINE\SYSTEM\CurrentControlSet\Control\Session Manager\Memory Management\PrefetchParameters
3.Make sure you have selected PrefetchParameters then in the right window double click on EnableSuperfetch key and change it’s value to 0 in the value data field.

4.Click OK and close the Registry Editor.
5.Restart your PC to save changes and see if you’re able to Fix Service Host: Local System (svchost.exe) High CPU and Disk Usage.
Method 4: Registry Fix
1.Press Windows Key + R then type regedit and hit Enter to open Registry Editor.
2.Navigate to the following registry key:
HKEY_LOCAL_MACHINE\SYSTEM\ControlSet001\Services\Ndu
3.Make sure to select Ndu then in the right window pane double-click on Start.

4.Change the value of Start to 4 and click OK.

5.Close everything and reboot your PC to save changes.
Method 5: Run Windows Update troubleshooter
1.Press Windows Key + I to open Settings then click on Update & Security.
![]()
2.From the left-hand menu make sure to select Troubleshoot.
3.Now under Get up and running section, click on Windows Update.
4.Once you click on it, click on “Run the troubleshooter” under Windows Update.

5.Follow on-screen instructions to run the troubleshooter and see if you’re able to Fix Service Host: Local System (svchost.exe) High CPU and Disk Usage.

Method 6: Perform a Clean boot
Sometimes 3rd party software can conflict with System and therefore can cause high CPU usage on your PC. In order to Fix Service Host: Local System (svchost.exe) High CPU and Disk Usage, you need to perform a clean boot on your PC and diagnose the issue step by step.
Method 7: Restart Windows Update service
1.Press Windows Key + R then type “services.msc” (without quotes) and hit Enter.
2.Locate the following services:
Background Intelligent Transfer Service (BITS)
Cryptographic Service
Windows Update
MSI Installer
3.Right-click on each of them and then select Properties. Make sure their Startup type is set to Automatic.

4.Now if any of the above services are stopped, make sure to click on Start under Service Status.
5.Next, right-click on Windows Update service and select Restart.

6.Click Apply followed by OK and then reboot your PC to save changes.
Method 8: Change Processor Scheduling
1.Press Windows Key + R then type sysdm.cpl and hit Enter to open System Properties.
2.Switch to the Advanced tab and click on Settings under Performance.

3.Again switch to Advanced tab under Performance Options.
4.Under Processor scheduling select Program and click Apply followed by OK.

5.Reboot your PC to save changes and check if you’re able to resolve Service Host: Local System (svchost.exe) High CPU and Disk Usage issue.
Method 9: Disable Background Intelligent Transfer Service
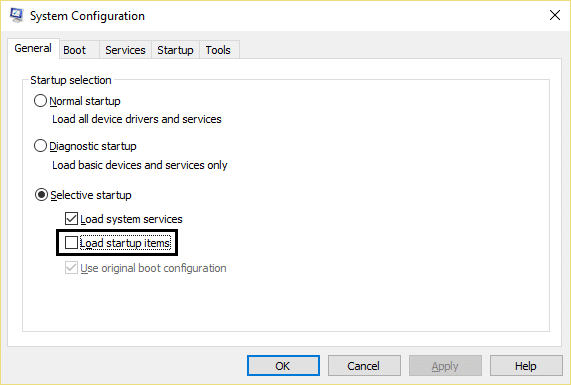
1.Press Windows Key + R then type msconfig and hit Enter.
2.Switch to services tab then uncheck “Background Intelligent Transfer Service”.

3.Click Apply followed by OK.
Method 10: Perform System Restore
1.Press Windows Key + R and type”sysdm.cpl” then hit enter.
2.Switch to System Protection tab and click on System Restore button.

3.Click Next and choose the desired System Restore point.

4.Follow the on-screen instruction to complete system restore.
5.Reboot your PC to save changes.
Recommended:
- Fix HDMI Sound Not Working in Windows 10
- 5 Ways to Fix No Sound on YouTube
- Youtube Not Working Issue on Chrome [SOLVED]
- Fix YouTube Running Slow On Your PC
That’s it you have successfully Fix Service Host: Local System (svchost.exe) High CPU and Disk Usage but if you still have any questions regarding this tutorial then feel free to ask them in the comment’s section.


