Fix Corrupted Outlook .ost and .pst Data Files: Microsoft has its own Office applications which come in a package called Microsoft Office that consists of all the modules/applications which are required to operate an organization efficiently. For example, Microsoft Word is used to create documents, Microsoft PowerPoint to create presentations, Microsoft Outlook to provide Calendar, Event Manager, etc.
Microsoft Outlook is one of the most popular applications under Microsoft Office. It is an offline personal information manager design for various platforms like MS Windows and MAC. MS Outlook is designed to work as an email application. It also has plenty of other features which includes calendar, task manager, event manager, journals, web browsing, etc. It can also use to share multiple files and documents with multiple users.

MS Outlook stores the copy of all emails, contacts, calendars, journals, etc. All the above data is saved in two file formats which are OST and PST, depending on the account type for offline access.
OST files: OST is an offline folder in MS Outlook. These files enable to save Outlook data in offline mode and can sync automatically when connected to the Internet. All the saved offline data is stored in the MS Exchange server. This feature enables the user to read, delete, compose or even send reply of emails in offline mode.
PST files: PST files also known as Personal Storage Table is a personal or online storage folder. The data is stored on servers except for exchange server (where OST files saved data is stored) and on users hard disk. IMAP and HTTP use PST file folders. So all the emails which are sent or receive or attach to them are stored in PST format. All the emails, journals, calendars, contacts which are locally stored are also saved in .pst format.
PST and OST files are very large. These files can accumulate many years of emails, contacts, appointments, etc. In the early days, PST/OST files were limited to the size of 2GB but these days they can grow into many terabytes. As these files size grow they can cause several problems with a span of time. The problems arise can be:
- The files may stop working
- You will have searching or indexing problem
- The files may get damaged, corrupted or missing
To solve all the above problems, all desktop versions of Outlook provided with a repair tool called Microsoft Outlook Index Repair Tool to troubleshoot and fix problems with .ost and .pst files. The Index Repair Tool is available in the Office installation directory.
Fix Corrupted Outlook .ost and .pst Data Files
To fix corrupted outlook data files: .ost files and .pst files and to recover missing items from inbox follow the below steps:
Method 1 – Fix Corrupted Offline Outlook Data File (.OST File)
To fix issues with .ost files, first close the email app and then follow the below steps:
1.Search for Control Panel in the Windows Search and then click on the search result.

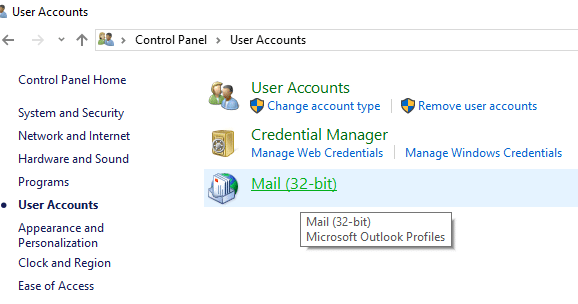
2.Click on User Accounts under Control Panel.

3.Next, click on Mail.
4.After clicking on “Mail”, if you do not have any added profile, the below box will appear. (If you already have any profile added then skip to step 6).

5.Click on the Add Button and add Profile. If you do not want to add any profile simply click OK. Outlook will be created as a default profile.

6.If you already have any profile added then under “Mail Setup – Outlook” click on “Show profiles”.

7.All the profiles available will appear.
Note: Here only one default profile “Outlook” is available)

8.Select the profile you want to fix from available profiles.

9.Then click on the Properties button.

10.Next, click on the Email Accounts button.

11.Now under Account Settings click on the Data Files tab.

12.Select the corrupted account from available accounts.

13.Click the Open File Location button.

14.Click the close button for “Account settings”, “Mail Setup” and “Mail”.
15.Right-click on .ost file for the account which has an issue and click on the Delete button.

16.Once all the above steps are completed, open the desktop version of Outlook again and recreate the .ost file for the account you want to repair.
This will successfully Fix Corrupted Outlook Data Files (.OST) and you would be able to access Microsoft Outlook without any issues.
Method 2 – Fix Corrupted Online Outlook Data File (.PST File)
To fix issues with .pst files, first close the Outlook application and then follow the below steps:
1.Open the Run window using Windows key + R.

2.Type the below path and click OK.
C:\Program Files (x86)\Microsoft Office\root\Office16
Important Note: The above path applies to Office 2016, Office 2019 and Office 365. If you have Outlook 2013, instead of above path use: C:\Program Files (x86)\Microsoft Office\Office15. For Outlook 2010 change Office15 to Office14 and for Outlook 2007 change Office15 from the path to Office13.

3.Click on the OK button.

4.Double-click the SCANPST file to open the Microsoft Outlook Inbox Repair experience.

5.The below box will open up.

6.Click on the Browse button under Microsoft Outlook Inbox Repair Tool.

7.Locate the .pst file you want to Repair.
8.Then click on the Open button.

9.The selected file will open in Microsoft Outlook Inbox Repair tool.

10.Once the select file is loaded click on the Start Button.

11.The below box will appear which will show that the selected file has been scanned.

12.Checkmark “Make backup of scanned file before repairing” if it is not checked.
13.After the .PST file has been scanned click on the Repair button.

14.After the repair finishes, look for the stats on the program to check if there are still some remaining errors left or not. If there are, then continue to run the Repair again and again until there no errors left.
Note: Initially, the repair will be slow but as soon as error starts fixing the process will speed up.
15.After completing the above steps, the Microsoft Outlook Inbox Repair tool will repair the .pst file which you selected earlier. Once the repair completes, you can now launch Outlook and your problem with the account should be resolved by now.
So, by carefully following the above process step by step, you can easily fix the corrupted Outlook data files whether it is in .ost format or .pst format.
Recommended:
- External Hard Drive Not Showing Up or Recognized? Here is how to fix it!
- Always Start Web Browser in Private Browsing Mode by Default
- How to Install ADB (Android Debug Bridge) on Windows 10
- Install And Configure XAMPP on Windows 10
I hope this article was helpful and you can now fix Corrupted Outlook .ost and .pst Data Files, but if you still have any questions regarding this tutorial then feel free to ask them in the comment’s section.