Do you want to quickly find desired emails in your inbox without sorting through a cluttered heap? If yes, Gmail labeling can help you organize your inbox for easy accessibility. But as many users are unaware, you can also label multiple emails simultaneously and create label filters for automated grouping in Gmail. We will discuss these methods to separate your work-related, personal, and promotional ones, allowing you to locate them within seconds.

How to Label Multiple Emails in Gmail
To find the required email, people often spend a significant amount of time on their email accounts. However, labeling provides several helpful features, especially on Gmail, that can come to the rescue. Learning these methods can help you spend less time searching and be more productive in your actual work. Fortunately, these methods are easy to perform and will be covered in the following sections. Let’s dive in!
Quick Answer
To label multiple emails in Gmail, you can follow these steps:
1. Select the emails you want to label by clicking on the checkbox next to each email on your Gmail account.
2. Click on the Label icon at the top of the Gmail inbox. This will open a drop-down menu with all your available labels.
3A. Choose the label that you want to apply to the selected emails.
3B. Or, click on Create new at the bottom of the drop-down menu and type in the name of the new label.
How to Label Multiple Emails in Gmail?
To know how to label multiple emails in Gmail, follow these steps:
Option I: On Gmail Web
Note: Make sure you are logged into Gmail with your Google account.
1. Open the browser on your PC and access your Gmail account.
2. Click on the hamburger menu icon > Inbox from the left pane.
![]()
3. Select the desired emails that you want to label.
4. Click on the label icon from the top of your email inbox.
![]()
5. Click on the desired label to which you want your emails to appear.
Note: You can also click on Create new to create a personalized label for the selected emails.

Now, let’s see how you can label multiple emails on the Gmail app.
Also Read: How to Create Labels in Gmail
Option II: On Gmail App
1. Open the Gmail app on your phone.
2. Tap and hold every desired email you want to label.
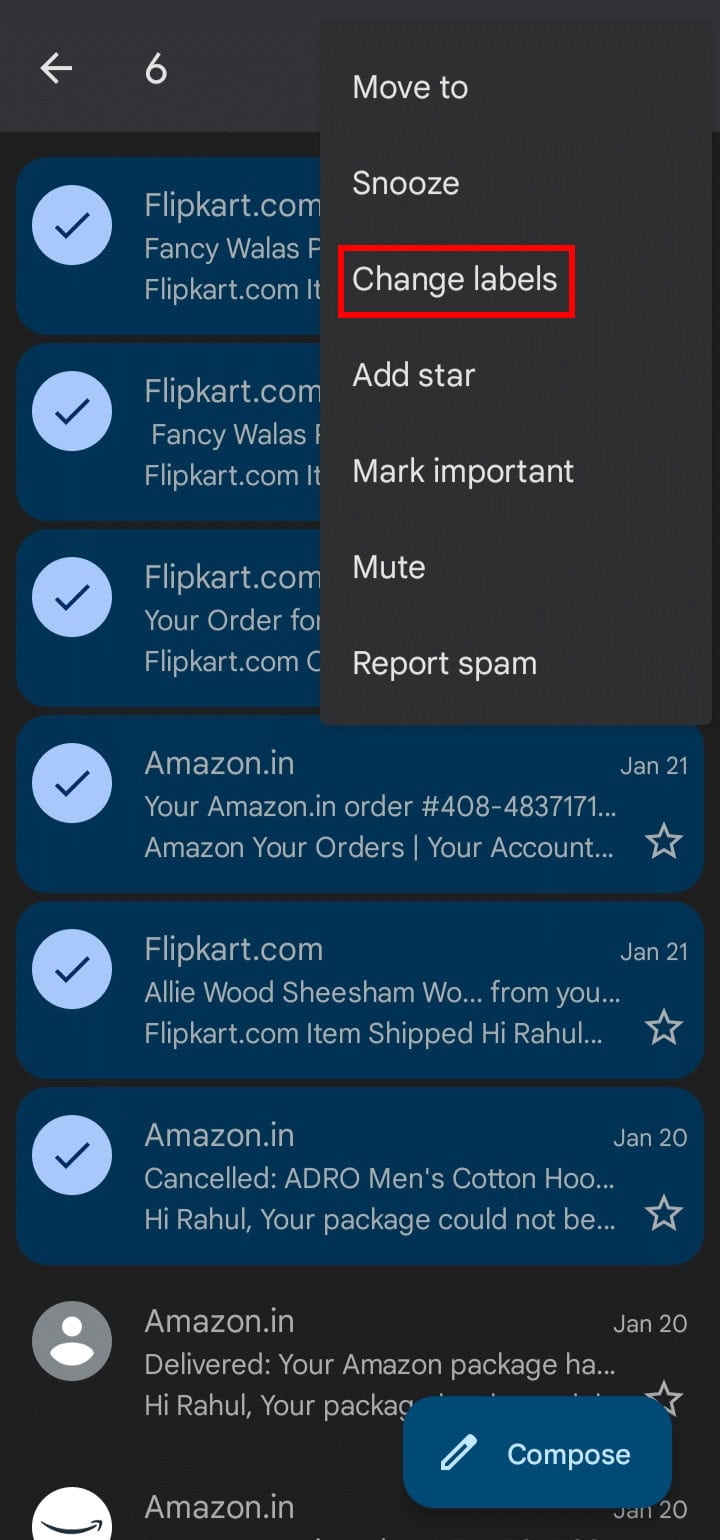
3. Tap on the three-dotted icon from the top right corner of the screen.
![]()
4. From the drop-down menu, tap on the Change labels option.
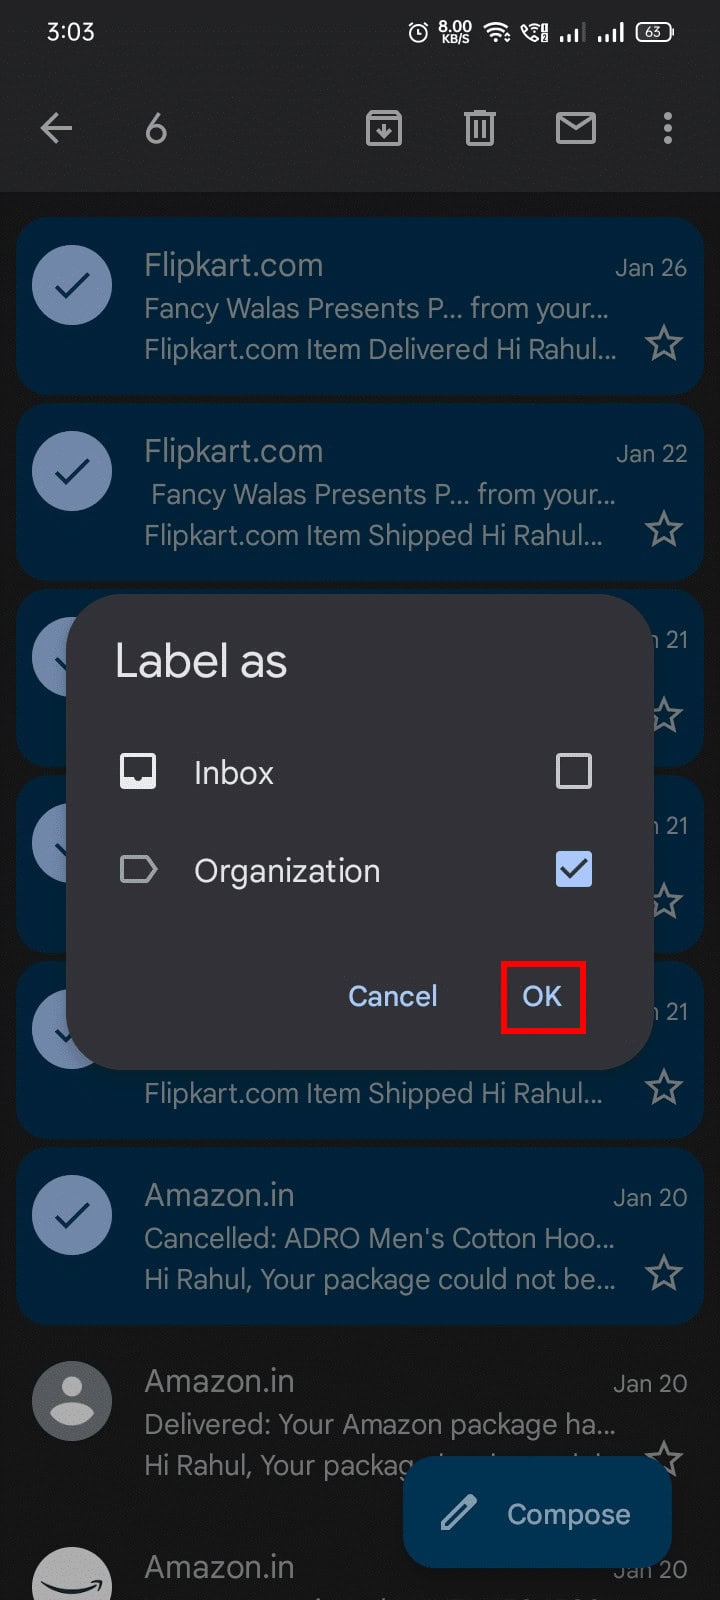
5. Then, uncheck the checkbox for the Inbox option.
6. Now, tap on the desired label name to apply it.
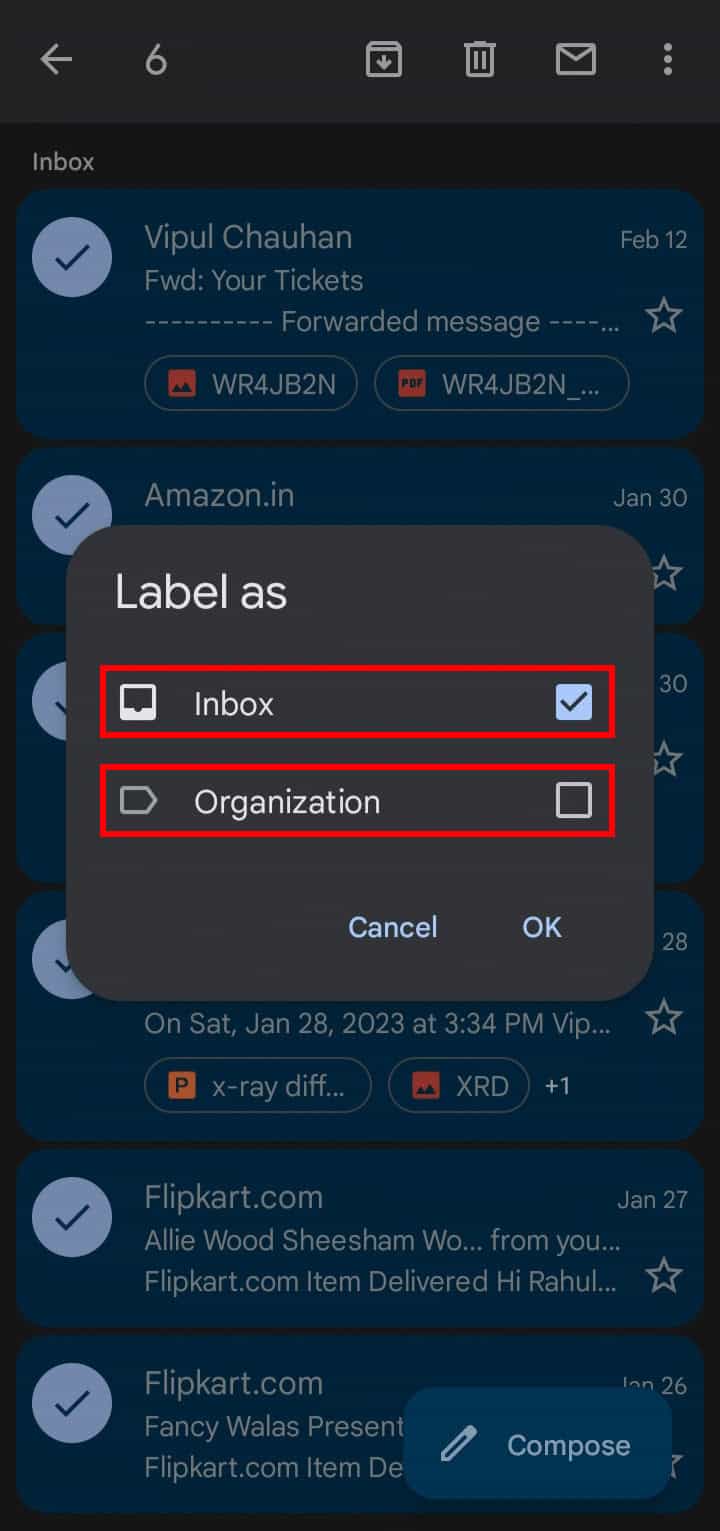
7. Tap on the OK option to confirm the label change.
Also Read: How to Remove Labels from Google Maps Map View
How Do I Move Emails Directly to Labels in Gmail?
Below are the steps on how to move emails directly to label emails Gmail:
1. Launch the Gmail app on your phone.
2. Select the desired emails and tap on the three-dotted icon.
3. From the drop-down menu, tap on the Move to option.
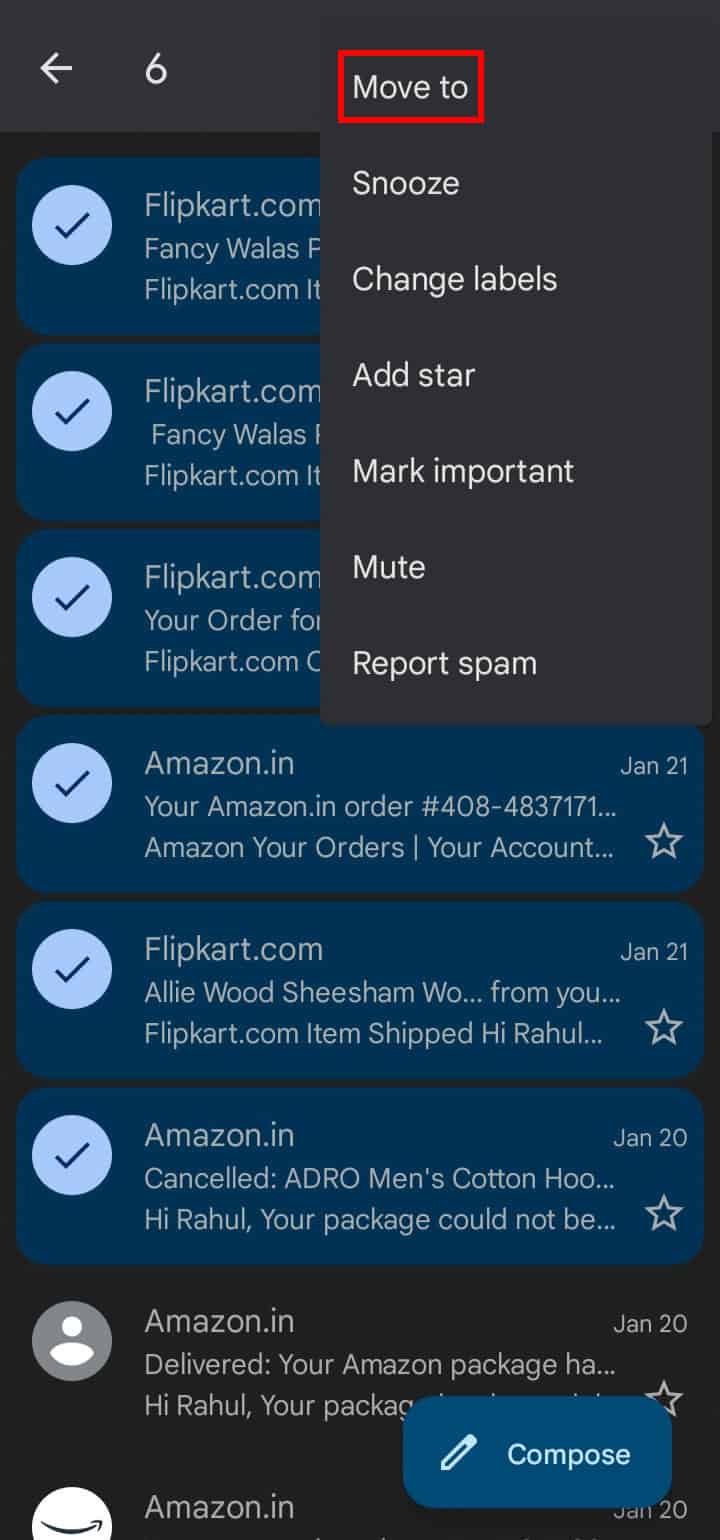
4. Tap on the desired label to which you want to move your emails.

Also Read: How to Delete Emails in Gmail on Phone
How to Automatically Label Emails in Gmail?
To know how to automatically label emails in Gmail, follow these steps:
1. Open your Gmail account.
2. Click on the Filter icon from the search bar at the top.
![]()
3. Enter the desired email addresses whose emails you would like to receive in the selected label.
4. Based on your preference, enter the remaining filter details.

5. Click on the Create filter option to create a filter of your set restrictions.

6. Mark the checkboxes for the Skip the Inbox (Archive it) and Apply the label option.
7. Then, select the desired label.

8. Select the other desired checkboxes and click on Create filter.

Now, navigate to the desired label menu to see the assigned emails.
Recommended:
- How to Recover Permanently Deleted Text Messages
- What to Do If I Forgot My Verizon Email Password?
- How to Create Multiple FedEx Shipping Labels
- Fix Email Address Not Found in Gmail
So, as said earlier, learning how to label multiple emails in Gmail methods is not a tough task at all. And you must have realized it now with the help of this article. Mention various labels you have created in your Gmail account to keep it away from any clutter. Also, drop any queries or suggestions about this topic in the space provided below.