
Fix Windows Experience Index Freezing Issue: Windows Experience Index was specifically designed as a benchmark tool that offers a score based on your system hardware. These scores tell you how well your system will perform various tasks but later it was removed from newer versions of Windows starting from Windows 8.1. Anyway, users were experiencing the freezing issue when they were playing games or running the Windows Experience Index utility.

The main problem which seems to be causing this issue is DXVA (DirectX Video Acceleration) which crashes thus freezing the Windows Experience Index. So let’s see how to Fix Windows Experience Index Freezing Issue with the help of below-listed troubleshooting guide.
Windows Experience Index Freezing [SOLVED]
Make sure to create a restore point just in case something goes wrong.
Method 1: Disable DirectX Video Acceleration (DXVA)
Note: DXVA requires .NET Framework and Microsoft Visual C++ 2008 Runtime to run.
2.Run the setup.exe to install the application and then run the DXVA Checker.
3.Switch to DirectShow/MediaFoundation Decoder tab and from the top-right corner click on DSF/MFT Viewer.

4.Now there will be two tabs one will be DirectShow and another one will be Media Foundation.
5.Under both of these tabs, you will find some entries written in red which means these entries are DXVA-accelerated.

6.Select these entries one by one and then from the bottom-right click on DXVA and select Disable DXVA2 or Disable.

7.Reboot your PC to save changes and see if you’re able to Fix Windows Experience Index Freezing Issue.
Method 2: Update Graphics Drivers
1.Press Windows Key + R then type “devmgmt.msc” (without quotes) and hit enter to open Device Manager.

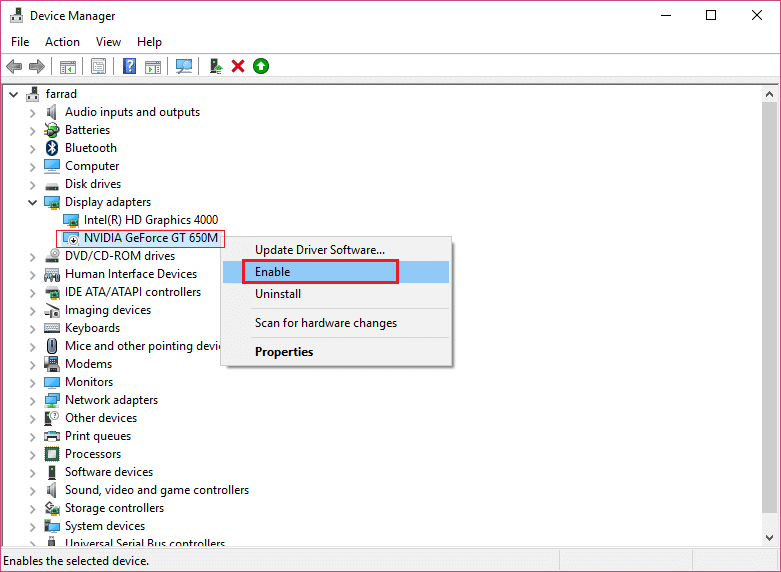
2.Next, expand Display adapters and right-click on your Nvidia Graphic Card and select Enable.
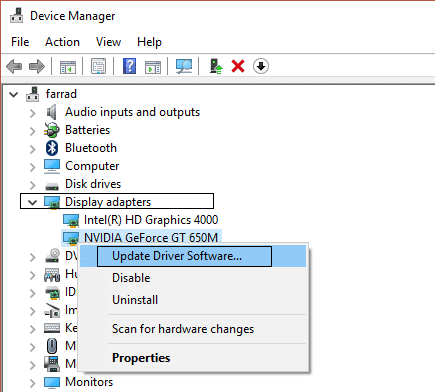
3.Once you have done this again right-click on your graphic card and select “Update Driver Software.“
4.Select “Search automatically for updated driver software” and let it finish the process.

5.If the above step was able to fix your problem then very good, if not then continue.
6.Again select “Update Driver Software” but this time on the next screen select “Browse my computer for driver software.“

7.Now select “Let me pick from a list of device drivers on my computer.”

8.Finally, select the compatible driver from the list for your Nvidia Graphic Card and click Next.
9.Let the above process finish and restart your PC to save changes.
Method 3: Update BIOS
Performing BIOS update is a critical task and if something goes wrong it can seriously damage your system, therefore, an expert supervision is recommended.
1.The first step is to identify your BIOS version, to do so press Windows Key + R then type “msinfo32” (without quotes) and hit enter to open System Information.

2.Once the System Information window opens locate BIOS Version/Date then note down the manufacturer and BIOS version.

3.Next, go to your manufacturer’s website for e.g in my case it’s Dell so I will go to Dell website and then I will enter my computer serial number or click on the auto detect option.
4.Now from the list of drivers shown I will click on BIOS and will download the recommended update.
Note: Do not turn off your computer or disconnect from your power source while updating the BIOS or you may harm your computer. During the update, your computer will restart and you will briefly see a black screen.
5.Once the file is downloaded, just double-click on the Exe file to run it.
6.Finally, you have updated your BIOS and this may also Fix Windows Update Stuck or Frozen issue.
Recommended:
- Fix Steam Error Failed to load steamui.dll
- Change Template of a Drive, Folder, or Library in Windows 10
- Fix Windows cannot complete the extraction error
- Fix DHCP is not enabled for WiFi in Windows 10
That’s it you have successfully Fix Windows Experience Index Freezing Issue but if you still have any questions regarding this guide then feel free to ask them in the comment’s section.


