If you are a person who loves to play games, then the Steam app isn’t foreign to you. One of the files that help the proper functioning is the steam_api64.dll. The steam_api64.dll missing error may occur due to faulty applications, malicious software, or issues in Windows Registry. As a solution, if you are searching for the result to steam_api64.dll download, be sure to try the methods explained before and then proceed to such methods.

How to Fix steam_api64.dll Missing on Windows 10
Try the basic troubleshooting methods at first to solve the issue of the steam_api64.dll file missing error. If there is a certain glitch in the Steam app or on your PC, it can be easily resolved.
1. Restart your PC: If there is a minor glitch on your PC that is stopping you from using the Steam app effectively, you can try restarting your PC. To restart your PC, press the Windows key, click on the Power button, and select the option Restart in the menu to restart your PC.

2. Disable Anti-virus software on your PC: If the Anti-virus software, especially third-party anti-virus software, is enabled on your PC, it can disrupt the proper functioning of the Steam app. You may not be able to find the steam_api64.dll file on your PC, thus, disabling the Anti-virus software on your PC can help you use the app properly.

3. Run Windows Defender Offline Scan on your PC: If there are issues on your PC that are not letting you find the steam_api64.dll file, you can try running a Windows Defender Offline Scan on your PC to fix this issue. The scan will lead you to the glitches on your PC, and you can clear them to fix the issues.

4. Repair System Files: If the problem steam_api64.dll is not available due to the files on your PC, you can try running an SFC or the System File Checker scan on your PC, to find the issues and fix them. This way you will be able to clear all the glitches and you can use the Steam app with ease.

5. Perform System Restore on your PC: If your PC was performing well at earlier versions or has been disrupted after installing new features, you can try performing a System Restore that would help you restore your PC to the older version in which it was functional. This way you may be able to find the steam_api64.dll in the C Drive or the destination folder you have chosen.

6. Install the latest C++ version on your PC: If the C++ version on your PC is so outdated, it may not help you in using hi-tech apps like Steam, and eventually, the steam_api64.dll file may be missing from your PC. Hence, you need to install the latest C++ version on your PC from the official website.

7. Update Graphics Driver: If you are using an outdated graphics driver, you may not be able to use the Steam app as it is an app that requires good display drivers. Hence, you need to update your Graphics driver to use the Steam app and to avoid the steam_api64.dll is missing issue.

8. Contact System Administrator for Support: If the glitch in your PC is not resolved despite the several basic troubleshooting methods mentioned above, you may contact the System Administrator for support. By resolving the issues on the PC, you can find the steam_api64.dll on your destination folder.
Also Read: Fix Steam Content File Locked Error
Method 1: Run Steam as Administrator
If you are not able to use the Steam app because the steam_api64.dll file is missing for a particular game, you can try running the app as an Administrator. This way, all the DLL files for the games will be restored on the Steam app.
1. Press the Windows + D keys together to view your PC Desktop, right-click on the Steam app icon, and select the option Properties in the menu displayed.

2. Navigate to the Compatibility tab in the Properties window and select the option Run this program as an administrator in the Settings section. Click on the buttons Apply and then on OK to run the Steam app as an Administrator.

Method 2: Run the Steam app in Compatibility mode
If you are not able to use the Steam app in the upgraded Windows version, you may try using it in Compatibility mode using this method to fix the steam_api64.dll is missing error.
1. Press the keys Windows+ D at the same time to view your PC Desktop, right-click on the Steam app icon, and select the option Properties in the menu displayed.

2. Navigate to the Compatibility tab in the Properties window, select the option Run this program in compatibility mode for: and select the best Windows version in the drop-down menu in the Compatibility mode section. Click on the buttons Apply and then on OK to run the Steam app in compatibility mode.

Also Read: Fix Steam Keeps Crashing
Method 3: Verify Integrity of Steam Files
This method will help you check the problems with the games installed in your Steam app. This way you will be able to fix the issue of the missing steam_api64.dll file in the Steam app. As a first step, you are required to check the integrity of the Steam files in your Steam app. The next step is to repair the folder containing the files in your Steam app.
1. Click on the Steam tab at the top-left corner of the home page and select the Settings option in the menu available.

2. In the Settings window, click on the Downloads tab on the left pane of the window and click on the STEAM LIBRARY FOLDERS button in the Content Libraries section.

3. In the Storage Manager window, select the Local Drive (C:) button, and click on the ellipsis or the three-horizontal dots button. Select the option Repair Folder in the list displayed in the button to repair the files in the folder.

Method 4: Replace DLL File
This section will allow you to replace the DLL files from another source on your PC. You can follow the option that suits best for you.
Option I: Install DLL File from Official Site
In this method, you can replace the DLL by downloading it from a website source. It is to be noted that there are no official sites that offer you DLL files, so you need to download them at your own risk.
1. Launch the website for DLL files for steam api64 and download the most suited DLL file.

2. Follow the on-screen wizard to install the DLL file and choose the destination location as Local Drive (C:) > Windows > System32.

3. Finally, reboot the PC for the changes to take effect on your PC.

Also Read: How to Backup Steam Games
Option II: Copy DLL file from Another PC
In this method, you can copy the DLL files from a PC that has a functional Steam app and games and install the file on your PC using any installation media.
As a pre-requisite, you are required to see if the devices are compatible, you can do so by checking the specifications of the PC. Follow the steps below on both the devices to find out if both the devices are having the same specifications.
1. Press the Windows + I keys together to open the Settings.
2. Click on the option System in the menu displayed on the home page.

3. Click on the About tab in the left pane of the System window and check for the Device specifications and Windows specifications in the window.

The steps below will let you force install the DLL file for the game on your steam app manually.
4. Launch the Windows Explorer by pressing the keys Windows+ E at the same time and navigate to the Steam folder using the path mentioned as Local Drive (C:) > Program Files (x86) > Steam.

5. Navigate to the Game folder and paste the DLL file into the folder using the installation media.
6. Finally, restart the PC.
Also Read: Where are Steam Games installed?
Method 6: Reinstall Steam Games
You can try reinstalling the games on your Steam app to fix the steam_api64.dll is missing error on your PC. This way the games will have a new DLL file and you can solve the issue.
1. Launch the Steam app on your PC by searching for it in the search bar and clicking on the app result.

2. Go to the LIBRARY tab on the top of your home page, find the game, and right-click on it.

3. Move your cursor over the option Manage in the menu and select the option Uninstall in the adjacent list to initiate uninstalling the game.

4. Click on the Uninstall button on the UNINSTALL window to uninstall the game from your Steam app.

5. Navigate to the STORE tab on the home page and search for the game on the search bar.

6. Click on the game and click on the Play Game button to install the game to your Steam app.

Method 7: Install DirectX
DirectX is an API that is used by many games for graphical support and in-game backend mechanics. There are numerous DLL or Dynamic Link Library files that help in the proper functioning of the games on apps. So, you can use DirectX to install the DLL file to fix the steam_api64.dll is missing error.
1. Open the DirectX official website in your web browser and click on the Download button to download the installer.

2. Launch the downloaded file and follow the on-screen instructions on the wizard to install the package.
3. Then, reboot the PC.

Also Read: How to Disable Steam Overlay in Windows 10
Method 8: Reinstall Steam
If none of the methods work for you, you can try reinstalling the Steam app using this method. You will have to uninstall the existing Steam app and then reinstall the app on your PC. The following steps will let you uninstall the Steam app on your PC using the Control Panel app.
1. Press the Windows key, type control panel, and hit the Enter key.

2. Select the option Category in the View by drop-down menu in the top-right corner and select the option Uninstall a program under the Programs section in the menu.

3. Select the Steam app in the list and click on the Uninstall button at the top bar to initiate uninstalling the Steam app.

4. Click on the Uninstall button on the Steam Uninstall window to uninstall the Steam app on your PC.

5. Delete the Steam folder in the location path Local Disk (C:) > Program Files (x86) by pressing the Delete key.

The steps explained below will help you reinstall the Steam app on your PC from scratch.
6. Open the official website of the Steam app on your default web browser and click on the Install Steam button on the top-right corner of the home page.

7. Click on the INSTALL STEAM button on the next page to download the Steam app on your PC.

8. Click on the downloaded SteamSetup.exe file in the bottom-left corner of the page to launch the Steam app on your PC.

9. Click on the Next button on the Steam Setup window to initiate the setup of your Steam app on your PC.

10. Select the language of your choice in the next window and click on the Next button in the wizard.

11. Select the destination folder of the Steam app by clicking on the Browse… button and clicking on the Install button to complete the installation of the app.

12. Click on the Finish button on the Completing Steam Setup window to complete the steam setup.

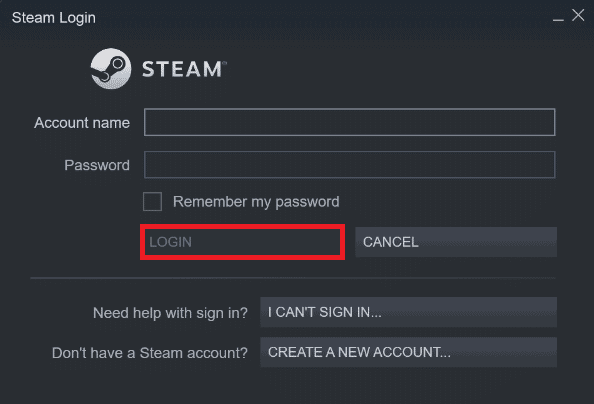
13. Create a new account or log in to your existing account using the login credentials on the Steam app.

Recommended:
- Top 16 Best Budget Phablet
- Fix Skyrim Won’t Launch in Windows 10
- Fix Steam Remote Play Not Working in Windows 10
- Fix Missing Downloaded Files Error on Steam
The article discusses the methods to fix the issue with steam_api64.dll file on your Steam app. To fix the steam_api64.dll missing error on your PC, you can try all the methods described above. The article has also briefed on the steam_api64.dll download process. If you have any suggestions or queries, post them in the comments section for us to revert with answers.


