
Why I am seeing dwm.exe in Task Manager?
While checking your system’s Task Manager, you might have noticed dwm.exe (Desktop Window Manager). Most of us are not aware of this term or its usage/function in our system. If we explain it in very simple words, it is a system process that controls and commands the display & pixels of Windows. It manages high-resolution support, 3D animation, images, and everything. It is a compositing window manager which collects graphical data from different apps and develops a final image on the desktop that users see. Each application in Windows creates its own image to a particular place in memory, dwm.exe combines all of them into one image displays as a final image to the user. Basically, it has a crucial part in rendering the GUI (Graphical User Interface) of your system.

What does this DWM.EXE do?
DWM.EXE is a Windows service that allows Windows in filling visual effects like transparency and desktop icons. This utility also helps in displaying live thumbnails when the user uses various Windows components. This service is also used when users connect their high-resolution external displays.
Now you might have got an idea what exactly Desktop Window Manager does. Yes, it is all about the display and pixels of your system. Whatever you see on your Windows in terms of images, 3D effects and all are controlled by dwm.exe.
Does it make your system slow?
If you think that the Desktop Window Manager reduces your system performance, it is not completely true. Sure, it does consumes a large resource of the system. But sometimes it takes more RAM and CPU usage because of some factors such as viruses on your system, absolute graphics drivers, etc. Moreover, you can make some changes in the display setting to reduce the CPU usage of dwm.exe.
Is there a way to disable DWM.EXE?
No, there is no option available to disable or enable this function on your system. In the previous Windows versions such as Vista and Windows 7, there was the feature using which you could have disabled this function. But, modern Windows OS has very intensively integrated visual service within your OS which cannot be run without Desktop Window Manager. Moreover, why you would do that. There is no need to turn off this function because it does not take a large number of resources of your system. It has become more advanced in functioning & managing the resources, so you do not need to bother to disable it.
What if Desktop Window Manager is using high CPU & RAM?
There are some incidents noticed wherein many users accused Desktop Window Manager of high CPU usage on their system. The first thing that you need to do is check how much CPU usage and RAM this function is consuming.
Step 1 – Open Task Manager by pressing “CTRL +Alt +Delete”.
Step 2 – Here under Windows Processes, you will find Desktop Window Manager.
Step 3 – You can check its RAM and CPU usage on the table chart.
Method 1: Disable Transparency Effects
The first thing that you can do is disable the transparent setting of your system which will reduce the CPU usage of Desktop Window Manager.
1.Press Windows Key + I to open Settings then click on Personalization.
![]()
2.Now under Personalization, click on Colors from the left-hand menu.
3.Click on the toggle under Transparency effects to turn it off.

Method 2: Turn off all the Visual Effects of your system
This is another way to reduce the burden on the desktop window manager.
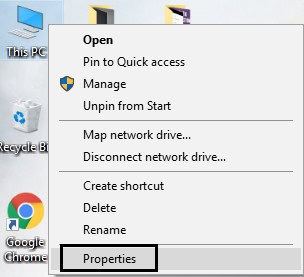
1.Right-click on “This PC” and choose Properties.
2.Here you need to click on the Advanced system settings link.

3.Now switch to the Advanced tab and click on the Settings button under Performance.

4.Choose the option “Adjust for best performance”.

5.Click Apply followed by OK to save changes.
Method 3: Disable Screensaver
Your screensaver is also controlled and managed by the Desktop Windows Manager. It has been noted that in the latest updates of the Windows 10, many users reported that screensaver settings are consuming high CPU usage. Thus, in this method, we will try to disable the screensaver to check whether CPU usage is reduced or not.
1.Type lock screen settings in the Windows search bar and hit Enter to open Lock screen settings.

2.Now from the Lock screen setting window, click on Screen saver settings link at the bottom.

3.It could be possible that the default screensaver is activated on your system. Many users reported that there was a screensaver with a black background image that was already activated but they never realized that it was a screensaver.
4.Therefore, you need to disable the screensaver to fix the Desktop Window Manager High CPU usage (DWM.exe). From the screen saver drop-down select (None).

5.Click Apply followed by OK to save changes.
Method 4: Make sure all Drivers are updated
One of the biggest factors of slowing down your PC is drivers are not up to date or they are simply corrupted. If your system’s drivers are updated, then it will reduce the burden on your system and free some of your system’s resources. However, majorly updating Display drivers will help in reducing the burden on Desktop Window Manager. But it is always a good idea to update Device Drivers on Windows 10.

Method 5: Run the Performance Troubleshooter
1.Type powershell in the Windows Search then right-click on Windows PowerShell and select Run as administrator.

2.Type the following command into PowerShell and hit Enter:
msdt.exe -id MaintenanceDiagnostic

3.This will open System Maintenance Troubleshooter, click Next.

4.If some problem is found, then make sure to click Repair and follow on-screen instructions to finish the process.
5.Again type the following command in PowerShell window and hit Enter:
msdt.exe /id PerformanceDiagnostic

6.This will open Performance Troubleshooter, simply click Next and follow the on-screen instructions to finish.

Is dwm.exe a virus?
No, it is not a virus but an integral part of your operating system which manages all your display settings. It is by default located in the Sysetm32 folder in the Windows installation driver, if it is not there, then you should start worrying.
Recommended:
Hopefully, you have got the idea of what Desktop Window Manager is and how it performs. Moreover, it consumes very fewer resources on your system. One thing that you need to keep in mind is that it is an integral part of your system so you should not make any unnecessary changes to it. All you can do is check how much usage it is consuming and if you find it is consuming a lot, then you can take the measures mentioned above. If you want to know more, please share your comments.


