
If you’re downloading a large file from the Internet or installing a program that’s going to take hours, then you probably want to schedule automatic shutdown because you probably won’t sit that long just to shut down your PC manually. Well, you can schedule Windows 10 to shut down automatically at the time which you specified earlier. Most people aren’t aware of this feature of Windows, and they probably waste their time sitting at their computer to perform shutdown manually.

There are few ways by which you can perform the auto-shutdown of Windows, and we are going to discuss all of them today. Just use the solution which best suits your need, so without wasting any time let’s see How to Schedule Windows 10 Automatic Shutdown with the help of below-listed troubleshooting guide.
How to Schedule Windows 10 Automatic Shutdown
Make sure to create a restore point just in case something goes wrong.
Method 1: Schedule a shutdown using Task Scheduler
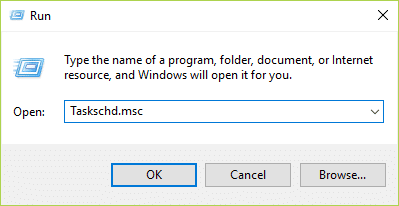
1. Press Windows Key + R then type taskschd.msc and hit Enter to open Task Scheduler.
2. Now, from the right-hand window under Actions, click on Create Basic Task.

3. Type any name and description you want in the field and click Next.

4. On the next screen, set when you want the task to start, i.e. daily, weekly, monthly, one time etc. and click Next.

5. Next set the Start date and time.

6. Select “Start a program” on the Action screen and click Next.

7. Under Program/Script either type “C:\Windows\System32\shutdown.exe” (without quotes) or browse to the shutdown.exe under the above directory.

8. On the same window, under “Add arguments (optional)” type the following and then click Next:
/s /f /t 0

Note: If you want to shut down the computer say after 1 minute then type 60 in place of 0, similarly if you want to shut down after 1 hour then type 3600. This is also an optional step as you have already selected the date & time to start the program so you could leave it at 0 itself.
9. Review all the changes you did until now, then checkmark “Open the Properties dialog for this task when I click Finish” and then click Finish.

10. Under General tab, tick the box which says “Run with highest privileges“.

11. Switch to the Conditions tab and then uncheck “Start the task only if the computer is on AC power”.

12. Similarly, switch to the Settings tab and then checkmark “Run task as soon as possible after a scheduled start is missed“.

13. Now your computer will shut down at the date & time you selected.
Method 2: Schedule Windows 10 Automatic Shutdown using Command Prompt
1. Open Command Prompt. The user can perform this step by searching for ‘cmd’ and then press Enter.

2. Type the following command into cmd and hit Enter:
shutdown –s –t number
Note: Replace number with the seconds after which you want your PC to shut down, for example, shutdown –s –t 3600

3. After hitting Enter, a new prompt will open informing you about the auto-shutdown timer.
Note: You can perform the same task in PowerShell to shut down your PC after the specified time. Similarly, open Run dialog and type shutdown –s –t number to achieve the same result, make sure to replace the number with the specific amount of time you want to shut down your PC.
Recommended:
- Fix Windows Defender Update fails with error 0x80070643
- Fix If playback doesn’t begin shortly try restarting your device
- How to Fix Sec_error_expired_certificate
- Fix Favorites missing in Internet Explorer on Windows 10
That’s it you have successfully learned How to Schedule Windows 10 Automatic Shutdown but if you still have any questions regarding this post then feel free to ask them in the comment’s section.


