
Disk Cleanup was first developed by Microsoft for Windows Operating Systems. This process helps scan all the unnecessary files in your PC to clean them up. If you wish to learn about this useful utility, read this guide to learn how to perform disk cleanup in Windows 11.

How to Perform Disk Cleanup in Windows 11
Disk cleanup can be crucial in maintaining your computer’s performance. When you have a lot of data stored on your system, it can slow your PC down, and in some cases create corrupt files. These corrupt files can also cause serious harm to your computer. Therefore, knowing how to perform a disk cleanup on your Windows 11 computer is important to avoid these issues.
What Does Disk Cleanup Do?
When the computer system runs out of space, it slows down its working, including all the fundamental programs. Disk Cleanup’s 2 of the major contribution to these issues are:
- The Disk Cleanup commands scan the system’s hard drives, removing all the unwanted files that take up unnecessary space like caches, files in the recycle bin, or temporary files, adding to the additional storage.
- This facility can also get the system rid of the viruses that may be present due to some files, contributing to the computer system’s safety.
Different Methods to Perform Disk Cleanup
The following are some of the most effective methods to perform a clean-up on Windows 11 PC. For these methods you don’t have to use any disk cleanup commands, rather you can free up the space from Run, Control Panel, and other utilities.
Method 1: Using Disk Cleanup Utilities
Windows 11 computers are equipped with various utilities to free up the disk space. For using the Disk Cleanup Utilities, the following are the methods that need to be followed:
Method 1A: Using Run Dialog Box
To use the disk cleanup utility using the Run Dialog Box, the following commands and steps need to be followed:
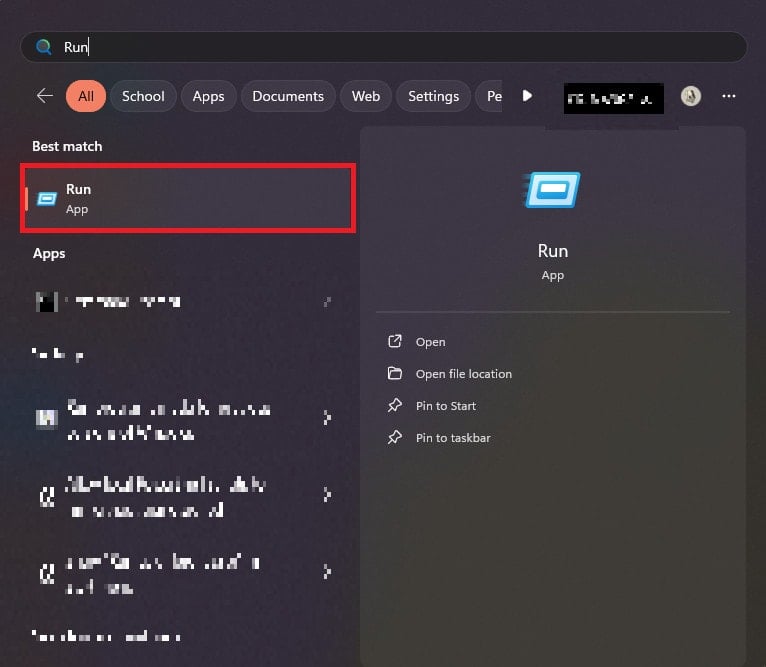
1. Press Ctrl+R or Search for Run in the Search Box on the Desktop.
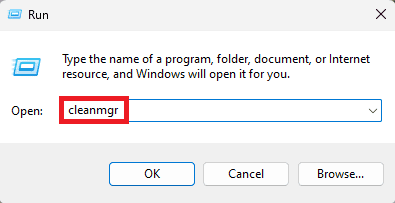
2. Type cleanmgr in the Run Dialog Box.
3. Under the Files to Delete section, select the file you want to delete and tap OK.

4. Tap on the Delete Files button to confirm.
Also Read: How to Use Disk Cleanup in Windows 10
Method 1B: Using Start Menu
To use the disk utility using the start menu, the following steps need to be followed:
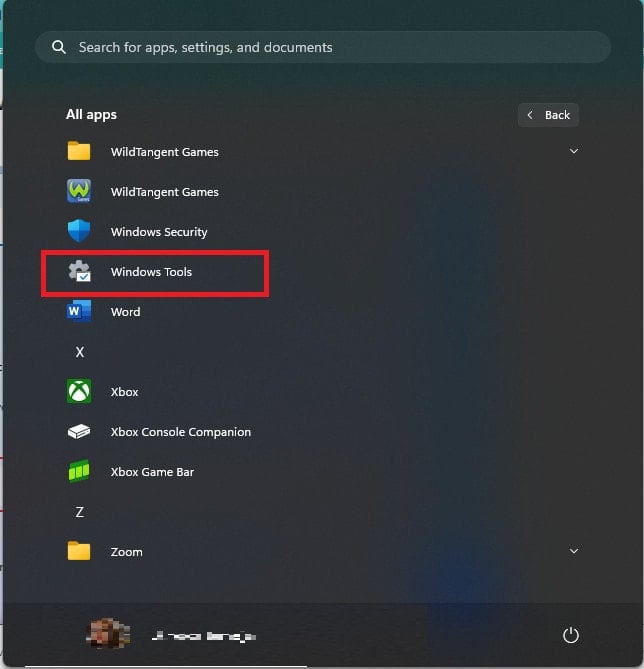
1. Tap the start button and tap on all apps.
2. Scroll down and tap on Windows Tools.
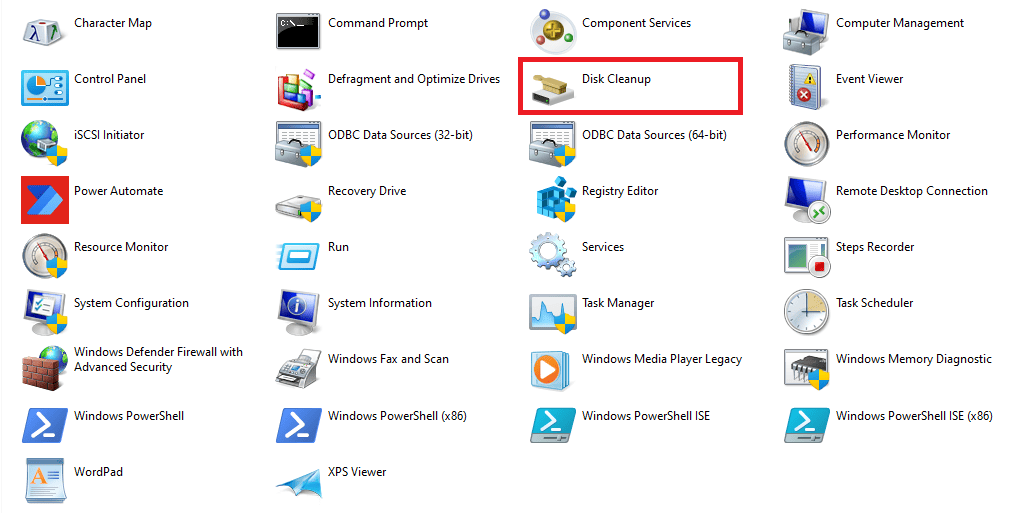
3. Tap on Disk Cleanup.
4. Under the Files to Delete section, select the file you want to delete and tap OK.
5. Tap on the Delete Files button to confirm.
Method 1C: Using Control Panel
To use the disk utility using the control panel, the following steps need to be followed:
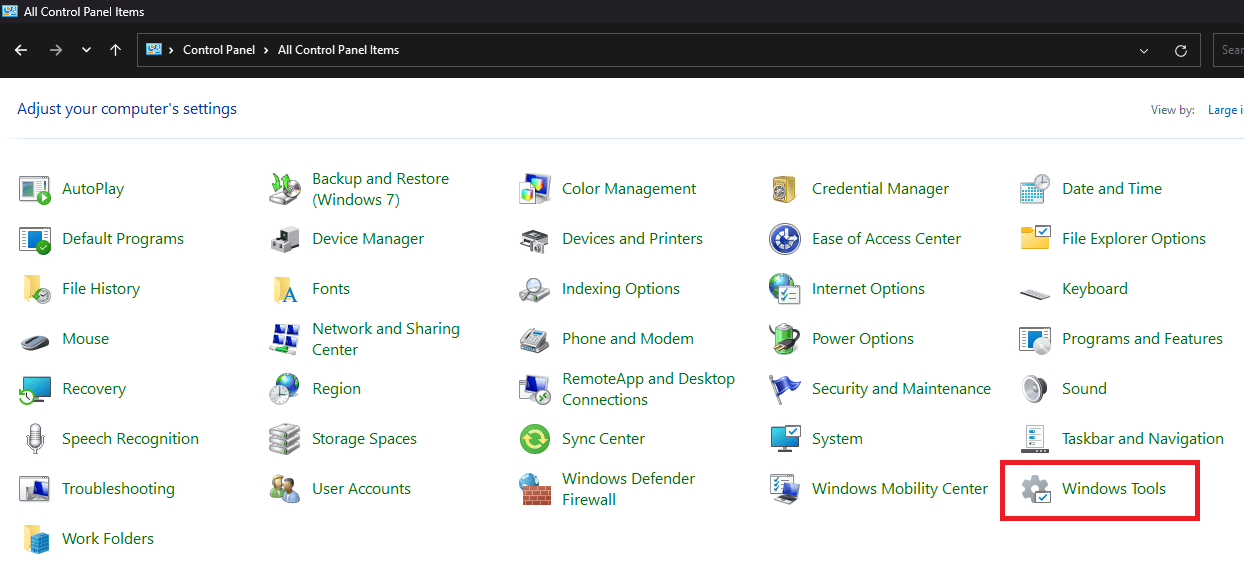
1. Search for the Control Panel in the search bar.
2. Tap on the arrow beside the control panel on the top left of the screen and then tap on all control panel items.
![]()
3. Tap on Windows Tools.
4. Tap on Disk Cleanup.

5. Under the Files to Delete section, select the file you want to delete and tap OK.
6. Tap on the Delete Files button to confirm.
Also Read: How to Fix File System Error 789839862 on Windows 11
Method 2: Deleting Temporary Files
To delete temporary files, the following steps need to be followed:
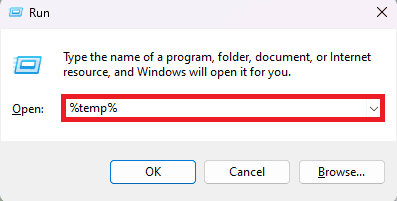
1. Press Ctrl+R or Search for Run in the Search Box on the Desktop.
2. Type %temp% in the run dialog box.
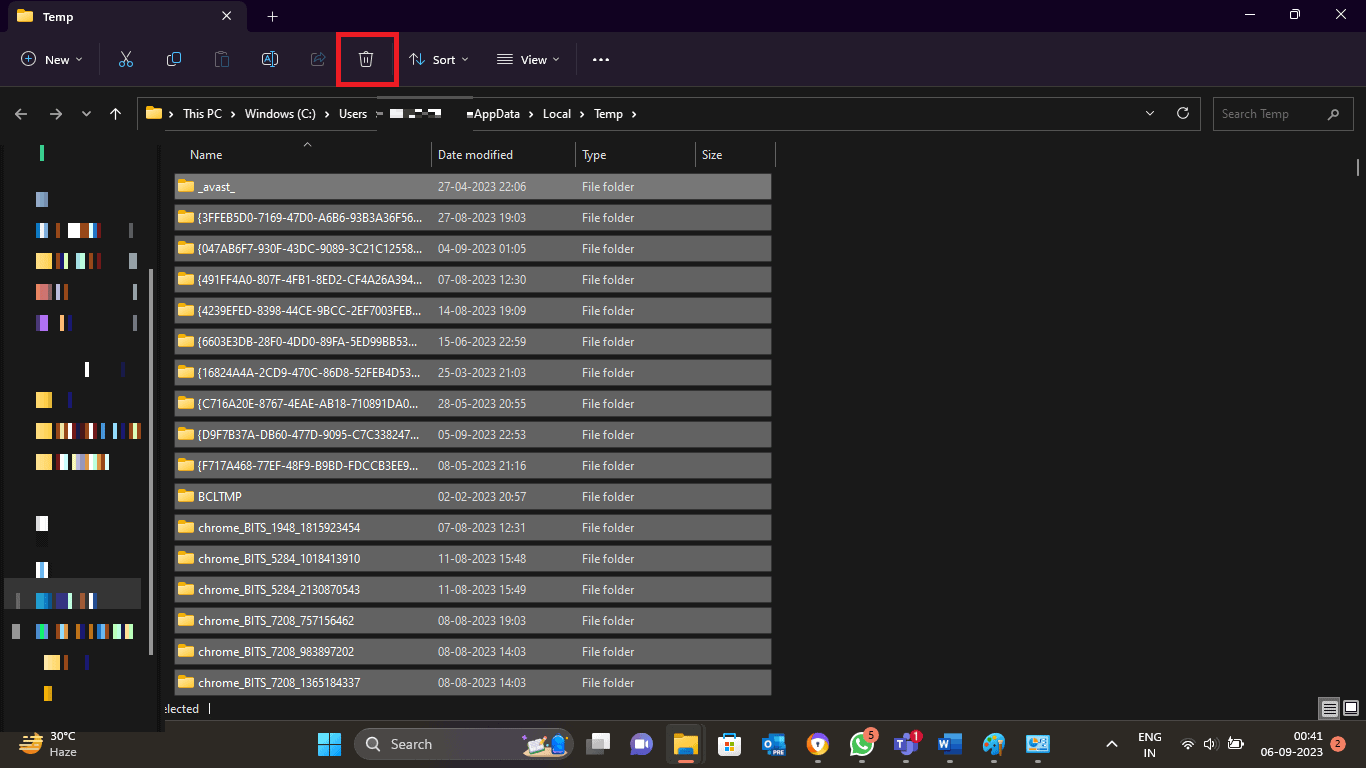
3. Select all the files and tap delete.
Method 3: Activate Storage Sense for Disk Cleanup
To activate storage sense for disk cleanup the following steps need to be followed:
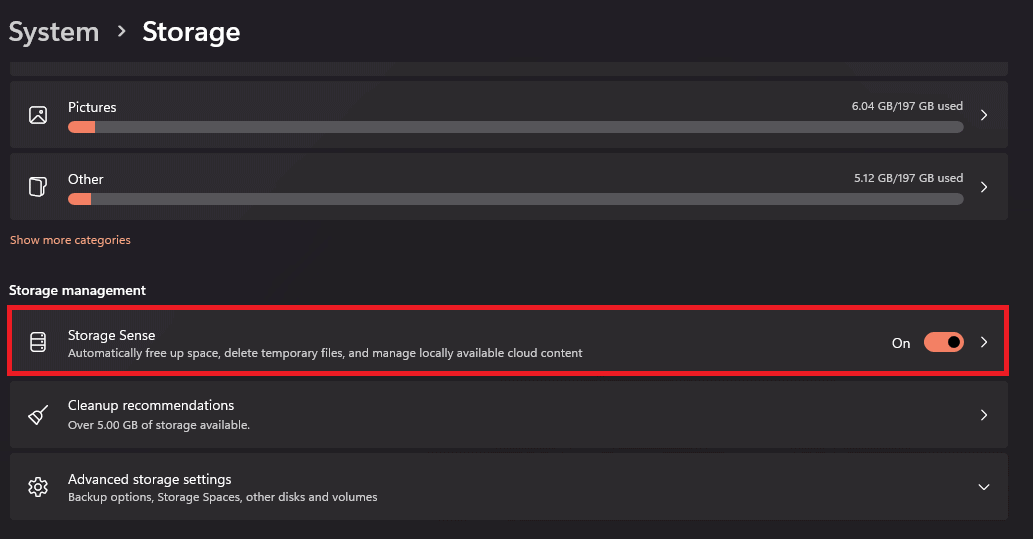
1. Tap on Windows and open settings.
2. Scroll down and turn on the Storage Sense option.
Also Read: How to Check Disk for Errors Using chkdsk in Windows 11
We hope this article helped you learn How to Perform Disk Cleanup in Windows 11. Keep reading our blog for such helpful guides! Feel free to leave your suggestions & queries in the comment section below.


