
WMI allows administrators to monitor system events, manage system settings, retrieve performance data, and perform various administrative tasks remotely or locally through scripting languages like PowerShell or VBScript. However, if the WMI Provider Host encounters issues or conflicts with certain applications, it can lead to high CPU usage, affecting system performance. If you are facing High CPU or memory usage because of WMI i.e. Windows Management Instrumentation Provider Host, don’t worry as today we will see how to resolve this issue using this guide.
Fix WMI Provider Host High CPU Usage on Windows 10
WMI High CPU usage can be checked using Task Manager. Simply Press left Ctrl + Shift + Esc keys together to open Task Manager where you will find that a process WmiPrvSE.exe (acronym for Windows Management Instrumentation Provider Service) causing High CPU Usage and in some cases, High Memory usage also as depicted below.

What is WMI Provider Host (WmiPrvSE.exe)?
WMI Provider Host (WmiPrvSE.exe) stands for Windows Management Instrumentation Provider Service. Windows Management Instrumentation (WMI) is a component of the Microsoft Windows operating system that provides management information and control in an enterprise environment. WMI Provider Host is used by the developer for Monitoring Purposes as it acts as a mediator between the Management Application Programming Interface (API) and the actual providers that supply the data.
You might face the above issue when you have recently updated or upgraded to Windows 10. Some other causes include virus or malware infection, corrupt system files, the incorrect configuration for WMI Provider Host Service
Make sure to create a restore point just in case something goes wrong.
Method 1: Run System Maintenance Troubleshooter
1. Press Windows Key + R then type control and hit Enter to open Control Panel.
![Press Windows Key + R then type control | Fix WMI Provider Host High CPU Usage [Windows 10]](https://techcult.com/wp-content/uploads/2016/06/control-pannel.png)
2. Search Troubleshoot in the Search box and click on Troubleshooting.

3. Next, click on View all in the left pane.
4. Click on System Maintenance to run the Troubleshooter for System Maintenance.

5. The Troubleshooter may be able to Fix WMI Provider Host High CPU Usage on Windows 10.
Method 2: Restart Windows Management Instrumentation Service (WMI)
1. Press Windows Key + R then type services.msc and hit Enter.

2. Find Windows Management Instrumentation Service in the list then right-click on it and select Restart.
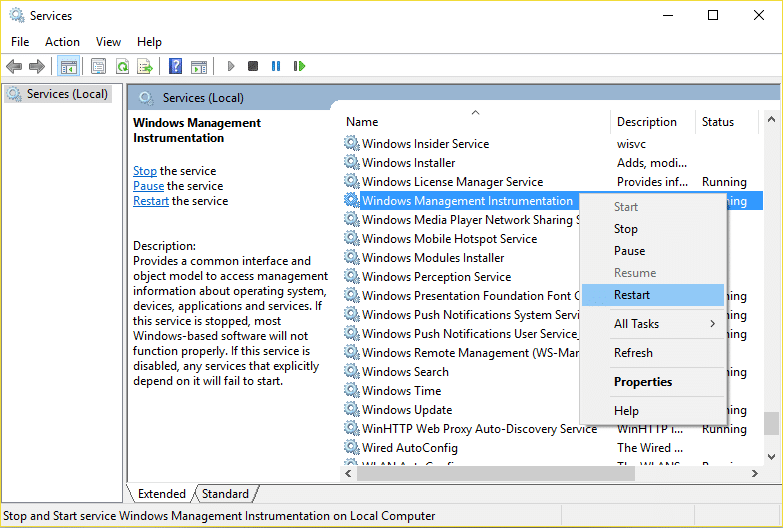
3. This will restart all the service associated with WMI services and Fix Fix WMI Provider Host High CPU Usage on Windows 10.
Method 3: Restart Other Services associated with WMI
1. Open Command Prompt. The user can perform this step by searching for ‘cmd’ and then press Enter.

2. Type the following into cmd and hit Enter after each one:
net stop iphlpsvc
net stop wscsvc
net stop Winmgmt
net start Winmgmt
net start wscsvc
net start iphlpsvc
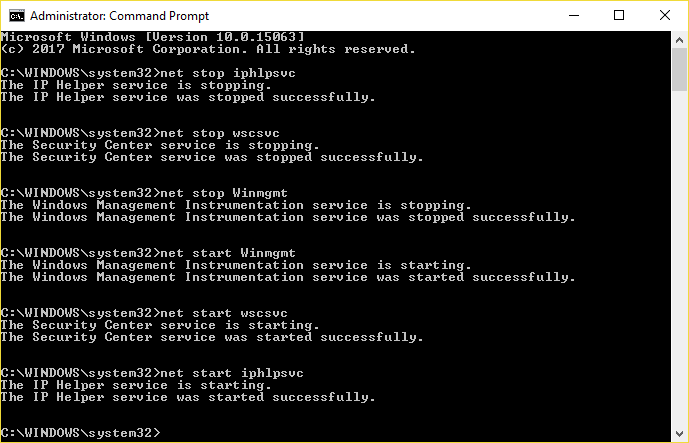
3. Reboot your PC to save changes.
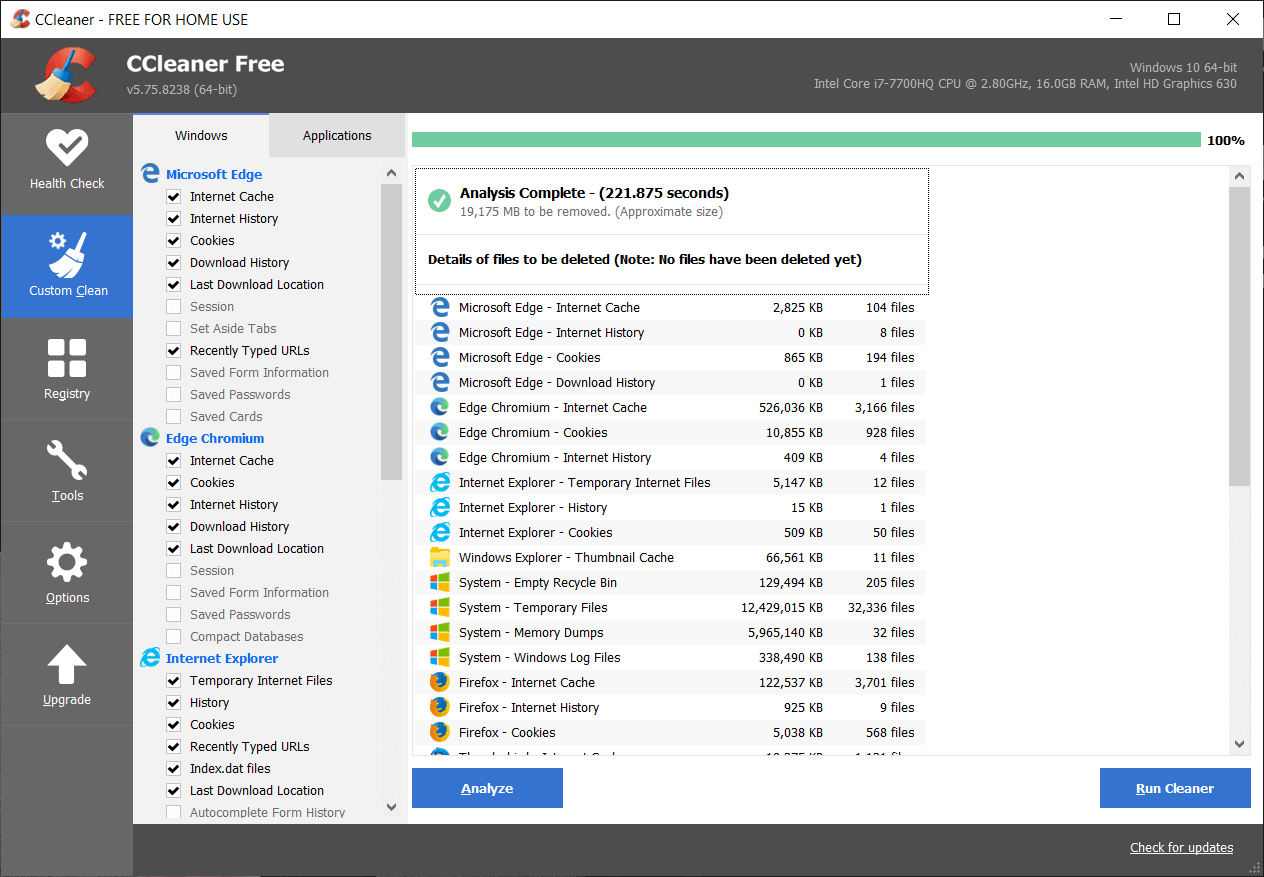
Method 4: Run CCleaner and Malwarebytes
1. Download and install CCleaner & Malwarebytes.
2. Run Malwarebytes and let it scan your system for harmful files. If malware is found, it will automatically remove them.

3. Now run CCleaner and select Custom Clean.
4. Under Custom Clean, select the Windows tab and checkmark defaults and click Analyze.
![Select Custom Clean then checkmark default in Windows tab | Fix WMI Provider Host High CPU Usage [Windows 10]](https://techcult.com/wp-content/uploads/2017/07/Select-Custom-Clean-then-checkmark-default-in-Windows-tab.png)
5. Once Analyze is complete, make sure you’re certain to remove the files to be deleted.
6. Finally, click on the Run Cleaner button and let CCleaner run its course.
7. To further clean your system, select the Registry tab, and ensure the following are checked:
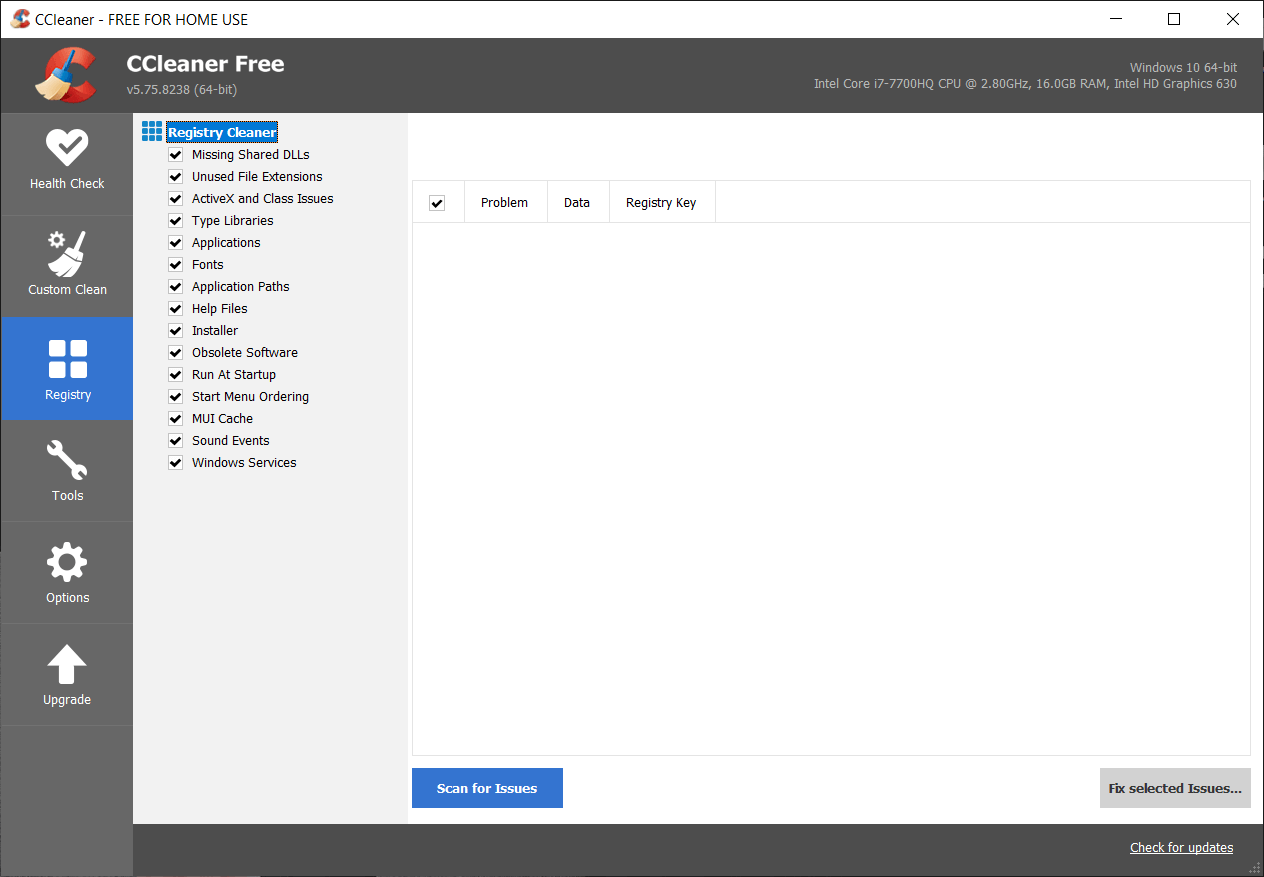
8. Click on the Scan for Issues button and allow CCleaner to scan, then click on the Fix Selected Issues button.
![Once scan for issues is completed click on Fix selected Issues | Fix WMI Provider Host High CPU Usage [Windows 10]](https://techcult.com/wp-content/uploads/2017/07/Once-scan-for-issues-is-completed-click-on-Fix-selected-Issues.png)
9. When CCleaner asks “Do you want backup changes to the registry?” select Yes.
10. Once your backup has completed, click on the Fix All Selected Issues button.
11. Restart your PC to save changes.
Method 5: Troubleshoot the issue in Safe Mode
1. Boot into Safe Mode with Networking using this guide.
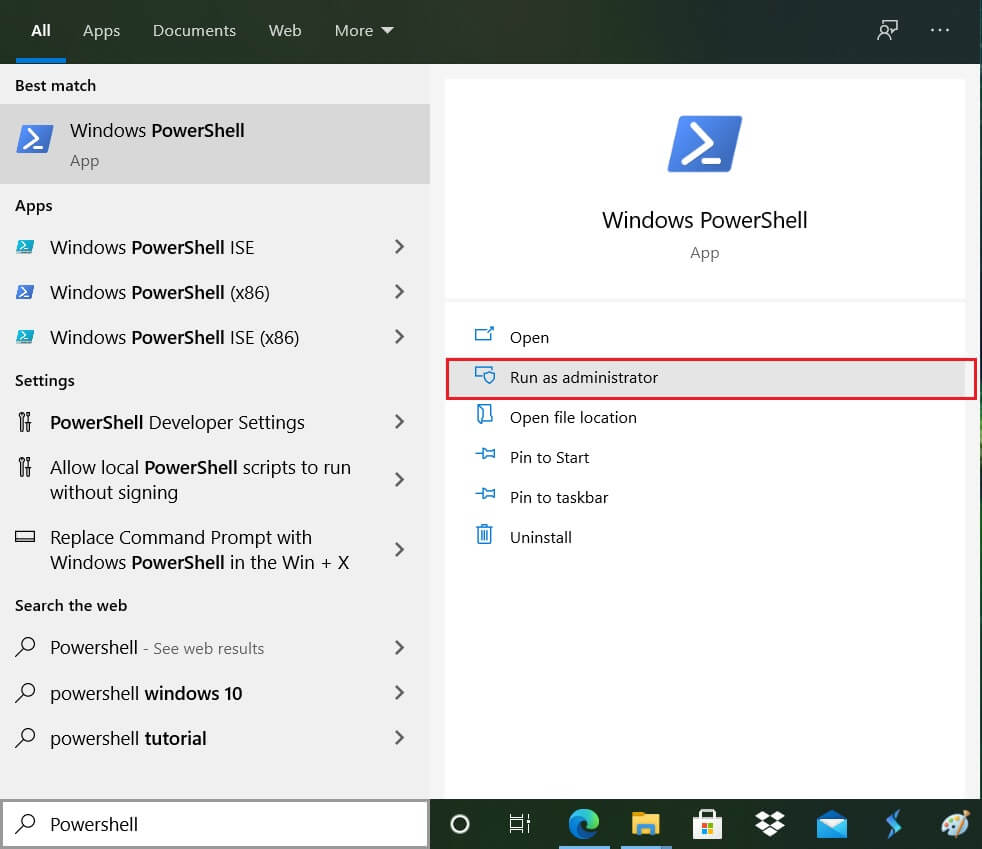
2. Once in Safe Mode, type PowerShell in the Windows Search then right-click on Windows PowerShell and select Run as administrator.
3. Type the following command into PowerShell and hit Enter:
msdt.exe -id MaintenanceDiagnostic

4. This will open System Maintenance Troubleshooter, click Next.

5. If some problem is found, then make sure to click Repair and follow on-screen instructions to finish the process.
6. Again type the following command in PowerShell window and hit Enter:
msdt.exe /id PerformanceDiagnostic
![Type msdt.exe /id PerformanceDiagnostic in PowerShell | Fix WMI Provider Host High CPU Usage [Windows 10]](https://techcult.com/wp-content/uploads/2019/01/Type-msdt.exe-id-PerformanceDiagnostic-in-PowerShell.png)
7. This will open Performance Troubleshooter, click Next and follow the on-screen instructions to finish.

8. Exit from Safe Mode and boot to your Windows normally.
Method 6: Locate the troubling process manually using Event Viewer
1. Press Windows Key + R then type eventvwr.MSc and hit Enter to open Event Viewer.

2. From the top menu, click on View and then select Show Analytic and Debug Logs option.

3. Now, from the left pane navigate to the following by double-clicking on each of them:
Applications and Services Logs > Microsoft > Windows > WMI-Activity
4. Once you are under WMI-Activity folder (make sure you have expanded it by double-clicking on it) select Operationally.
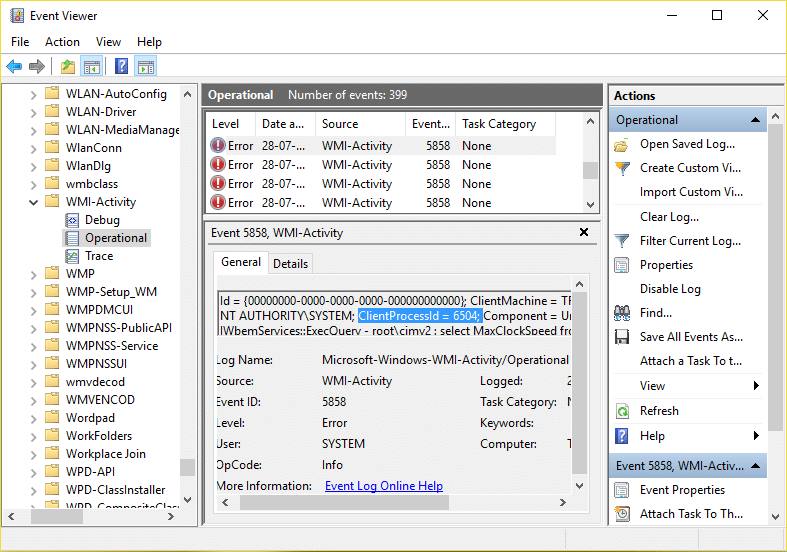
5. In the right window pane select Error under Operational and General tab look for the ClientProcessId for that particular service.
6. Now we have the Process Id of the particular service causing High CPU usage, we need to disable this particular service to Fix WMI Provider Host High CPU Usage.
7. Press Ctrl + Shift + Esc together to open Task Manager.

8. Switch to Service tab and look for the Process Id which you noted above.
![Switch to Service tab and look for the Process Id which you noted | Fix WMI Provider Host High CPU Usage [Windows 10]](https://techcult.com/wp-content/uploads/2017/08/Switch-to-Service-tab-and-look-for-the-Process-Id-which-you-noted-above.png)
9. The service with the corresponding Process ID is the culprit, so once you find it go to Control Panel > Uninstall a Program.
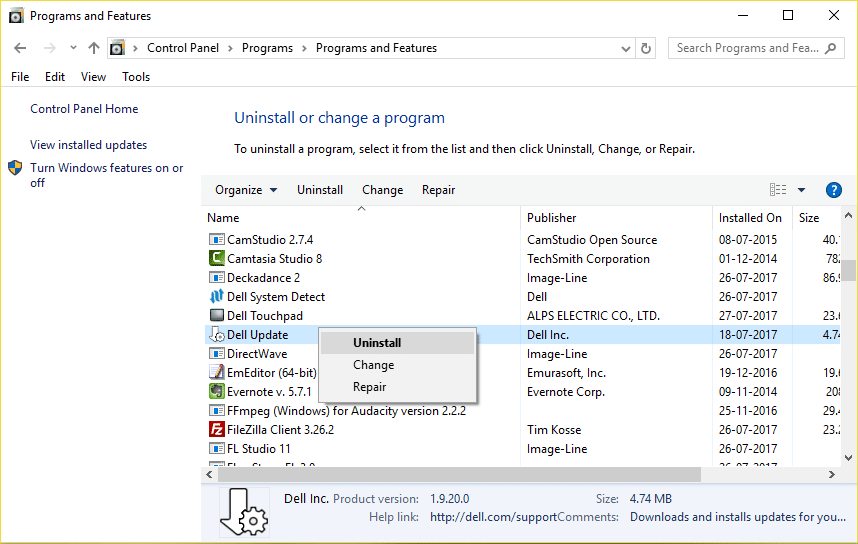
10. Uninstall the particular program or service associated with above Process ID then reboot your PC.
Recommended: Fix Taskbar Disappeared from the Desktop
That’s it you have successfully Fix WMI Provider Host High CPU Usage on Windows 10 but if you still have any queries regarding this post then feel free to ask them in the comment’s section.


I’d like to share the following experience as it may be useful for someone (as a way to Thank the author of this page for sharing this Methods of solutions for this problem).
My WMI started to cause high CPU Ghz loads even without using high percentages of the CPU (1% to 4% of CPU Load used 2.00Ghz to 3.00Ghz of the CPU constantly/continuously), when before the problem started it only used around 0.90Ghz to 1.30Ghz when normally working IDLE (without any program running or with programs that don’t charge the CPU with loads when open) and also when having programs opened that don’t charge the CPU (like Adobe Acrobat Reader, Office programs, and many others that don’t make hard use of the CPU).
It started suddenly after updating some program some day (maybe the Avast Antivirus, and/or maybe the Google Chrome web browser, or any other program that I had installed and that updated in the same range of time that I detected this problem, and even when uninstalling all the programs that updated then the problem didn’t got solved), I can’t tell exactly when but I can tell the range of time as I normally check the Task Manager and when I detected the continuous high loads of Ghz in the CPU I noticed that something was Not Fine/OK and is then that I detected the WMI continuous Percentage of Load and when searching in Google about it is that appeared that something with it was causing this problems and also the solutions mentioned in this page/article.
I decided recently to try the Method 3 mentioned in this page/article, (it took me some time to decide to do it as I normally don’t like to mess around with configurations in the computer and I only do it in cases like this when something is definitely Not Fine/OK and not doing something about it might cause big problems in the future), and when applying the 3 STOPs and 3 STARTs the WMI instantly dropped its percentage of load from 1.5% (1.8%) to 0% on the CPU, and the Ghz in the CPU dropped from 2.00Ghz (3.00Ghz) to 1.30Ghz (0.90Ghz) which solved the problem, BUT…
BUT… When I restarted the computer the problem with the WMI appeared again, and when applying the Method 3 again the problem again was solved.
So, the solution works (at least for me) only by applying the Method 3 and NOT Restarting/Rebooting the computer, only Turning it Off (by keeping the option in the Energy Settings to “Turn On Fast Startup” as mentioned in troubleshooter.xyz/wiki/disable-fast-startup-in-windows-10 but the opposite process to what’s mentioned there), as when having the Full Shutdown is the equivalent to the Restarting of the computer and the problem with the WMI will appear again (at least in my case it does).
When you Restart/Reboot the computer (or when having “Turn On Fast Startup” off and on each turning off of the computer), you’ll have to apply the Method 3 again for solving the problem until the next time (Restart/Reboot or the above mentioned of completely Turning Off of the computer), and is necessary to keep checking the Task Manager (mentioned at the beginning of this Article/Page) to apply the Method 3 when the WMI appears again creating high loads of CPU Percentage and Ghz (in my case a continuous percentage of 1.8% and continuous loads of above 2.00Ghz up to 3.00Ghz in the CPU).
Hopefully the above will be useful for someone as it was for me. Thank You Very Much to “adityafarrad” for sharing in this Page/Article this Method of Solution for this problem, as Constant/Continuous High Loads of Ghz in the CPU can’t be good for the Processor and the Mother Board and components in general, (in my case the Hard Drive also was experiencing external high temperatures when I touched above the zone where it is located in the laptop/computer and when this problem got solved the temperatures also got down and normal in that zone where it is located, and also the zone where the processor is has now lower external temperatures as the CPU is having lower Loads in Percentage and in Ghz in IDLE as the computer is normally used with programs that don’t load the CPU much in my case), and indicates that something is Not working Fine/OK, and in the middle/long term should cause problems to the CPU Processor and other parts of the computer by wearing them away faster than what’s needed and required and desired.
Method 3: Restart Other Services associated with WMI
1.Press Windows Key + X then select Command Prompt (Admin).
command prompt with admin rights
THIS IS THE “WINDOWS POWERSHELL (ADMIN)” option.
2.Type the following into cmd and hit Enter after each one:
net stop iphlpsvc
net stop wscsvc
net stop Winmgmt
net start Winmgmt
net start wscsvc
net start iphlpsvc
Fix High CPU Usage by WmiPrvSE.exe by restarting several Windows services
THEY SHOULD BE STOPPED AND STARTED IN THE SAME ORDER AS INSTRUCTED.
NOTE: DON’T APPLY THIS: 3.Reboot your PC to save changes.
AND REMEMBER TO USE “Turn On Fast Startup” IN ENERGY SETTINGS, for the problem not to appear (at least until the next Restart/Reboot of the system).