
Fix Windows couldn’t connect to the Group Policy Client service: If you are facing the above error while trying to login into non-administrator account then you are at the right place as today we are going to discuss how to fix this issue. The error clearly states that Group Policy Client service failed while trying to log in the non-administrator users into Windows. While using administrator account there is no such error and the user can easily login into Windows 10.

As soon as the standard user tries to login into Windows he/she sees an error message” Windows couldn’t connect to the Group Policy Client service. Please consult your system administrator.” It clearly says consult your system administrator because administrators can login into the system and view the event logs for a better understanding of the error.
The main issue seems like the Group Policy Client service isn’t running when the standard user tried to log in and therefore, the error message is displayed. While administrators can login into the system but they will also see the error message in the notification saying “Failed to connect to a Windows service. Windows couldn’t connect to the gpsvc service. This problem prevents standard users from signing in” So without wasting any time let’s see how to actually Fix Windows couldn’t connect to the Group Policy Client service error with the help of below-listed troubleshooting guide.
Fix Windows couldn’t connect to the Group Policy Client service
Make sure to create a restore point just in case something goes wrong.
Method 1: Set Group Policy Client service to Automatic
Make sure you are logged in with the Administrative account in order to carry out the following changes.
1.Press Windows Key + R then type services.msc and hit Enter.

2.Find Group Policy Client service then right-click and select Stop.
3.Now double click on it and make sure the Startup type is set to Automatic.

4.Next, click on Start in order to again start the service.
5.Click Apply followed by OK.
6.Reboot your PC and this will Fix Windows couldn’t connect to the Group Policy Client service error.
Method 2: Try System Restore
1.Press Windows Key + R and type”sysdm.cpl” then hit enter.
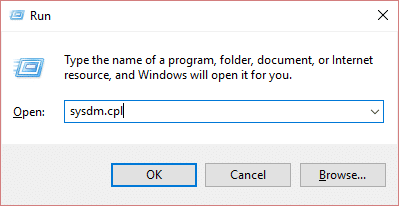
2.Select System Protection tab and choose System Restore.

3.Click Next and choose the desired System Restore point.

4.Follow on screen instruction to complete system restore.
5.After reboot, you may be able to Fix Windows couldn’t connect to the Group Policy Client service error.
Method 3: Run SFC and DISM
1.Press Windows Key + X then click on Command Prompt(Admin).

2.Now type the following in the cmd and hit enter:
Sfc /scannow
sfc /scannow /offbootdir=c:\ /offwindir=c:\windows (If above fails then try this one)

3.Wait for the above process to finish and once done restart your PC.
4.Again open cmd and type the following command and hit enter after each one:
a) Dism /Online /Cleanup-Image /CheckHealth
b) Dism /Online /Cleanup-Image /ScanHealth
c) Dism /Online /Cleanup-Image /RestoreHealth

5.Let the DISM command run and wait for it to finish.
6. If the above command doesn’t work then try on the below:
Dism /Image:C:\offline /Cleanup-Image /RestoreHealth /Source:c:\test\mount\windows
Dism /Online /Cleanup-Image /RestoreHealth /Source:c:\test\mount\windows /LimitAccess
Note: Replace the C:\RepairSource\Windows with the location of your repair source (Windows Installation or Recovery Disc).
7.Reboot your PC to save changes and see if you’re able to Fix Windows couldn’t connect to the Group Policy Client service error.
Method 4: If you can’t open Windows Update Setting
1.Press Windows Key + X then select Command Prompt (Admin).
2.Type the following command into cmd and hit Enter:
netsh
winsock reset
netsh winsock repair

3.Reboot your PC to save changes and the error is resolved.
Method 5: Turn off Fast Startup
1.Press Windows Key + R then type “powercfg.cpl” and hit enter to open Power Options.
2.Click on Choose what the power buttons do in the top-left column.

3.Next, click on Change settings that are currently unavailable.
4.Uncheck Turn on Fast startup under Shutdown settings.

5.Now click Save Changes and Restart your PC.
This solution seems to be helpful and should Fix Windows couldn’t connect to the Group Policy Client service error.
Method 6: Registry Fix
1.Press Windows Key + R then type regedit and hit enter to open Registry Editor.

2.Now navigate to the following key in the Registry Editor:
Computer\HKEY_LOCAL_MACHINE\SYSTEM\CurrentControlSet\Services\gpsvc
3.Next, find the value of imagepath key and check its data. In our case, its data is svchost.exe -k netsvcs.

4.This means the above data is in charge of the gpsvc service.
5.Now navigate to the following path in the Registry Editor:
HKEY_LOCAL_MACHINE\SOFTWARE\Microsoft\Windows NT\CurrentVersion\SvcHost

6.In the right window pane locate netsvcs and then double click on it.
7.Check the Value data field and make sure gpsvc is not missing. If it’s not there then add the gpsvc value and be very careful in doing so because you don’t want to delete anything else. Click Ok and close the dialog box.

8.Next, navigate to the following folder:
HKEY_LOCAL_MACHINE\SOFTWARE\Microsoft\Windows NT\CurrentVersion\SvcHost\netsvcs
(This is not the same key present under SvcHost, its present under the SvcHost folder in the left window pane)
9.If netsvcs folder is not present under SvcHost folder then you need to manually create it. To do so, right-click on SvcHost folder and select New > Key. Next, enter netsvcs as the name of the new key.

10.Select the netsvcs folder which you just created under SvcHost and in the left window pane right-click and select New > DWORD (32-bit) value.

11.Now enter the name of the new DWORD as CoInitializeSecurityParam and double click on it.
12.Set Value data to 1 and click OK to save changes.

13.Now similarly create the following three DWORD (32-bit) Value under netsvcs folder and enter the value data as specified below:
Name of the DWORD                                    Value Data

CoInitializeSecurityAllowLowBox:                        1
CoInitializeSecurityAllowInteractiveUsers:              1
AuthenticationCapabilities:                            3020

14.Click Ok after setting the value of each of them and close the Registry Editor.
Method 7: Registry Fix 2
1.Press Windows Key + R then type regedit and hit Enter to open Registry Editor.
2.Navigate to the following registry key:
HKEY_LOCAL_MACHINE\SYSTEM\CurrentControlSet\Services\gpsvc
3.Just make sure the above key is in it’s location and then continue.
4.Now navigate to the following key:
HKEY_LOCAL_MACHINE\SOFTWARE\Microsoft\Windows NT\CurrentVersion\Svchost
5.Right-click on Svchost and select New > Multi-String Value.

6.Name this new string as GPSvcGroup and then double click on it to change it’s value to GPSvc and hit OK.

7.Again right-click on Svchost and select New > Key.
8.Name this key as GPSvcGroup and hit Enter.
9.Now right-click on GPSvcGroup and select New > DWORD (32-bit) value.

10.Name this DWORD as AuthenticationCapabilities and double click on it to change it’s value to 12320 (make sure you are using Decimal base).

11.Similarly, create a new DWORD called ColnitializeSecurityParam and change it’s value to 1.
12.Close Registry Editor and reboot your PC.
Recommended for you:
- Fix Photo App Keeps Crashing in Windows 10
- How to Reset Microsoft Edge to Default Settings
- Fix Something went wrong error while creating account in Windows 10
- Fix Mail and Calendar app crashes on opening in Windows 10
That’s it, you have successfully Fix Windows couldn’t connect to the Group Policy Client service error but if you still have any queries regarding this guide then feel free to ask them in the comment’s section


I have explained my problem in the feedback. The problem is same as you have quoted but I can’t open windows explorer or any folder(I get the error as “The server process could not be started because the configured identity is incorrect. Check the username & password). I can’t open command prompt as admn or any .exe file or system files( It says device is not ready) . Please advise me further. Thank you so much
When I enter services.msc my computer takes a long time and then a window pops up telling me it’s taken too long to process.
I have tried restarting my computer many times, and doing this, and nothing changes. I can’t even get to step 2 of step 1
Any suggestions would be very helpful
Did you find a solution? I am having same issue.
No help me
Greetings,
Please none of the above works for me. The problem is same as you have quoted but I can’t open windows explorer or any folder(I get the error as “The server process could not be started because the configured identity is incorrect. Check the username & password). I can’t open command prompt as admn or any .exe file or system files( It says device is not ready) . When I press Windows key + R, and type anything, the same pop up message is displayed, “The server process could not be started because the configured identity is incorrect. Check the username & password) Please advise me further. Thank you so much
Woww. Thanks a lot. Method 4 worked for me.