
If you’re facing the error “Windows Can’t Communicate with the Device or Resource (Primary DNS Server)” then this means you cannot access the Internet which is happening because your PC is unable to connect to the primary DNS server of your ISP. If you are getting limited access Internet connection, you can try to run the network troubleshooter, showing you the above error message.

The main cause for this network error is caused by DNS issues, corrupted, outdated, or incompatible network adapter drivers, corrupted DNS Cache, incorrect configuration of Hosts file etc. Anyway, without wasting any time, let’s see How to Fix Windows can’t communicate with the device or resource with the help of the below-listed tutorial.
Fix Windows can’t communicate with the device or resource
Make sure to create a restore point just in case something goes wrong.
Method 1: Obtain the DNS server address and IP address automatically
1. Press Windows key + R, then type ncpa.cpl and hit enter.

2. Now right-click on your WiFi (NIC) and select Properties.
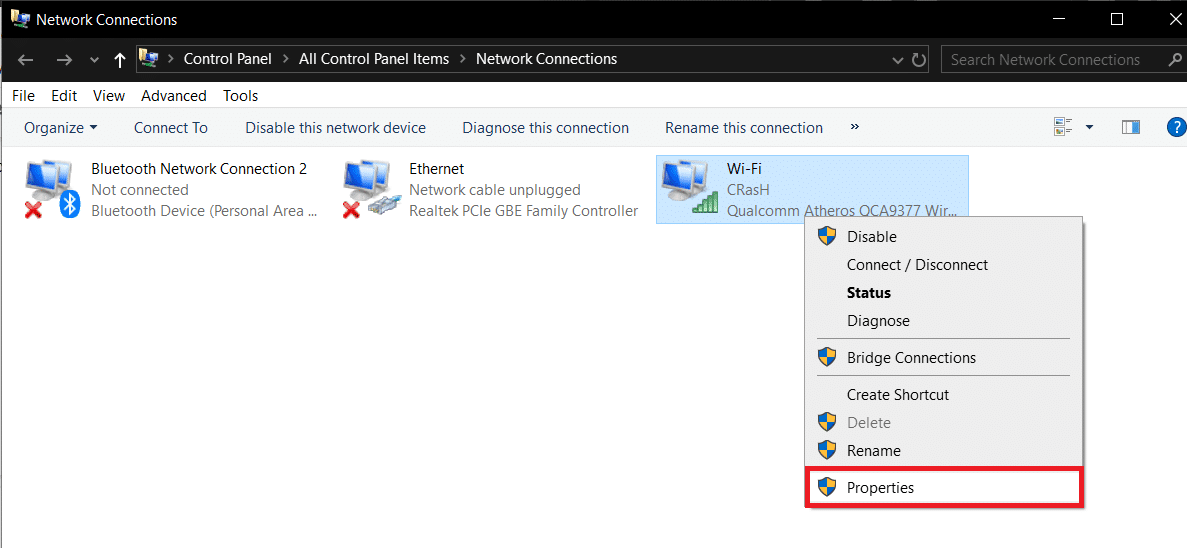
3. Select Internet Protocol Version 4 (TCP/Ipv4) and then click Properties.

4. Make sure to checkmark the following options:
Obtain an IP address automatically
Obtain DNS server address automatically.
5. Click Ok and exit WiFi properties.

6. Reboot to apply changes.
Method 2: Clear DNS cache and Reset TCP/IP
1. Open Command Prompt. The user can perform this step by searching for ‘cmd’ and then press Enter.

2. Now type the following command and press Enter after each one:
ipconfig /release
ipconfig /flushdns
ipconfig /renew

3. Again, open Admin Command Prompt and type the following and hit enter after each one:
ipconfig /flushdns
nbtstat –r
netsh int ip reset
netsh winsock reset

4. Reboot to apply changes. Flushing DNS seems to Fix Windows can’t communicate with the device or resource error.
Method 3: Update your network driver
1. Press Windows key + R and type devmgmt.msc in Run dialogue box to open device manager.

2. Expand Network adapters, then right-click on your Wi-Fi controller(for example Broadcom or Intel) and select Update Drivers.

3. In the Update Driver Software Windows, select “Browse my computer for driver software.”

4. Now select “Let me pick from a list of device drivers on my computer.”

5. Try to update drivers from the listed versions.
6. If the above didn’t work then go to manufacturers website to update drivers: https://downloadcenter.intel.com/
Method 4: Uninstall Wireless Network Adapter Drivers
1. Press Windows Key + R then type devmgmt.msc and hit Enter to open Device Manager.
2. Expand Network Adapters and find your network adapter name.
3. Make sure you note down the adapter name just in case something goes wrong.
4. Right-click on your network adapter and select uninstall.

5. If ask for confirmation, select Yes.
6. Restart your PC and try to reconnect to your network.
7. If you cannot connect to your network, it means the driver software isn’t automatically installed.
8. Now you need to visit your manufacturer’s website and download the driver from there.

9. Install the driver and reboot your PC.
Method 5: Use Google DNS
You can use Google’s DNS instead of the default DNS set by your Internet Service Provider or the network adapter manufacturer. This will make sure that the DNS your browser is using has nothing to do with the YouTube video not loading. To do so,
1. Right-click on the network (LAN) icon in the right end of the taskbar, and click on Open Network & Internet Settings.
![]()
2. In the settings app that opens, click on Change adapter options in the right pane.

3. Right-click on the network you want to configure, and click on Properties.

4. Click on Internet Protocol Version 4 (IPv4) in the list and then click on Properties.

Also Read: Fix Your DNS Server might be an unavailable error.
5. Under the General tab, choose ‘Use the following DNS server addresses’ and put the following DNS addresses.
Preferred DNS Server: 8.8.8.8
Alternate DNS Server: 8.8.4.4

6. Finally, click OK at the bottom of the window to save changes.
7. Reboot your PC and once the system restart, see if you’re able to Fix Windows can’t communicate with the device or resource.
Method 6: Edit Windows Hosts file
1. Press Windows Key + Q then type Notepad and right-click on it to select Run as administrator.
2. Now click File then select Open and browse to the following location:
C:\Windows\System32\drivers\etc

3. Next, from the file type, select All Files.

4. Then select the hosts file and click Open.
5. Delete everything after the last # sign.

6. Click File>save then close notepad and restart your PC.
Method 7: Run CCleaner and Malwarebytes
1. Download and install CCleaner & Malwarebytes.
2. Run Malwarebytes and let it scan your system for harmful files. If malware is found, it will automatically remove them.

3. Now run CCleaner and select Custom Clean.
4. Under Custom Clean, select the Windows tab and checkmark defaults and click Analyze.
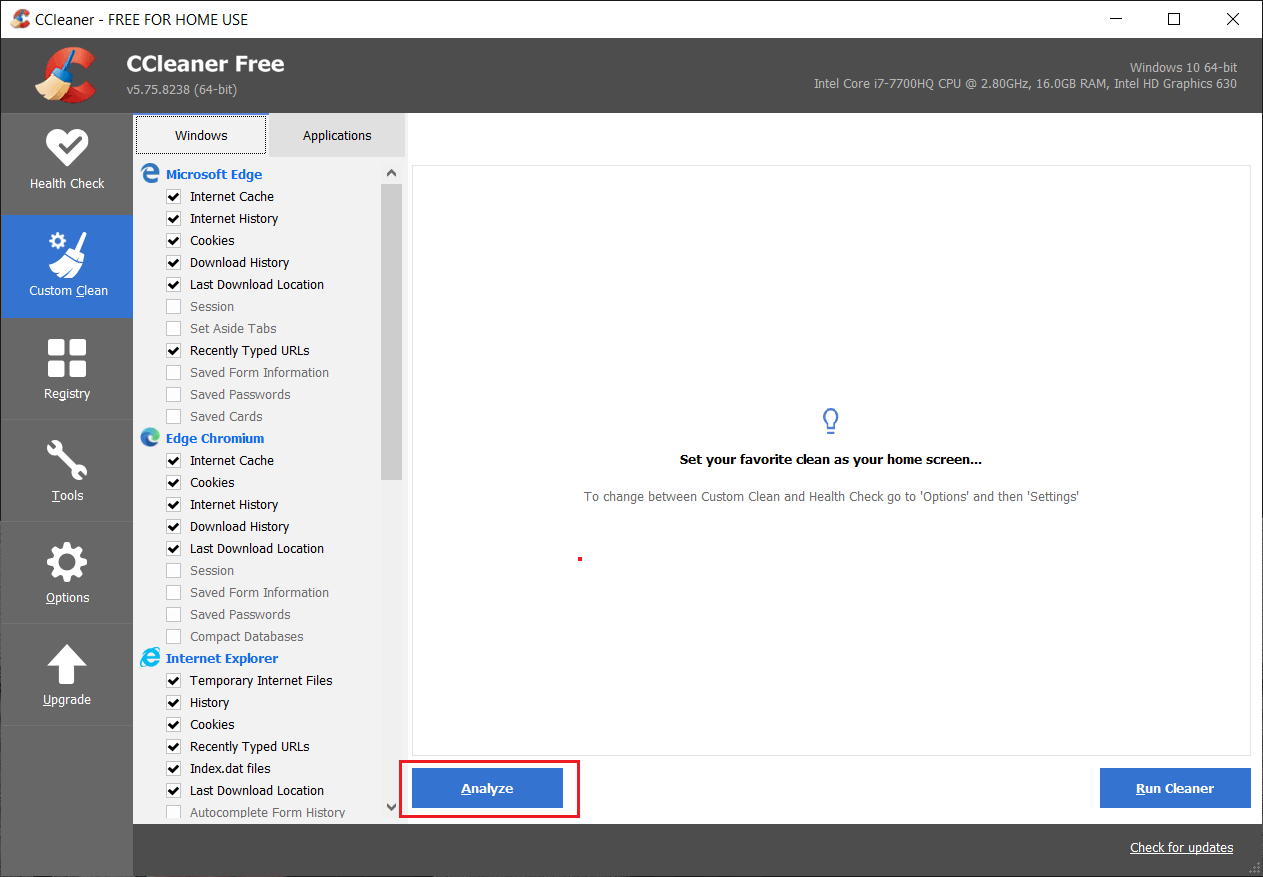
5. Once Analyze is complete, make sure you’re certain to remove the files to be deleted.
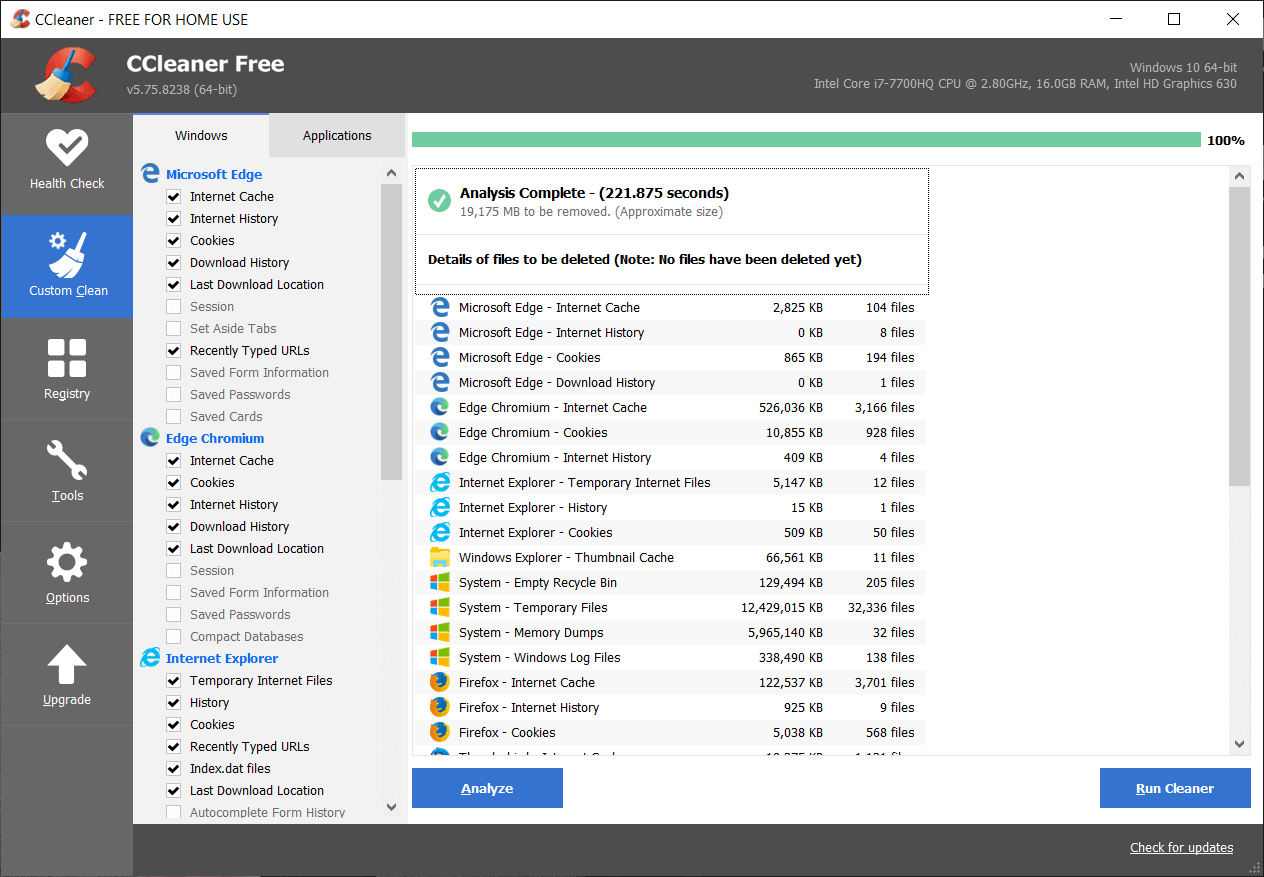
6. Finally, click on the Run Cleaner button and let CCleaner run its course.
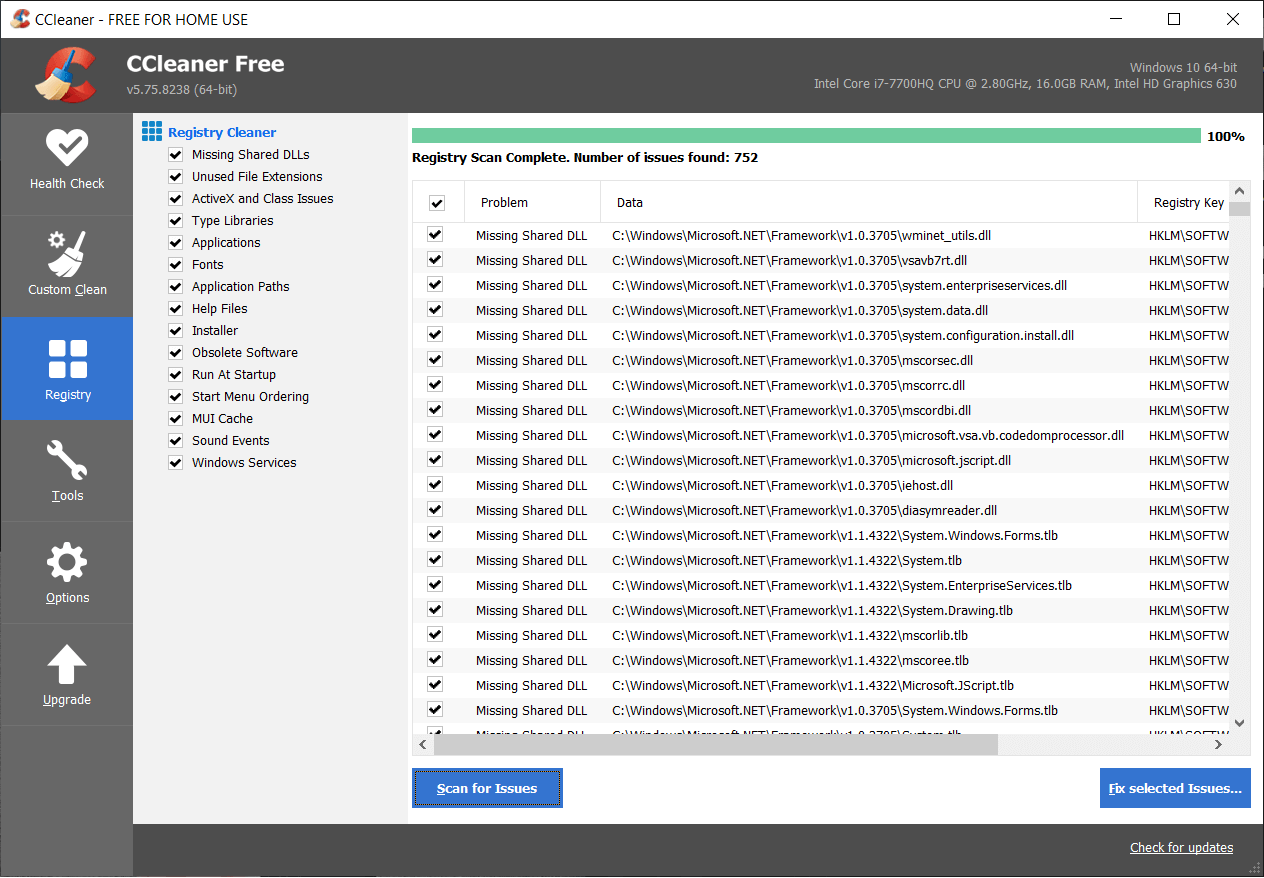
7. To further clean your system, select the Registry tab, and ensure the following are checked:
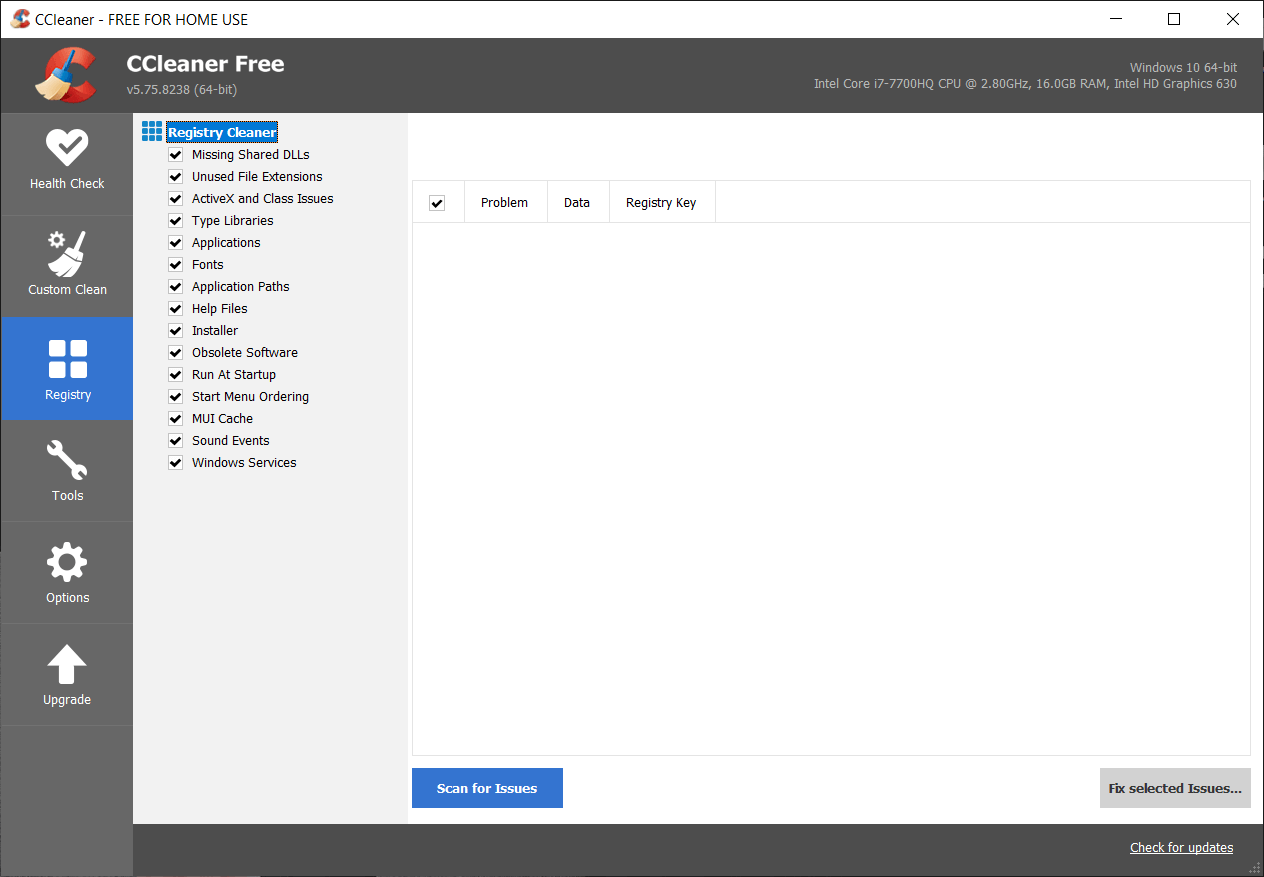
8. Click on the Scan for Issues button and allow CCleaner to scan, then click on the Fix Selected Issues button.
9. When CCleaner asks “Do you want backup changes to the registry?” select Yes.
10. Once your backup has completed, click on the Fix All Selected Issues button.
11. Restart your PC to save changes.
Method 8: Disable Intel PROSet/Wireless WiFi Connection Utility
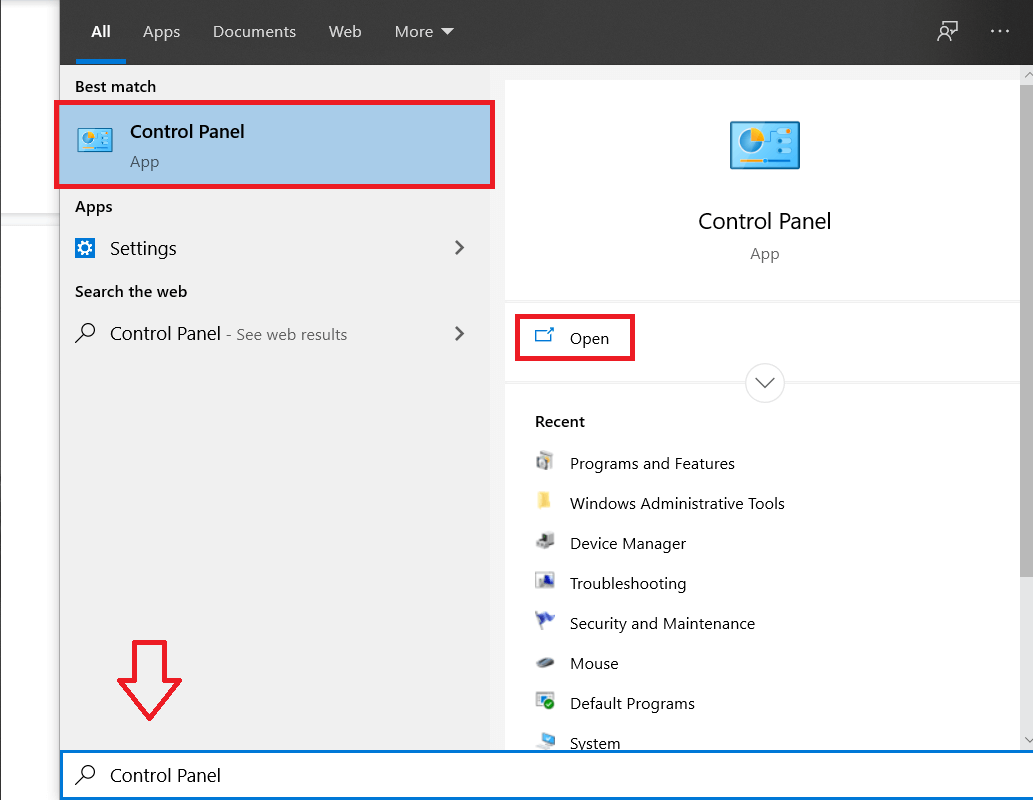
1. Search for the control panel from the Start Menu search bar and click on it to open the Control Panel.
2. Then click on Network and Internet > View network status and task.

3.Now on the bottom left corner click on Intel PROset/Wireless Tools.
4. Next, open settings on Intel WiFi Hotspot Assistant then uncheck “Enable Intel Hotspot Assistant.”

5. Click OK and reboot your PC to save changes.
Recommended:
- Fix Keyboard Not Typing in Windows 10 Issue
- How to Connect Cortana to Gmail Account in Windows 10
- Fix GeForce Experience Won’t Open in Windows 10
- [SOLVED] WiFi Connected But No Internet on Windows 10
That’s it you have successfully Fix Windows can’t communicate with the device or resource error but if you still have any queries regarding this post then feel free to ask them in the comment’s section.


