
Warframe is a multiplayer online game developed by Digital Extremes. You can enjoy this game on Windows, Xbox One, PlayStation 5, PlayStation 4, Nintendo Switch, and Xbox Series X/S. One of the primary reasons contributing to its popularity is that it is completely free to play. If needed, you can play this game as a third-person shooter. Often, several updates are released to fix any bugs within the game. But many users face Warframe launcher update failed issues during an update. You may encounter the issue both on Steam and other gaming platforms wherever you are accessing it. We bring a perfect guide that will help you fix this issue. So, continue reading!

How to Fix Warframe Launcher Update Failed Error in Windows 10
In this article, we have shown all the possible method to fix Warframe launcher update failed error in Windows 10. But before going through the solutions, let us know why this issue is occured. Some of the reasons for this update error are given below.
- Microsoft Visual C++ Redistributable package installation issue
- Corrupt game files,
- Damaged Warframe components,
- Incorrect Warframe Launcher settings,
- Malware or virus attack,
- Inadequate internet speed or bad internet configuration.
You may face any one of the following error messages when you face the problem.
- Update failed!
Some content updates could not be downloaded from our servers.
Please restart Warframe to try again.
The update will be restarted shortly… - Update failed!
The content servers are temporarily unavailable.
ERROR_HTTP_INVALID_SERVER_RESPONSE
The update will be restarted shortly… - Update failed!
Download data was corrupted.
The update will be restarted shortly… - Update failed!
The content servers are temporarily unavailable.
ERROR_INTERNET_CANNOT_CONNECT.
The update will be restarted shortly.
In this section, we have compiled a list of effective troubleshooting steps to fix this failed update issue.
Method 1: Restart Router
Restarting the router will re-initiate the network connectivity. Few users have reported that all the changes marked in the configuration settings will be effective in action when you restart the router. Therefore, follow the below-mentioned steps to restart your router.
1. Find the Power button at the back of your router.
2. Press the button once to turn it off.

3. Now, disconnect your Router power cable and wait until the power is entirely drained from the capacitors.
4. Then, reconnect the power cable and switch it on after a minute.
5. Wait until the network connection is re-established and try signing in again.
Also Read: Fix Sea of Thieves Services Are Temporarily Unavailable Lavenderbeard
Method 2: Reset Your Router
Before you try the below instructions, you must be aware of a few points that router reset will bring the router to the factory settings. All the settings and setups like forwarded ports, black-listed connections, credentials, etc., will be erased. Still, if you decide to reset the router, follow the instructions as discussed below.
Note 1: All the settings and setups like forwarded ports, black-listed connections, credentials, etc., will be erased. So, make sure to keep an account of these before proceeding to the instructions discussed below.
Note 2: After Reset, the router will switch back to its default settings and authentication password. So, use its default credentials to log-in after the reset.
1. Open the router settings using the default gateway IP address. Then, use your credentials to Login as shown.

2. Note down all the configuration settings. You will require them after resetting the router as you may lose your ISP credentials if you use a P2P protocol (Point-to-Point Protocol over the Internet)
3. Now, hold the Reset button on your router for 10-30 seconds.
Note: You have to use pointing devices like a pin, or toothpick to press the RESET button in some Routers.

4. The router will automatically turn off and turn back on. You can release the button when the lights begin to blink.
5. Re-enter configuration details for the router on the webpage.
Also Read: How to Increase WiFi Internet Speed on Windows 10
Method 3: Close Background Processes
Often, when too many bandwidth-hogging applications are running in the background, you may not be able to download an update, resulting in failure. Additionally, they might increase CPU and memory usage, thereby affecting system performance. Follow the below-mentioned steps to close background tasks:
1. Launch Task Manager by pressing the Ctrl + Shift + Esc keys at the same time.
2. Locate and select the unwanted background processes using high Memory.
3. Then, click End task, as shown highlighted.

Method 4: Optimize Internet Connectivity
Ensure you have a stable network connection whenever you update any game.
1. Visit the SpeedTest page and check ping values.

2. If you are using a wireless connection, switch to an Ethernet cable if possible.
3. Opt for a faster internet package by contacting your network provider.
Also Read: How to Hide WiFi Network Name in Windows 11
Method 5: Run Network Troubleshooter
Running the Network Adapter Troubleshooter will resolve any glitches in the Ethernet connection, thus resolving the Warframe launcher update failed issue. This method is applicable not only for Windows 10 but also for Windows 7 & 8.1.
1. Press Windows + I keys simultaneously to launch Settings.
2. Click on the Update & Security tile, as shown.

3. Click Troubleshoot from the left pane and locate Find and fix other problems in the right pane.
4. Select Network Adapter troubleshooter and click on Run the troubleshooter button shown highlighted.

5. Select the troubling network adapter and click Next.

6. Wait for the troubleshooter to detect and fix the problem. Once the process is complete, follow on-screen instructions and restart your PC.
Method 6: Reset Network Settings
If you face this failed update issue even after running the Network troubleshooter, this indicates you have network conflicts. You can fix them by running commands as instructed below:
1. Hit the Windows key, type Command Prompt and click on Run as administrator.

2. Now, type the following commands one by one and hit Enter.
ipconfig/flushdns
ipconfig/release
ipconfig/release6
ipconfig/renew

3. Finally, wait for the process to be completed and check if the issue is resolved now.
Also Read: How to Disable WiFi Direct in Windows 10
Method 7: Synchronize Date and Time Settings
You might wonder why we should synchronize the time and date for this failed update issue. But, many users said that this solution worked. You can give it a try too!
1. Right-click on the time and date from the right end of the Taskbar.

2. Select the Adjust date/time option from the list.

3. Switch On the toggle for the given options:
- Set time automatically
- Set time zone automatically

Method 8: Change Warframe Launcher Settings
If none of the methods have helped you, there are chances that you have glitches in your game launcher. Tweak the settings to resolve the problem as instructed below.
1. Click on Start, type warframe, and hit the Enter key.

2. Click on the Settings icon at the top right corner, as shown below.
![]()
3. Now, uncheck the option marked Bulk Download shown highlighted below.

4. Click OK to confirm.

5. Again, click Ok.

Also Read: Where Are Steam Games Installed?
Method 9: Alternate Settings Between DirectX 10 and 11
You may also fix this update failed issue by switching the settings from DirectX10 to 11 or vice versa. Many tech experts are clueless about how this setting works, yet few users have confirmed that this method could help you fix the problem.
1. Launch Warframe and select the Settings icon as earlier.
![]()
2. Now, navigate to Graphics API and click on DirectX 10 or 11 as the case may be.

3. Click Ok as shown.

Method 10: Change Language in Warframe Launcher
You can also reload the launcher by changing the language and possibly fix Warframe Launcher update failed update issue.
1. Launch Warframe as done earlier.
2. Click on the drop-down menu near the Settings icon.
![]()
3. Now, change the language preference back and forth until the desired language reloads. Finally, check if the issue is resolved.

Also Read: How to Add Microsoft Games to Steam
Method 11: Update or Roll Back Network Driver
Follow the given step to fix Warframe error 10054 and launcher update failed error by updating network driver or rolling back the driver updates.
Option I: Update Driver
1. Type Device Manager in the Windows 10 search menu and click on Open.

2. Double-click on Network adapters to expand it.
3. Right-click on your wireless network driver (e.g. Qualcomm Atheros QCA9377 Wireless Network Adapter) and select Update driver, as depicted below.

4. Next, click on Search automatically for drivers to automatically download and install the best available driver.

5A. Now, the drivers will update and install to the latest version, if they are not updated. Restart your PC.
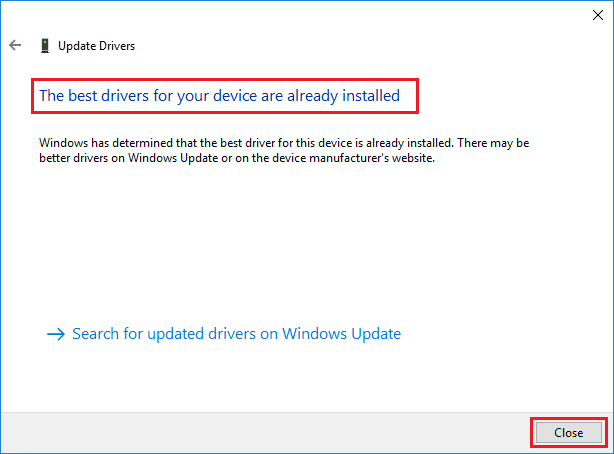
5B. If they are already in an updated stage, the message saying The best drivers for your device are already installed will be shown. Click on the Close button to exit the window.
Option II: Roll Back Driver Updates
1. Go to Device Manager > Network adapters as earlier.
2. Right-click on the Wi-Fi driver (e.g. Intel(R) Dual Band Wireless-AC 3168) and select Properties, as depicted below.

3. Switch to the Driver tab and select Roll Back Driver, as highlighted.
Note: If the option to Roll Back Driver is greyed out, it indicates that your computer does not have the pre-installed driver files or it has never been updated.

4. Provide your reason for Why are you rolling back? in Driver Package rollback. Then, click on Yes, as illustrated below.

5. Then, click on OK to apply this change. Finally, restart your PC.
Method 12: Disable Antivirus or Whitelist Warframe (If Applicable)
Sometimes, the antivirus program in your system might prevent you from updating Warframe, considering it as a threat. To resolve this, you can either whitelist the Warframe.Exe file or disable the antivirus program as instructed below. Follow the steps according to your antivirus application.
Note: Here, Avast Free Antivirus is taken as an example for demonstration. The steps and settings may vary depending on the anti-malware application.
Option I: Whitelist Warframe.Exe
1. Navigate to the search menu, type Avast and click Open from the search results.

2. Now, click on the menu option at the top right corner, as shown below.

3. Now, click on Settings from the drop-down list.

4. In the General tab, switch to the Exceptions tab and click on ADD ADVANCED EXCEPTION under the Exceptions field.

5. Now, click on File/Folder in the new window.

6. Now, paste the Warframe file/folder path in the Type in file or folder path field and click on the ADD EXCEPTION button, shown highlighted below.
Note: You can also select Warframe file/folder path using the BROWSE option.

Option II: Disable Antivirus Temporarily
1. Navigate to the Antivirus icon in the Taskbar and right-click on it.
![]()
2. Select the Avast shields control option.

3. Select any option to disable Avast temporarily.
- Disable for 10 minutes
- Disable for 1 hour
- Disable until computer is restarted
- Disable permanently

Also Read: Where Does Microsoft Store Install Games?
Method 13: Update Windows
Microsoft releases update its version regularly to fix the bugs in your system. If you are using an outdated version, the files in the system will be incompatible with the game files, leading to the Warframe launcher update failed issue. Follow the below-mentioned steps to update Windows:
1. Press Windows + I keys simultaneously to launch Settings.
2. Click on the Update & Security tile, as shown.
3. In the Windows Update tab, click on Check for updates button.

4A. If a new update is available, then click Install now and follow the on-screen instructions. Restart your PC when done.

4B. Otherwise, it will show You’re up to date message as shown.

Recommended:
- Fix Discord JavaScript Error on Startup
- Fix Warframe Update Failed
- How to Play Chess Titans on Windows 10
- How to Play Steam Games from Kodi
We hope that this guide was helpful to fix Warframe launcher update failed error in Windows 10. Let us know which method worked for you the best. Feel free to reach out to us with your queries and suggestions via comments section below.


