
The main cause of this error is still unknown, but there are various reasons why this problem occurs. Few of them are Windows Firewall might be disabled, malware infection, Incorrect date & time configuration, corrupted application package etc. Now Windows Store is an important component of Windows as it enables you to download different kinds of application required for personal or professional use.

Imagine not being able to download any Windows store application, that’s exactly what happens in this case. But don’t worry troubleshooter is here to fix this issue, follow the below-listed methods one by one and by the end of this guide, Windows Store would be back to normal.
There are few things which you should make sure of before continuing with the below-listed troubleshooting steps:
- Sometimes Family Saftey Settings blocks some apps due to which you may not be able to access the particular app on the Store. Check if the problem occurs on all the other apps or some particular apps. If this issue occurs only on selected apps, then turn off the Family Saftey Settings.
- If you recently made some changes on the system but forgot to restart your PC, you might not access Windows Store. Make sure to restart your system after Windows Update and see if the problem is resolved or not.
Fix No Install Button in Windows Store
Make sure to create a restore point just in case something goes wrong.
Method 1: Turn ON the Windows Firewall
Windows Store doesn’t let you access the apps until you make sure that the Windows Firewall is enabled.
1.Press Windows Key + I then select Control Panel.

2.Next, click on System and Security.
3.Then click on Windows Firewall.

4.Now from the left window pane click on Turn Windows Firewall on or off.

5. Select Turn On Windows Firewall for both private and public network settings and then restart your PC
After you are done, try to install the app again on the Windows Store and this time it should work out fine.
Method 2: Make sure your PC Date and time is correct
1. Right-click on Time displayed at the bottom right corner of your screen. Then click on Adjust Date/Time.

2. Make sure that both options labelled Set the time automatically and Set the time zone automatically have been disabled. Click on Change.

3. Enter the correct date and time and then click on Change to apply changes.

4. See if you’re able to Fix Your Connection is Not Private Error In Chrome.
5. If this doesn’t help then Enable both the Set Time Zone Automatically and Set Date & Time Automatically options. If you have an active internet connection, your Date and Time settings will get updated automatically.

Also Read: 4 Ways to Change Date and Time in Windows 10
Method 3: Clear Windows Store cache
1. Press Windows Key + R then type “Wsreset.exe” and hit enter.
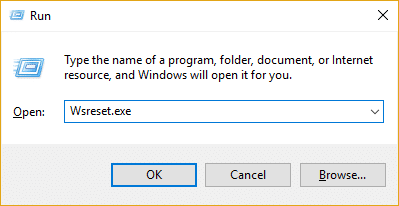
2. One the process is finished restart your PC.
Method 4: Re-register Store app
1. Open Command Prompt as an Administrator.

2. Run below PowerShell command
PowerShell -ExecutionPolicy Unrestricted -Command “& {$manifest = (Get-AppxPackage Microsoft.WindowsStore).InstallLocation + ‘\AppxManifest.xml’ ; Add-AppxPackage -DisableDevelopmentMode -Register $manifest}”
Or
Get-AppXPackage -AllUsers | Foreach {Add-AppxPackage -DisableDevelopmentMode -Register "$($_.InstallLocation)\AppXManifest.xml"}

3. Once done, close command prompt and Restart your PC.
This step re-register Windows Store apps which should automatically Fix No Install Button in Windows Store problem.
Method 5: Make sure Windows is Up to Date
1. Press Windows Key + I to open Settings then click on Update & Security.
![]()
2. From the left-hand side, menu clicks on Windows Update.
3. Now click on the “Check for updates” button to check for any available updates.

4. If any updates are pending, then click on Download & Install updates.
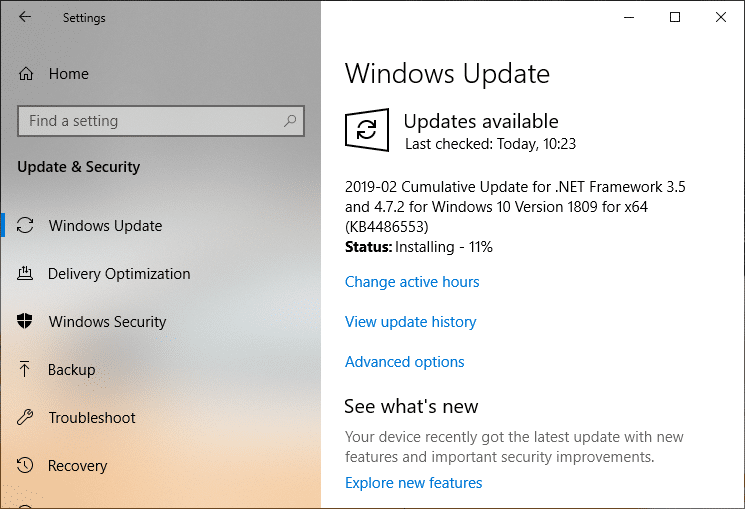
5. Once the updates are downloaded, install them, and your Windows will become up-to-date.
Method 6: Run CCleaner and Malwarebytes
1. Download and install CCleaner & Malwarebytes.
2. Run Malwarebytes and let it scan your system for harmful files. If malware is found, it will automatically remove them.

3. Now run CCleaner and select Custom Clean.
4. Under Custom Clean, select the Windows tab and checkmark defaults and click Analyze.
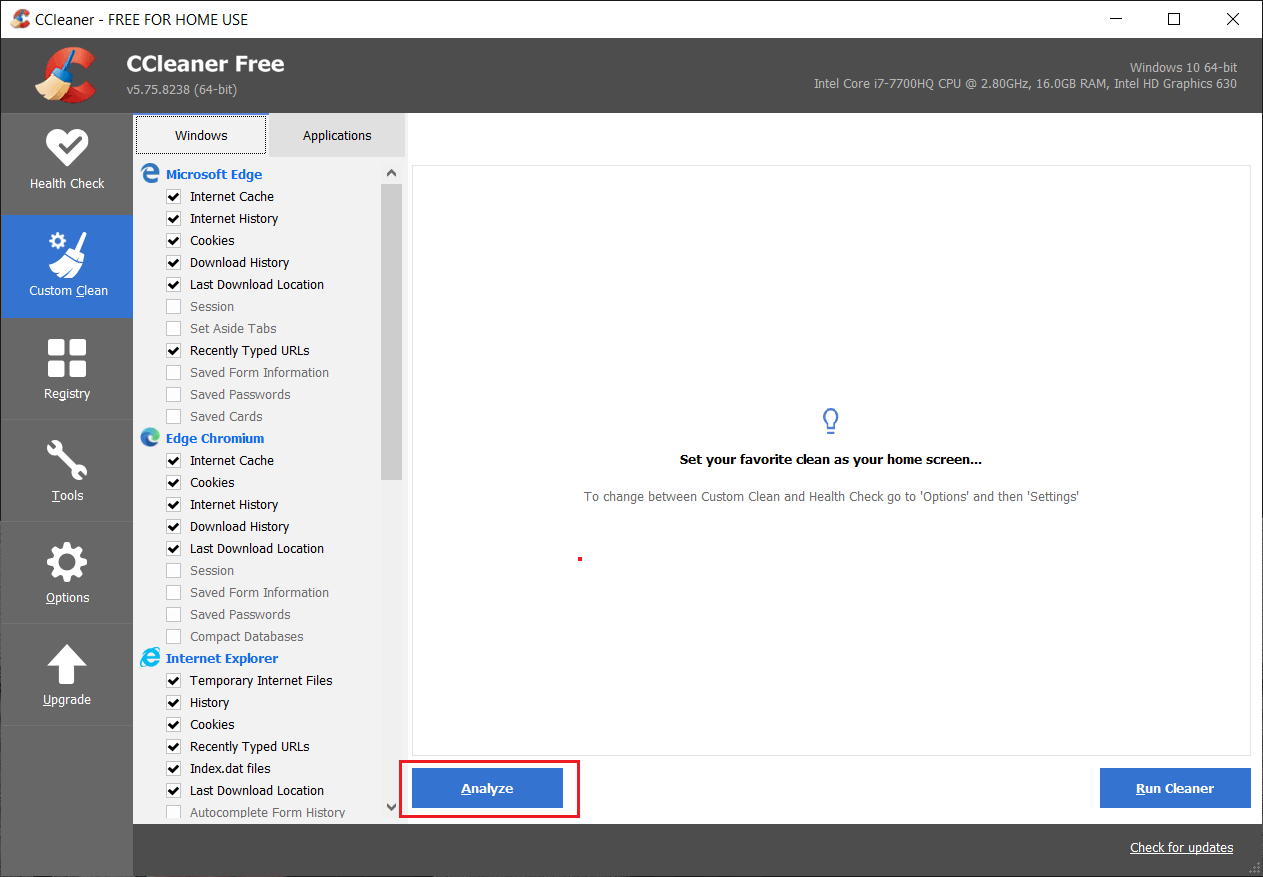
5. Once Analyze is complete, make sure you’re certain to remove the files to be deleted.
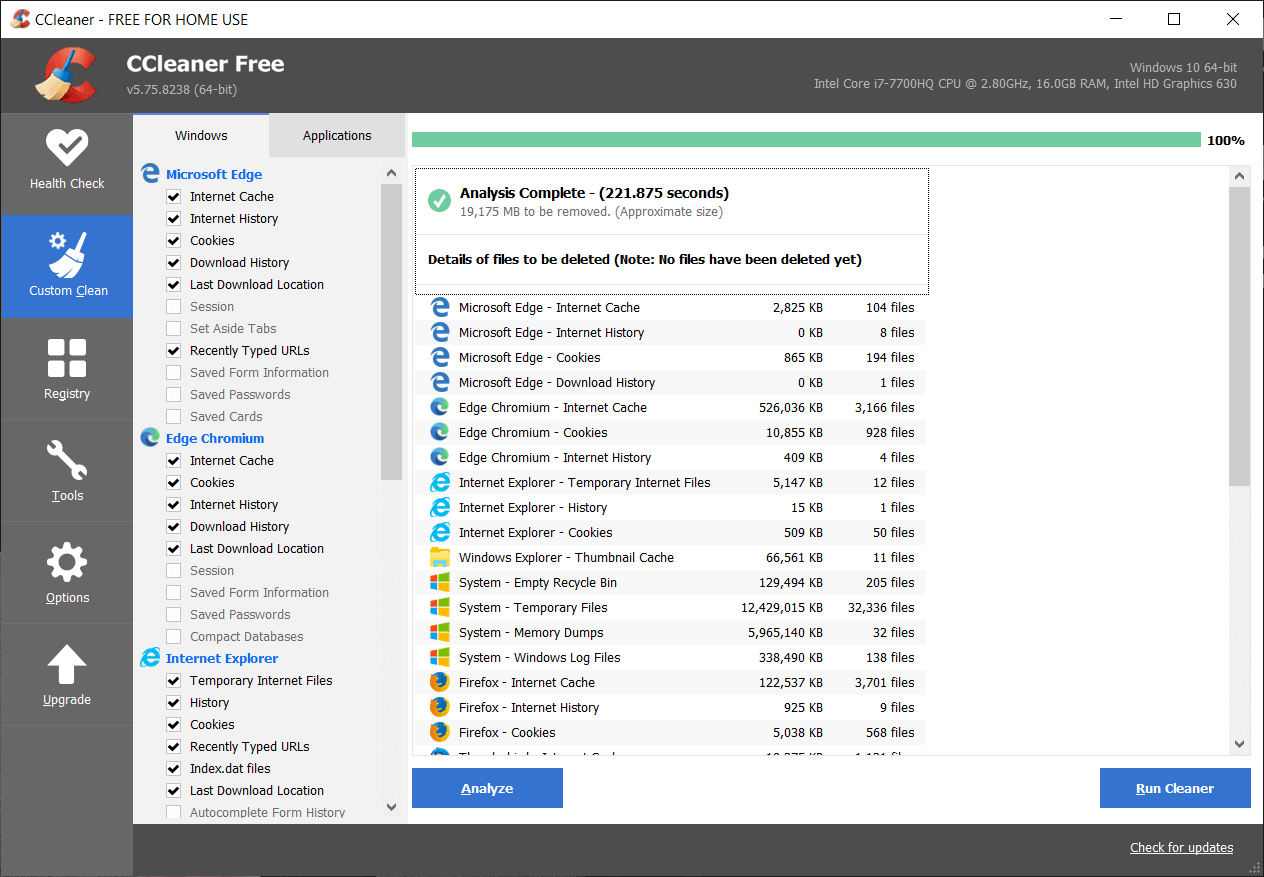
6. Finally, click on the Run Cleaner button and let CCleaner run its course.
7. To further clean your system, select the Registry tab, and ensure the following are checked:
8. Click on the Scan for Issues button and allow CCleaner to scan, then click on the Fix Selected Issues button.
9. When CCleaner asks “Do you want backup changes to the registry?” select Yes.
10. Once your backup has completed, click on the Fix All Selected Issues button.
11. Restart your PC to save changes.
Method 7: Perform Clean Boot in Windows
Sometimes 3rd party software can conflict with Windows Store and therefore, you should not install any apps from the Windows apps store. In order Fix No Install Button in Windows Store problem, you need to perform a clean boot in your PC and diagnose the issue step by step.
Method 8: Run Windows Update and Windows Store Apps troubleshooter
1.Type troubleshooting in the Windows Search bar and click on Troubleshooting.

2.Next, from the left window pane select View all.
3. Then from the Troubleshoot computer problems list select Windows Update.

4. Follow on-screen instruction and let the Windows Update Troubleshoot run.
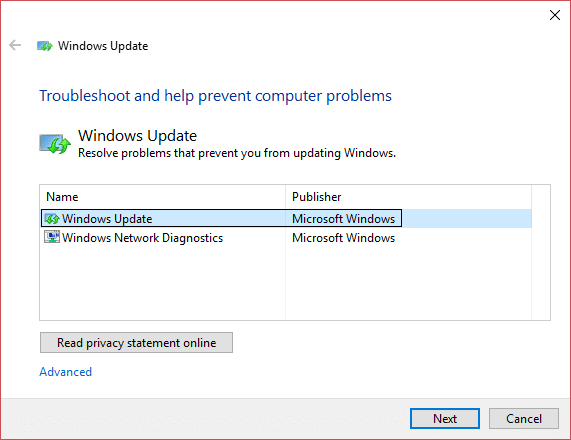
5. Now again go back to the View all window but this time select Windows Store Apps. Run the troubleshooter and follow on-screen instructions.
6. Restart your PC and again try to install apps from Windows Store.
Recommended:
- Fix Windows Store Error The Server Stumbled
- Fix Windows Store not Loading in Windows 10
- 7 Ways To Fix Laptop battery plugged in not charging
- Fix Antimalware Service Executable High CPU Usage
That’s it you have successfully Fix No Install Button in Windows Store but if you still have any queries regarding this post feel free to ask them in the comment’s section.


clearing windows store cache worked for me, thanks