
If you’re facing this issue when you open File Explorer in Windows 10 it keeps on crashing every time you open it, then you are among thousands of users who have been facing this issue since upgrading to Windows 10. While updating to a new version of Windows should fix the problem with previous versions, Windows 10 is far from perfect, and instead of fixing the problem, it seems to create more issues.

In some cases, File Explorer only crashes when a user uses the search function to search for files or folders while for others simply right-clicking or using copy or paste seems to crash File Explorer. The only fix is to restart your PC but when you open File Explorer it again crashes. There is no particular cause to this issue as it depends on user to user why the File Explorer crashes. Each system has a unique configuration, and hence there is a various possible solution to this problem. So without wasting any time let’s see how to actually Fix File Explorer Crashing Issue in Windows 10 with the below-listed troubleshooting guide.
Fix File Explorer Crashing Issue in Windows 10
Make sure to create a restore point just in case something goes wrong.
Method 1: Find the cause of the Problem using Event Viewer
1. Press Windows Key + R then type eventvwr and hit Enter to open Event Viewer or type Event in the Windows search then click Event Viewer.

2. Now from the left-hand side menu double click on Windows Logs then select System.

3. In the right window pane look for error with the red exclamation mark and once you find it, click on it.
4. This will show you the details of the program or process, causing the Explorer to crash.
5. If the above app is the third party, make sure to uninstall it from Control Panel.
Method 2: Explorer Crashing Issue Root Cause
1. Type Reliability in the Windows Search and then click Reliability History Monitor.

2. It will take some time to generate a report in which you will find the root cause for the Explorer crashing issue.
3. In most cases, it seems to be IDTNC64.cpl which is the software supplied by IDT (Audio software) which is not compatible with Windows 10.

4. Press Windows Key + Q to bring up the search and type cmd.
5. Right-click on the cmd and select Run as Administrator.
6. Type the following command in the cmd and hit Enter:
ren IDTNC64.CPL IDTNC64.CPL.old

7. Close Command Prompt and reboot your PC.
8. If you’re not able to rename the above file, you need to uninstall IDT Audio Manager from the Control Panel.
9. If your Control Panel closes automatically, then you need to disable Windows Error Reporting Service.
10. Press Windows Key + R then type services.msc and hit Enter.

11. Find Windows Error Reporting Service then right-click on it and select Properties.

12. Make sure Startup Type is set to Disable, and the service is not running, else click on Stop.

13. Now press Windows Key + X then select Control Panel.

14. Uninstall IDT Audio from Control Panel to finally Fix File Explorer Crashing issue.
15. Reboot your PC to save changes.
Note: Again set the Startup type of Windows Error Reporting Service back to Manual.
Method 3: Launch Folder Windows In A Separate Process
1. Open File Explorer then click View and then click on Options.

Note: If you can’t access File Explorer then open Control Panel and search for File Explorer Options.

2. Switch to the View tab and then checkmark “Launch folder windows in a separate process.”

3. Click Apply, followed by OK.
4. Reboot PC to save changes.
Again, check if you’re able to Fix File Explorer Crashing Issue, if not then continue with the next method.
Method 4: Change the size of text, apps, and other items
1. Press Windows Key + I to open Setting then click System.
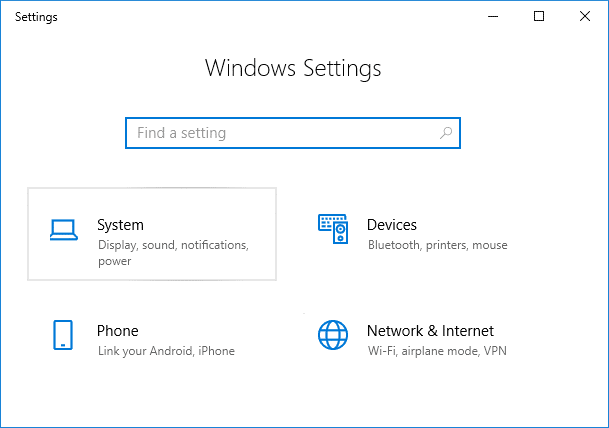
2. From the left-hand menu, switch to the Display tab.
3. Now, Make sure to change the size of text, apps, and other items to 150% or 100%.

Note: Make sure the above setting is not set at 175%, which seems to be causing this issue.
4. Reboot your PC to save changes.
Method 5: Clear File Explorer history
1. Press Windows Key + X then select Control Panel.
2. Search for File Explorer and then click File Explorer Options.
3. Now in General tab, click Clear next to Clear File Explorer history.

4. Restart your PC to save changes.
This method should able to Fix File Explorer Crashing Issue in Windows 10, if not then continue with the next one.
Method 6: Disable all Shell Extensions
When you install a program or application in Windows, it adds an item in the right-click context menu. The items are called shell extensions; now if you add something that might conflict with the Windows, this could cause the File Explorer to crash. As Shell extension is part of Windows File Explorer, any corrupt program could easily cause File Explorer Crashing Issues in Windows 10.
1. Now, to check which of these programs are causing the crash, you need to download a 3rd party software called ShexExView.
2. Double click the application shexview.exe in the zip file to run it. Please wait for a few seconds as when it launches for the first time it takes some time to collect information about shell extensions.
3. Now click Options then click on Hide All Microsoft Extensions.

4. Now Press Ctrl + A to select them all and press the red button in the top-left corner.

5. If it asks for confirmation, select Yes.

6. If the issue is resolved then there is a problem with one of the shell extensions but to find out which one you need to turn them ON one by one by selecting them and pressing the green button on the top right. If after enabling a particular shell extension Windows File Explorer crashes then you need to disable that particular extension or better if you can remove it from your system.
Method 7: Disable Quick access
1. Open File Explorer then click View and then click Options.
Note: If you can’t access accessExplorer then open Control Panel and search for File Explorer Options.
2. Now in General tab uncheck “Show recently used files in Quick access” and “Show frequently used folders in Quick access” under Privacy.

3. Click Apply, followed by Ok.
4. Reboot your PC to save changes.
Method 8: Perform a Clean Boot
Sometimes 3rd party software can conflict with Windows File Explorer, and therefore the File Explorer crashes. In order Fix File Explorer Crashing Issue in Windows 10, you need to perform a clean boot in your PC and diagnose the issue step by step.

Method 9: Give your account full permission to access the folder content
This method is only helpful if you face the File Explorer crashing problem with some particular files or folders.
1. Right-click on the File or Folder, which is having an issue and select Properties.
2. Switch to Security tab and then click Advanced.

3. Click Change next to Owner then Enter your user account name and click Check Names.

4. If you don’t know your user account name, click Advanced in the above window.
5. Now click Find Now which will show you your user account. Please select your account and double click on it to add it to the owner window.

6. Click OK to add your user account to the list.
7. Next, on Advanced Security Settings window checkmark “replace owner on subcontainers and objects.”

8. Then click OK and again Open Advanced Security Settings window.
9. Click Add and then click Select a principal.

10. Again add your user account and click OK.
11. Once you had set your principal, set the Type to be Allow.

12. Make sure to checkmark Full Control and then click OK.
13. Click Apply, followed by OK.
Recommended:
- This file does not have a program associated with it for performing this action
- Fix Microsoft Edge opens multiple windows
- How to Fix Monitor randomly turns OFF and ON
- Fix Unable to Delete Temporary Files in Windows 10
That’s it you have successfully Fix File Explorer Crashing Issue in Windows 10 but if you still have any questions regarding this guide then feel free to ask them in the comment’s section.


