
Microsoft Office is undoubtedly one of the best productivity/business application suites out there. Originally released in 1990, Office has undergone quite a few upgrades and is available in a variety of versions & licenses depending on one’s needs. It follows a subscription-based model and licenses allowing users to install the application suite on multiple systems have also been made available. Multi-device licenses are usually preferred by businesses while individuals often opt for a single device license.
For as great as the Office suite is, things become complicated when the user has to transfer his/her Office installation on another/newer computer. The user needs to be extremely careful when transferring Office as to not mess up his/her official license. While the transferring process has been made easier for newer versions (Office 365 and Office 2016), the process remains slightly complicated for older ones (Office 2010 and Office 2013).
Nevertheless, in this article, we will show you how to transfer Microsoft Office (all the versions) to a new computer without messing up the license.

How to transfer Microsoft Office 2010 and 2013 to a New Computer?
Before we move ahead to the steps of transferring Office 2010 and 2013, there are a couple of prerequisites.
1. You must have the installation media (disk or file) for Office.
2. A 25 digit Product key matching the installation media must be known in order to activate Office.
3. The license type you own must be transferable or support concurrent installs.
As mentioned earlier, Microsoft sells a variety of Office licenses based on the user’s requirement. Each license differs from the other based on the number of applications included in the suite, the number of installations permitted, transferability, etc. Below is a list of the most popular Office licenses that Microsoft sells:
- Full Product Pack (FPP)
- Home Use Program (HUP)
- Original Equipment Manufacturer (OEM)
- Product Key Card (PKC)
- Point of Sale Activation (POSA)
- ACADEMIC
- Electronic Software Download (ESD)
- Not For Resale (NFR)
Out of all the above license types, Full Product Pack (FPP), Home Use Program (HUP), Product Key Card (PKC), Point of Sale Activation (POSA), and Electronic Software Download (ESD) allow Office transfer to another computer. The rest of the licenses, unfortunately, cannot be transferred.
Also Read: How to Download Microsoft Office Picture Manager
Check your Microsoft Office License type
If you aren’t aware or simply don’t remember your Office license type, follow the below method to get a hold of it-
1. Click on the start button (or press Windows key + S), search for Command Prompt and click on Run As Administrator when the search result returns. Alternatively, type cmd in the Run dialog box and press ctrl + shift + enter.

In either case, a user account control popup requesting permission to allow Command Prompt to make changes to your system will appear. Click on Yes to grant permission.
2. For verifying the Office license type, we will need to navigate to the Office installation folder in the command prompt.
Note: Generally, the Microsoft Office folder can be found inside the Program Files folder in C drive; but if a custom path was set at the time of install, you might need to snoop around the File Explorer and find the exact path.
3. Once you have the exact installation path noted, type “cd \ + Office folder path” in the command prompt and press enter.
4. Finally, type the below command and press enter to know your Office license type.
cscript ospp.vbs /dstatus

The command prompt will take some time to return the results. Once it does, check the License Name and License Description values carefully. If you see the words “Retail” or “FPP”, you can move your Office installation to another PC.
Also Read: Microsoft Word has Stopped Working [SOLVED]
Check the number of allowed installations & transferability of your Office license
To get ahead of the curve, Microsoft started allowing all Office 10 licenses to be installed on two different computers at the same time. Certain licenses like the Home and Student bundle were even allowed up to 3 concurrent installs. So if you own an Office 2010 license, you may not need to transfer it but can instead directly install it on another computer.
The same isn’t the case for Office 2013 licenses though. Microsoft rolled back multiple installs and only allows a single install per license, irrespective of the type of bundle/license.
Apart from concurrent installs, Office licenses are also characterized by their transferability. However, only retail licenses are transferable. Refer to the below image for information regarding the number of total installations permitted and the transferability of each license type.

Transfer Microsoft Office 2010 or Office 2013 License
Once you have figured out what type of Office license you own and if it is transferable or not, it is time to carry out the actual transferring process. Also, remember to have the Product key handy as you will need it to prove the legitimacy of your license and activate Office.
The product key can be found inside the container of the installation media and if the license was downloaded/bought online, the product key can be located on the purchase record/receipt. There are also a number of third-party applications that can help you retrieve the product key of your current Office installations. KeyFinder and ProduKey – Recover lost product key (CD-Key) of Windows/MS-Office are two of the most popular product key recovery software.
Finally, to transfer Microsoft Office 2010 and 2013 to a new computer:
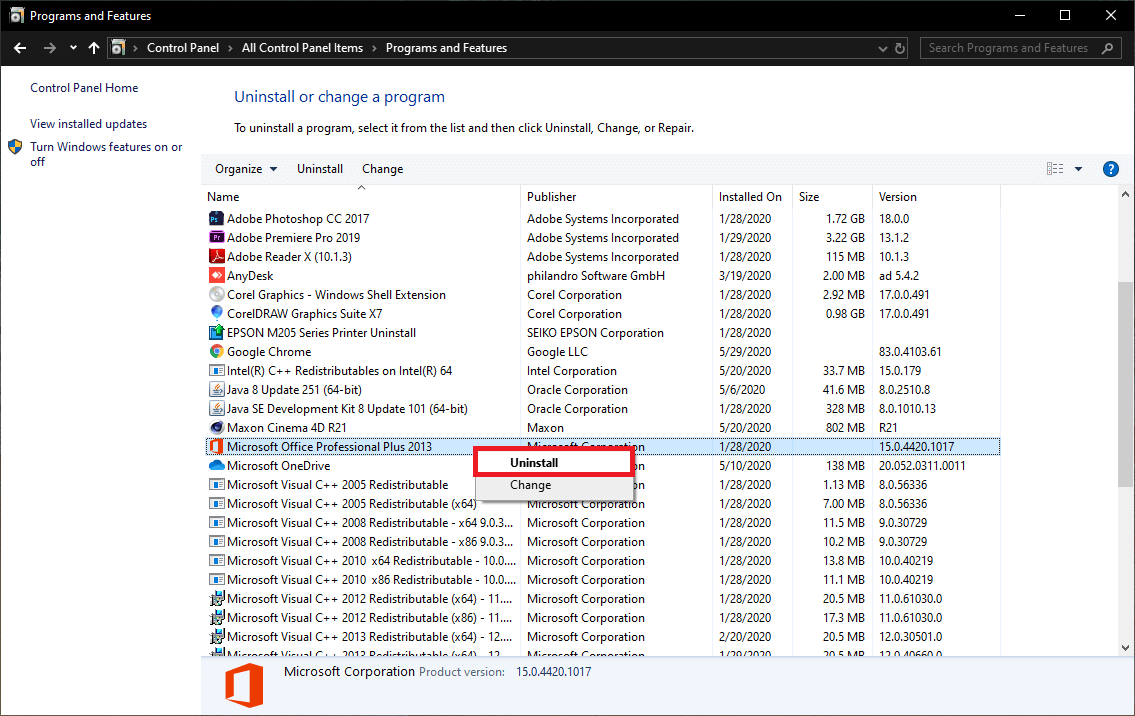
1. We start by uninstalling Microsoft Office from your current computer. Type Control Panel in the windows search bar and click on open when the search returns.
2. In the control panel, open Programs & Features.
3. Locate Microsoft Office 2010 or Microsoft Office 2013 in the list of installed applications. Right-click on it and select Uninstall.
4. Now, switch over to your new computer (on which you wish to transfer your Microsoft Office Installation) and check for any free trial copy of Office on it. If you find any, uninstall it following the above procedure.
5. Install Microsoft Office on the new computer using the installation CD or any other installation media you might have.

6. Once installed, open any application from the Office suite and click on File at the top-left corner. Select Account from the ensuing list of File options.
7. Click on Activate Product (Change Product Key) and enter your product activation key.
If the above installation method fails and results in ‘too many installations’ error, your only option is to contact Microsoft Support staff (Activation Center Phone Numbers) and explain to them the situation at hand.
Transfer Microsoft Office 365 or Office 2016 to a new computer
Starting from Office 365 and 2016, Microsoft has been linking licenses to the user’s email account instead of their hardware. This has made the transfer process way simpler in comparison to Office 2010 and 2013.
All you need to do is deactivate the license and uninstall Office from the current system and then install Office on the new Computer. Microsoft will then automatically activate your license once you Sign in to your account.
1. On the computer currently running Microsoft Office, open your preferred web browser and visit the following webpage: https://stores.office.com/myaccount/
2. Enter your login credentials (Mail address or phone number and password) and Sign in to your Microsoft account.
3. Once signed in, switch to the MyAccount webpage.
4. The MyAccount page maintains a list of all your Microsoft Products. Click on the orangish-red Install button under the Install section.
5. Finally, under Install information (or Installed), click on Deactivate Install.
A pop-up asking you to confirm your action to Deactivate Office will appear, simply click on Deactivate again to confirm. The deactivation process will take some time to complete.
6. Using the steps explained in the previous method, open the Program and Features window and uninstall Microsoft Office from your old computer.
7. Now, on the new computer, follow steps 1 to 3 and land yourself on the MyAccount page of your Microsoft account.
8. Click on the Install button under the Install information section to download the Office installation file.
9. Wait for your browser to download the setup.exe file, and once complete, double-click on the file and follow the on-screen prompts to install Microsoft Office on your new computer.
10. At the end of the installation process, you will be asked to sign in to your Microsoft Office. Enter your login credentials and click on Sign in.
The office will download some additional files in the background and will activate automatically in just a few seconds.
Also Read: 3 Ways to Remove Paragraph Symbol (¶) in Word
We hope you were successful in transferring Microsoft Office to your new computer. Although, if you are still facing any issues in following the above process, connect with us or Microsoft’s support team (Microsoft Support) for some help on the transfer process.


I desperately need to keep Office10 when I get a new computer. I have it on a Win10 & on a Win8.1 laptop now. I don’t remember how I finally got in the Win10 one. I need to keep it because it translates Lotus123 formulas & future versions do not. I retired before the world switched to the inferior product :-?. I can’t cope with Excel without the translation capability. I often just work in an old version of Lotus and save a file copy as .xls in case I lose Lotus.