
You will notice an Activate Windows 10 watermark at the bottom-right corner of your desktop screen if you are using a trial version of Windows 10 or a copy whose license has expired. It will also get in between the work you are doing and thus, is very irritating. Though it is a small thing, it is recommended to remove it. But, before doing so, first of all, you should know why this watermark appears, and what is this Windows activation?

What is Windows Activation?
Windows 10 can be installed on any PC or laptop and its version can be upgraded to a newer version but this does not activate the operating system. The operating system gets updated only when it is verified that you are using a genuine Windows. So, if you want to activate your Windows 10, you can:
- Either use a product key that you will get if you have purchased the Windows 10 license from Microsoft or from a retailer or if you have taken a PC or desktop which has an in-built Windows 10.
- Or use a digital license key that you will need if you have upgraded Windows 10 from lower versions like Windows 7 or Windows 8.1. In such a case you will not require a product key.
If you have not activated your Windows 10 and if you do not have a product key or a digital license, you cannot activate your Windows 10. And thus, you can not remove the Activate Windows 10 watermark from the desktop.
However, if you have a product key, then you can directly remove that watermark by simply entering a valid 25-digit product key.
Permanently Remove The Activate Windows 10 Watermark
To activate Windows using the product key, follow these steps:
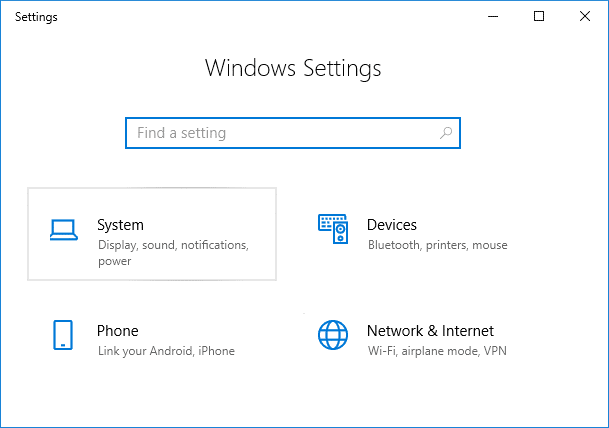
1. Search for Settings in Windows Search then click on the top search result.

2. Click on the Update & Security options.
![]()
3. Choose the Activation option from the menu at the left panel.
4. Click on the Change product key options.

5. Enter a valid 25-digit product key.

6. Click on the Next button.
After completing the above steps, if you have entered a valid product key, the Windows 10 should get activated and the watermark should disappear.
If you do not have a product key or a digital license, there are other several methods to remove the watermark permanently. A few of such methods have been discussed below.
Also Read: 3 Ways to Check if Windows 10 is Activated
Method 1: Removing the Activate Windows 10 watermark using a Batch file
You can remove the Activate Windows 10 watermark by creating a custom batch file or the .bat file by using the Notepad.
To create a batch file or the .bat file, follow these steps:
1. Open the Notepad.

2. Type the below commands in the new Notepad file.
@echo off
Taskkill  /F /IM explorer.exe
explorer.exe
exit

3. Click on the File option available at the top left corner and choose Save A. from the menu to save the above batch file.

4. Choose a location to save the file.
5. In the File name, enter Remove_watermark.bat, and from the drop-down menu next to the Save As Type field, choose the All files option.
Note: The extension “.bat” is very important.

6. Click on the Save button to save the batch file.
7. Now, visit the folder where you have saved the batch file then right-click on the batch file and chooses the Run as administrator option from the menu.
8. The batch file will start running. A command window will open up for a moment and then will close instantly.
9. When the batch file execution is done, restart your computer.
After the computer restarts, the watermark saying Activate Windows 10 will be removed completely.
Method 2: Removing the Activate Windows 10 watermark using the Registry
You can also remove the Activate Windows 10 watermark from your computer by editing the Windows registry. This method is for only advanced users. Editing anything in the registry may cause some serious issues if you do not know what you are doing.
However, to use the registry method to, follow these steps:
1. Open the Run dialog box from the search bar or by pressing the Windows + R shortcut key.
2. Now type regedit and hit Enter to open Registry Editor.

3. Click on the Yes button when asked for confirmation.
4. Navigate to the below path:
Computer\HKEY_CURRENT_USER\Control Panel\Desktop

5. On the right side, scroll down and reach to the PaintDesktopVersion option.

6. Double click on the PaintDesktopVersion option and in the Value data field, change the value from 1 to 0.

7. Click on the OK button.
8. Close the Registry Editor and restart your computer.
After the computer restarts, the watermark saying Activate Windows 10 will disappear from your desktop’s screen.
Method 3: Disable the Windows 10 tips
To disable the Windows 10 tips, follow the below steps:
1. Open the Settings.
2. Click on the System.
3. Click on the Notifications & actions option from the left-hand side menu.
4. Scroll down and look for all the options available under the Notifications.
5. Uncheck “Show me the Windows welcome experience after updates and occasionally when I sign in to highlight what is new and suggested” and “Get tips, tricks, and suggestions as you use windows” option.

6. Restart your computer.
After the computer restarts, the watermark saying Activate Windows 10 will no longer appear at your desktop.
Method 4: Try the universal watermark disabler
If none of the above methods are working, you can use a third-party tool called the universal watermark disabler. It is the best tool to remove the Activate Windows 10 watermark from the desktop.

In order to use the tool, download this tool, and open it. A dialog box will appear. Choose Install from the options. This will sign you out from the computer. Sign in again and once you will sign in, the Activate Windows 10 watermark will be removed from your desktop.
Method 5: Purchase a new Windows 10 key
If the above third-party tool also failed to remove the Activate Windows 10 watermark, then you will have to buy a new Windows 10 key. You can easily purchase a new Windows 10 key if you have never purchased any key or you have no issues with the business activation.
To purchase a new Windows 10 key, follow these steps:
1. Open the Settings.
2. Click on the Update & Security option.
![]()
3. Choose the Activation option from the menu at the left panel.
4. The screen below will appear.

5. Click on Go to the Store option.
6. Here, depending on your version that you have installed, Windows 10 home or Windows 10 pro, you will be able to purchase the Windows 10 key.
After purchasing the key, enter it into the product key option and your Activate Windows 10 watermark will get removed from the desktop.
Method 6: Review the enterprise activation to remove the activate Windows 10 watermark
This problem commonly occurs when your Windows was activated from a business server. So, if it loses its contact with that server, the activate Windows 10 watermark will appear.
To reconnect it and remove the watermark, follow these steps:
1. Open the Settings.
2. Click on Update & Security.
![]()
3. Choose the Activation option from the menu that appears.
You will see a message: We can’t activate Windows on this device because we can’t connect to your organization’s activation server. Now, you simply have to reconnect your system to that business server, either physically or by using the company’s VPN.
Recommended:
Hopefully, using any of the above methods, you will be able to permanently remove the annoying Activate Windows 10 watermark from the desktop.


Good day, I’d like to ask on how to undo the notepad trick since when I did it, it kinda made my laptop/PC slower. Thank you!
Thanks for this help of removing activate massage