
When you attempt to install Windows 10 on your PC, you might find it quite frustrating to lose all your vital data. However, if you happen to possess a GPT partition disk and want to install Windows 10 without risking your data, consider yourself lucky. In this article, we will walk you through straightforward steps to accomplish this task without compromising any of your valuable files.

How to Install Windows 10 on GPT Partition Without Data Loss
If your computer supports UEFI boot mode, you can easily install Windows 10 on a GPT partition without losing any data. In this article, you will learn the step-by-step instructions to do the same, so keep reading!
Can you Install Windows on GPT Partition?
Yes, you can install Windows 10 on a GPT partition if your computer’s motherboard supports UEFI (Unified Extensible Firmware Interface) boot mode. UEFI is a modern firmware interface that enables advanced features, including support for GPT partitions. If your computer is UEFI-compatible, you can effortlessly install Windows 10 on a GPT partition without any issues.
Follow these detailed steps to know how:
Step 1: Check Your Partition Style
1. Press the Windows key to open the start menu and search for Computer Management.
2. Right-click on the disk where Windows is installed.
3. Click on Properties.

4. Click on the Volumes tab and look for the Partition style. This will show you if your partition style is GPT or MBR.

Step 2: Check Your BIOS Mode
If your partition style is already GPT, you can skip this step. However, if your partition style is MBR and you want to install Windows 10 on a GPT partition, you need to check your BIOS mode. UEFI boot mode is necessary for GPT partitions.
Here’s how to check your BIOS mode:
1. Reboot your PC and access the BIOS settings by pressing Esc, F2, F8, F12, Del, or another key (depending on your motherboard).
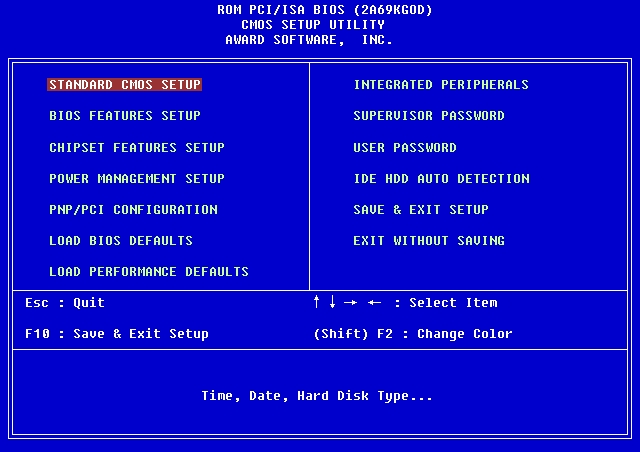
2. Look for an option that says either Legacy or UEFI. If it says Legacy, check if there’s an option to switch it to UEFI.
If there’s no option to switch to UEFI, you won’t be able to install Windows on a GPT partition. However, if you can switch to UEFI mode, you’re good to proceed.
Also Read: 3 Ways to Check if a Disk Uses MBR or GPT Partition in Windows 10
Step 3: Install Windows 10 on GPT Partition
If your Windows is already installed on a GPT partition but you want to perform a fresh installation, follow these steps without losing any data:
Note: You’ll lose the data on the C drive (where Windows 10 is installed), but data on the other drives (D, E, F, etc.) will remain intact.
1. Make a Bootable Pen Drive
1. Connect a USB pen drive with a minimum capacity of 8 GB and ensure there’s no data on it.
2. Rename your C drive to Win-10 for easy access during the Windows installation.
3. Visit the official Microsoft website and download the Media Creation Tool.

4. Run the Media Creation Tool and choose the option to Create installation media when prompted.

5. Select USB flash drive as the installation media and follow the on-screen instructions to make the pen drive bootable.

2. Install Windows on GPT Partition
1. Reboot your PC and access the BOOT Menu by pressing F12 or the appropriate key for your motherboard.
2. Choose the bootable pen drive with UEFI written on it.

3. Follow the on-screen instructions, and when prompted with Which type of installation do you want. Choose Custom: Install Windows only.
4. You’ll see four partitions: System, MSR (Reserved), Primary (C drive/Win-10), and Recovery. Delete these four partitions one by one. Ensure not to delete any other partitions to safeguard your data.
5. After deleting the four partitions, click on the Unallocated Space.
6. Click New, and then click Apply and OK.
7. Three partitions will be created. Choose the Primary partition (the one you just created) to install Windows.
8. Click Next and follow the on-screen instructions to complete the installation.
By following these steps, your data will remain safe. This method is particularly useful when you have a large amount of data, such as 50 GB or 60 GB, which cannot fit on a standard pen drive with only 16 GB capacity.
Also Read: How to Convert GPT Disk to MBR Disk in Windows 10
Is It Possible to Install Windows 10 on GPT Partition in Legacy BIOS Mode?
No, it is not possible to install Windows 10 on a GPT partition in Legacy BIOS mode. Legacy BIOS mode only supports booting from MBR-partitioned disks. To install Windows 10 on a GPT partition, your system must support UEFI mode, which is a more modern replacement for BIOS.
How To Convert MBR Partition to GPT And Legacy Mode To UEFI
If your motherboard currently operates in Legacy mode but supports UEFI, you can switch to GPT and UEFI using the following methods:
Method 1: Using MBR2GPT.exe
This method is available for Windows versions 1730 or later. Here’s how you can check your Windows version:
1. Press Windows + R keys.
2. Type winver in the Run box and press enter key to check your Windows version.

Note: If your Windows version is 1730 or later, follow these steps:
1. Press the Windows key to open the Start menu and search for Recovery options.

2. Click on Restart now in Recovery options.

3. Windows will restart and take you to the Advanced Startup menu.
4. From the list of options, navigate to Troubleshoot, select Advanced options, and click on Command Prompt.
5. In the command prompt, type mbr2gpt /validate and hit enter. Then type mbr2gpt /convert and hit enter.
Note: You can also specify the disk you want to convert by using the command mbr2gpt /convert /disk:# (replace # with the actual disk number, e.g., mbr2gpt /convert /disk:1).
6. Now, boot the system and enter the BIOS setup by pressing Del, Esc, or any other key (varies by PC).
7. In the BIOS or Boot tab, look for where Legacy is written. Change it to UEFI.
Method 2: Using Third-Party Software AOMEI Partition Assistant
AOMEI Partition Assistant is paid software, but it offers a free trial period. Here’s how you can use it:
Note: We do not endorse or support the use of third-party software. Please use them at your own risk.
1. Download and install AOMEI Partition Assistant.

2. Right-click on the MBR disk you want to convert and choose Convert to GPT.
3. Click OK, select Apply, and then Proceed.
4. Your PC will boot into AOMEI Pre-OS mode.
5. After the conversion completes, access your BIOS settings by pressing Del, F2, Esc, or any other key (depending on your PC).
6. Go to the BIOS or Boot tab and look for where Legacy is written. Change it to UEFI.
If you want more methods or detailed information, you can read our dedicated guide on Convert MBR to GPT Disk Without Data Loss in Windows 10.
We hope this guide has helped you successfully install Windows 10 on a GPT partition without experiencing any data loss. If you encounter any issues during the installation process or have any other questions or suggestions, please feel free to let us know in the comments section below. Happy computing!


