
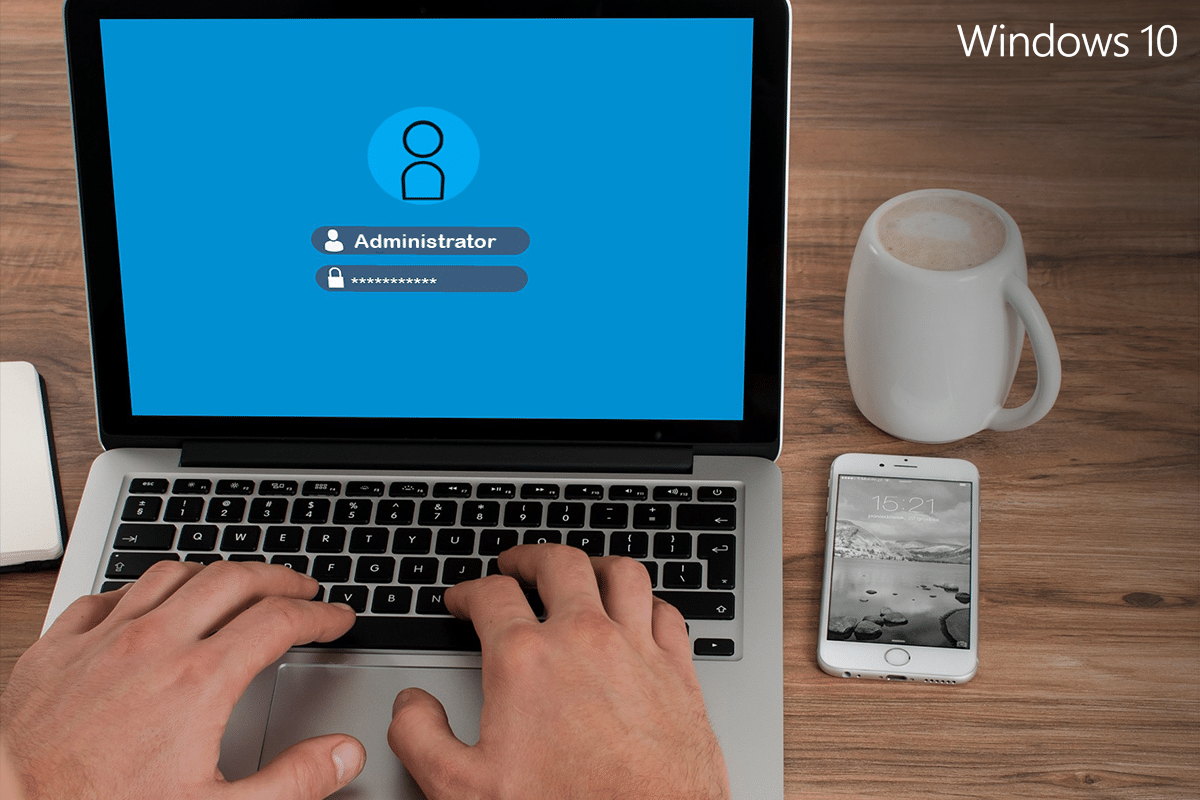
The Windows operating system usually has a Standard account & Administrator account. A standard account can perform all daily tasks. You can run programs, surf the internet, send/receive mail, watch movies, and so on. But you cannot install any software or add or remove any user accounts. If you want to install any software in your system or add/remove/change user accounts, you will have to use an administrator account. Another advantage of having an administrator account is that if you share your computer with someone else, they won’t be able to make any drastic changes that might cause harmful effects on the system. So, if you are looking to do so, you are at the right place. We bring a perfect guide that will help you enable or disable an administrator account in Windows 10.
How to Enable or Disable Administrator Account in Windows 10
If you have deleted your admin account accidentally, all your files and folders will be removed. Hence, it is always a good idea to back up these files in another account.
How to Identify My Account – Standard or Administrator?
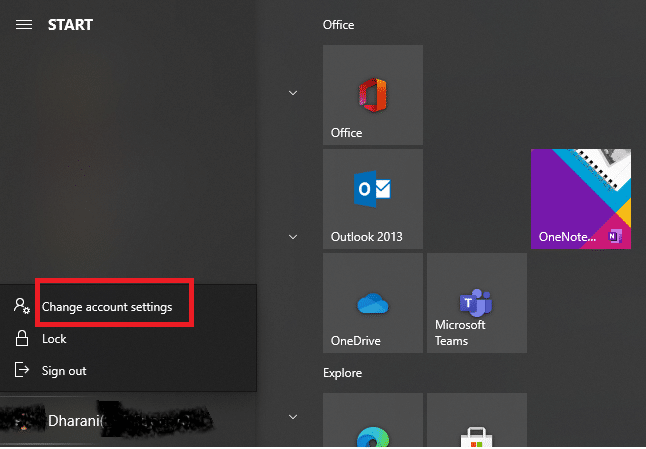
1. Click on the Start menu.
2. Either your name or an icon is displayed on the Start Menu. Click on your name or the icon and select Change account settings.
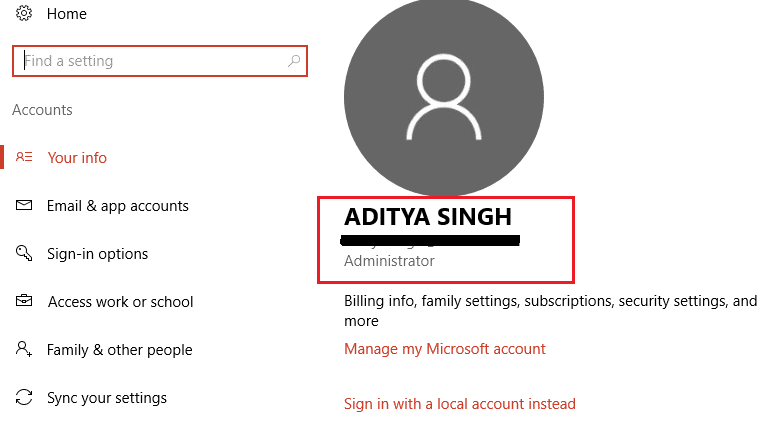
3. If you see the term Administrator below your user account, this is an Administrator account. Else, it is a standard account, and you cannot make any changes.
How to Switch Account Type on Windows 10
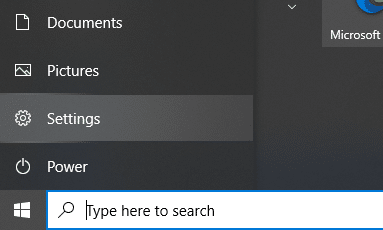
1. Click on your Windows key and type Settings in the search bar.
2. Open Settings from your search results. Alternatively, you can click on the Settings icon as depicted below.
3. Click on the Accounts from the panel on the left.

4. Click on Family & other users from the left-hand menu.
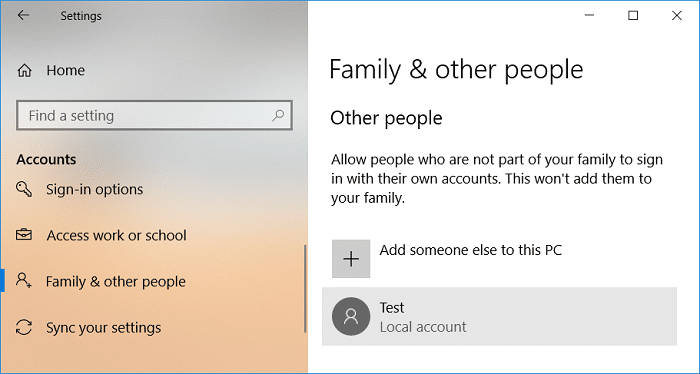
5. Under Other users, click on the account name you desire to switch then click on Change account type.

6. Finally, select Administrator under the Account type and click OK.
Note: This is not applicable for Standard account users.

How to Enable Administrator Account on Windows 10
The following methods will give a clear view of how you can enable an administrator account in Windows 10:
Method 1: Use Command Prompt to Enable an Administrator Account in Windows 10
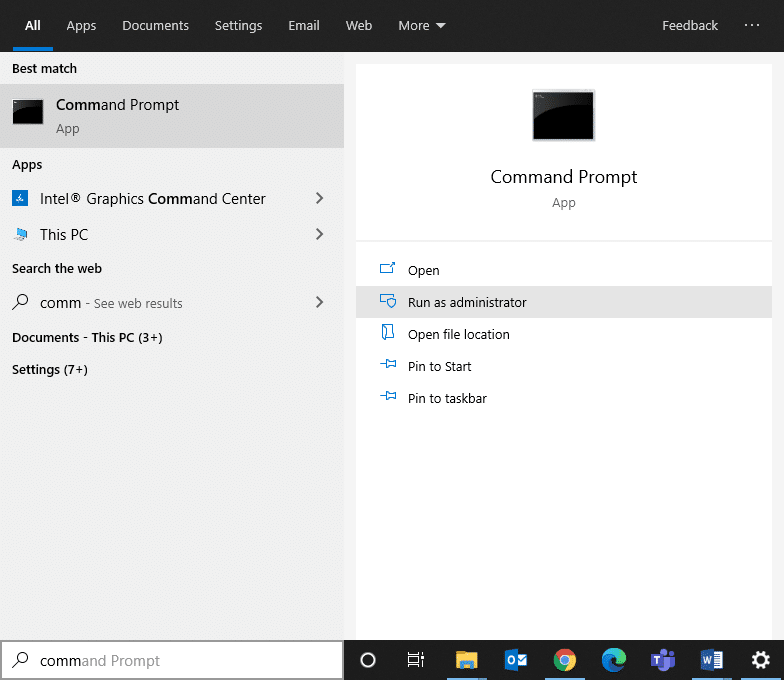
1. Click on your Windows key and search command prompt in the search bar.
2. Now, click on Run as administrator to open the Command Prompt with administrative privileges.
3. If it asks for a username and password, then type your account username and password.
4. Type net user administrator in the command prompt and hit enter. A message saying “The command completed successfully” will be displayed. Here, the Account Active condition will be No as depicted below.
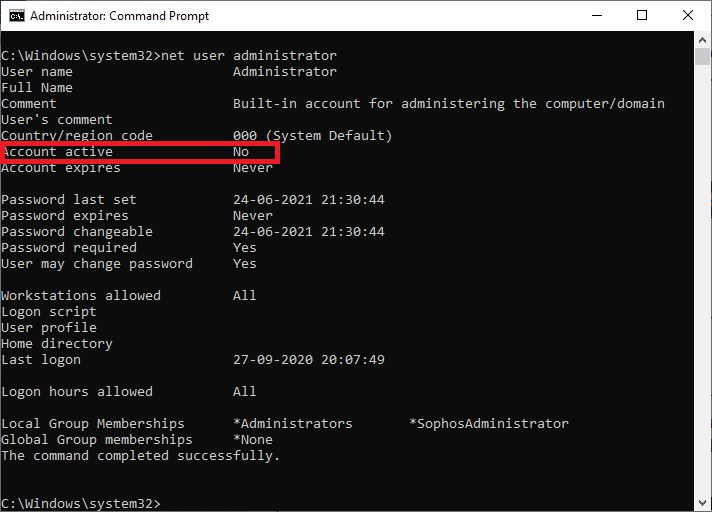
5. If the Account active is “No” this means no other local administrator accounts are active.
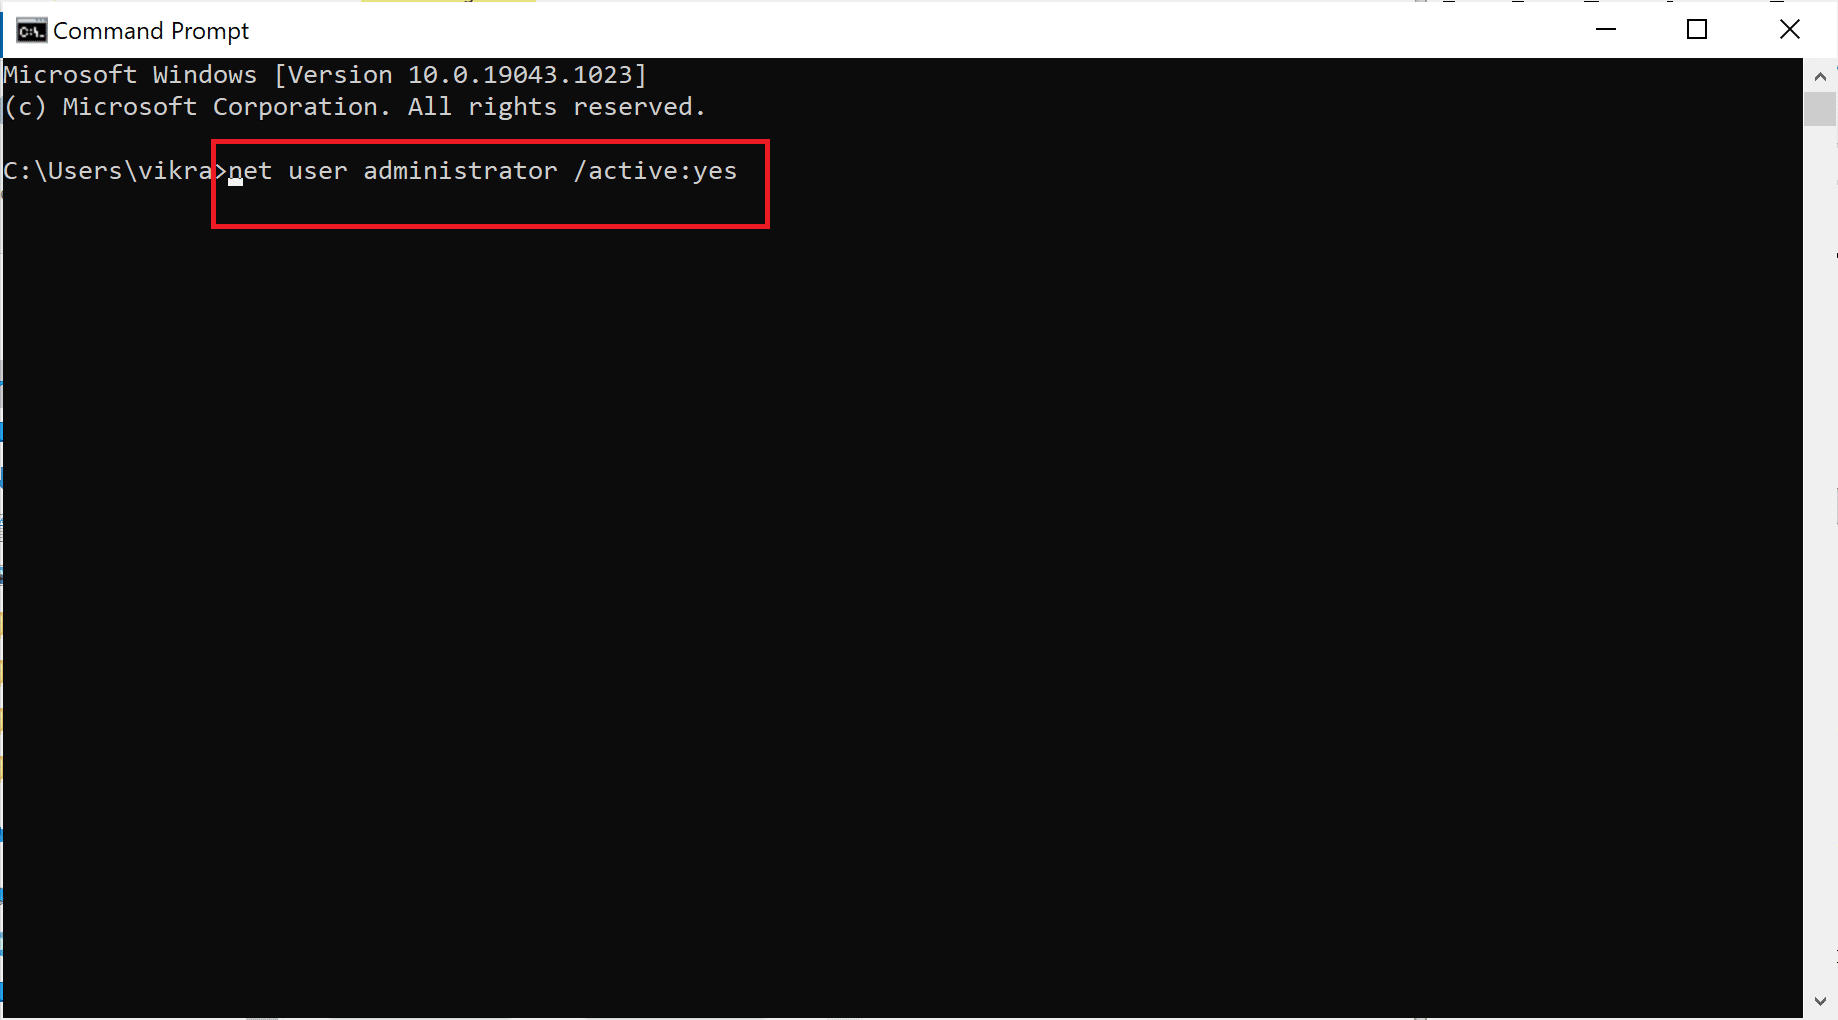
6. Now, to enable the administrator account, type net user administrator /active:yes and hit enter. To confirm the changes, run the earlier command as discussed in the above step.
You can now log in to your system as an administrator to fix the issues or install any software on the system.
Method 2: Use Admin Tools to Enable Administrator Account in Windows 10
With the help of administrator tools, you can enable an admin account on your Windows 10 PC. Here is how to implement it:
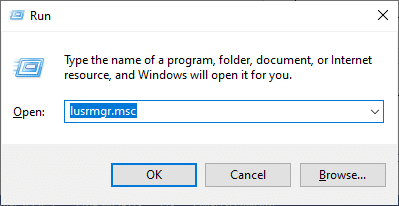
1. You can launch the Run dialog box by going to the search menu and typing Run.
2. Type lusrmgr.msc as follows and click OK.

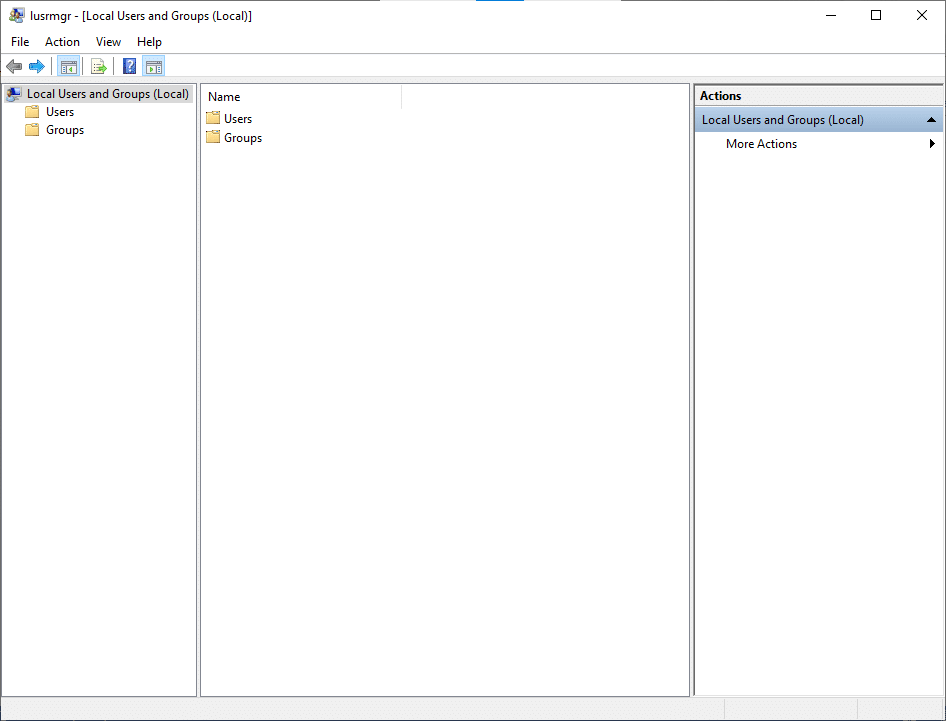
3. Now, double-click on Users under the Name field as depicted below.

4. Here, double-click on Administrator to open the properties window.

5. Here, uncheck the box that says Account is disabled.

6. Now, click on OK followed by Apply to save the changes.
Now, your administrator account is enabled in your Windows 10 system with the help of admin tools.
Also Read: Your Account Has Been Disabled. Please See Your System Administrator
Method 3: Use the Registry Editor to Enable Administrator Account in Windows 10
Note: If you are using Windows 10 Home, then you cannot follow this method. Try the command prompt method as mentioned earlier.
1. Open the Run dialog box (Click Windows key & R keys together) and type regedit.
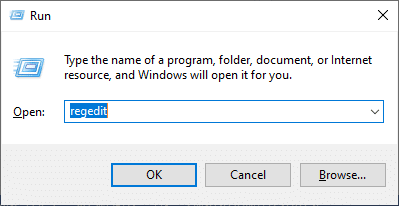
2. Click OK and navigate the following path:
Computer\HKEY_LOCAL_MACHINE\SOFTWARE\Microsoft\Windows NT\CurrentVersion\Winlogon\SpecialAccounts\UserList
3. Right Click on UserList and go to New > DWORD Value.
4. Enter the name of the Administrator and hit Enter.
5. Restart the computer, and now you will find an option to log in to your system as an administrator.
Method 4: Use Group Policy to Enable Administrator Account in Windows 10
The working environment of users and their accounts can be controlled by a feature called Group Policy. As a result, the system administrator can access a wide variety of advanced settings in Active Directory. In addition, group Policy is used as a security tool to apply security settings to the users and computers.
Note: Group Policy Editor is unavailable on Windows 10 Home. This method is only for the users who have Windows 10 Pro, Education, or Enterprise version.
1. To use the Run command box, press the Windows key +R key.
2. Type gpedit.msc, click on the OK button.

3. Navigate to the following location:
Local Computer Configuration > Windows Settings > Security Settings > Local Policies > Security Options
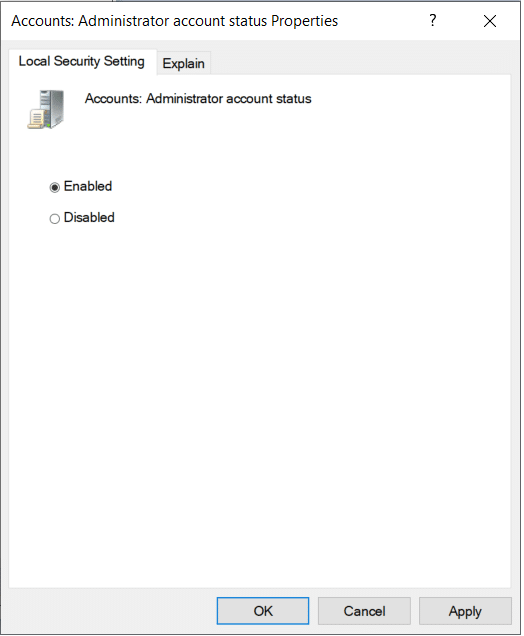
4. Under Security options double-click on Accounts: Administrator Account Status.
5. Check the Enable box to enable the setting.
6. Click on OK > Apply to save the changes.
Now, you have enabled the administrator account on your Windows 10 system. Now, let us see how to disable an administrator account on Windows 10.
Also Read: Install Group Policy Editor (gpedit.msc) on Windows 10 Home
How to Disable Administrator Account on Windows 10
The following steps will give a clear view of how to delete the Administrator account on Windows 10.
Method 1: Use Command Prompt to Delete an Administrator Account on Windows 10
1. Type CMD in the Start menu to open the Command Prompt.
2. Go to Command prompt and select Run as administrator.

3. Now, in the command window, enter net user administrator /active:no and hit enter.
4. A message saying “The command completed successfully” will be displayed on the screen.
5. Ensure whether the administrator account has been removed by typing the following command into cmd:
net user administrator
6. Hit Enter and you should see the status of Account Active as No.
Method 2: Use Admin Tools to Disable Administrator Account in Windows 10
With the help of administrator tools, you can disable the admin account on your Windows 10 PC.
1. You can launch the Run dialog box by going to the search menu and typing Run.
2. Type lusrmgr.msc as follows and click OK.
3. Now, double-click on Users under the Name field as depicted below.
4. Here, double-click the Administrator option to open the properties window.

5. Here, check the box Account is disabled.
6. Now, click on OK > Apply to save the changes.
Now, your administrator account is disabled in your Windows 10 system.
Also Read: Fix App can’t open using Built-in Administrator Account
Method 3: Use the Registry Editor to Disable Administrator Account in Windows 10
Note: If you are using Windows 10 Home, then you cannot follow this method. Try the command prompt method as mentioned earlier.
1. Open the Run dialog box (Click Windows key & R keys together) and type regedit.

2. Click OK and navigate the following path:
Computer\HKEY_LOCAL_MACHINE\SOFTWARE\Microsoft\Windows NT\CurrentVersion\Winlogon\SpecialAccounts\UserList
3. Delete the Administrator key under UserList.
4. Restart the computer to save changes.
Method 4: Use Group Policy to Disable Administrator Account in Windows 10
Note: Group Policy Editor is unavailable on Windows 10 Home. This method is only for the users who have Windows 10 Pro, Education, or Enterprise version.
1. To use the Run command box, press the Windows key +R key.
2. Type gpedit.msc and click on the OK button.

3. Follow this navigation:
- Local Computer Configuration
- Windows Settings
- Security Settings
- Local Policies
- Security Options
- Accounts: Administrator Account Status
4. Select the Disable box to disable the setting.

5. Click on OK > Apply to save the changes.
Now, you have disabled the administrator account on your Windows 10 system.
A common difference between an administrator and a standard user lies in the latter having limited access to accounts. An admin has the highest level of access to accounts in an organization. The administrator also determines the list of accounts that can be accessed. Administrators may change security settings; they can install software or hardware and view and access all files on the computer. They can make changes to user accounts.
Recommended:
- Enable or Disable Built-in Administrator Account in Windows 10
- Fix Folder Keeps Reverting to Read Only on Windows 10
- Fix This app can’t run on your PC error on Windows 10
- How to Change Password on Netflix
We hope this guide was helpful and you were able to enable an Administrator account in Windows 10. If you still have questions regarding how to enable or disable an Administrator account in your system, please feel free to ask in the comment section!


