
Your Android device relies on a Domain Name System (DNS) to translate human-readable web addresses into IP addresses that machines can understand. Occasionally, you may encounter DNS-related issues that can affect your internet browsing experience. When this happens, clearing your DNS cache can be an effective solution to resolve these problems. In this guide, we’ll walk you through the steps to clear the DNS cache on your Android device, ensuring a smoother and more reliable internet connection.

2 Easy Ways to Clear DNS Cache on Android
Method 1: Using Google Chrome
Note: Since smartphones don’t have the same Settings options, and they vary from manufacturer to manufacturer hence, ensure the correct settings before changing any. These steps were performed on Samsung Galaxy S21 5G.
1. Launch the Chrome application on your device.

2. Type chrome://net-internals/#dns in the Chrome search box and tap on Go.

3. Here, tap on Clear host cache to flush the DNS cache on the smartphone.

Method 2: Using Chrome Setting Page
Some technical experts have suggested that clearing the app on your device can also resolve the issues related to the domain name system. So, you can use the steps mentioned below:
1. Hold the Chrome app icon to open the shortcut menu. After that, open the App information page of Chrome by tapping on i icon or App Info.

2. Scroll down and tap on Storage.

3. Here, tap on Clear cache to clear the local cache stored on your device, which will probably also fix the DNS-related issues.

Also Read: How to Enable DNS over HTTPS in Chrome
How to Change DNS on Android
Google officially enabled a system-wide DNS configuration with the launch of Android 9. So there are different ways to change the server. So, follow the steps as per the version of Android that you own
Option I: On Android 9 or Higher Versions
You can change the DNS server on your device. Follow the simple steps to change the DNS server:
1. First, launch the Settings app on your smartphone.
![]()
2. Tap on Connections.

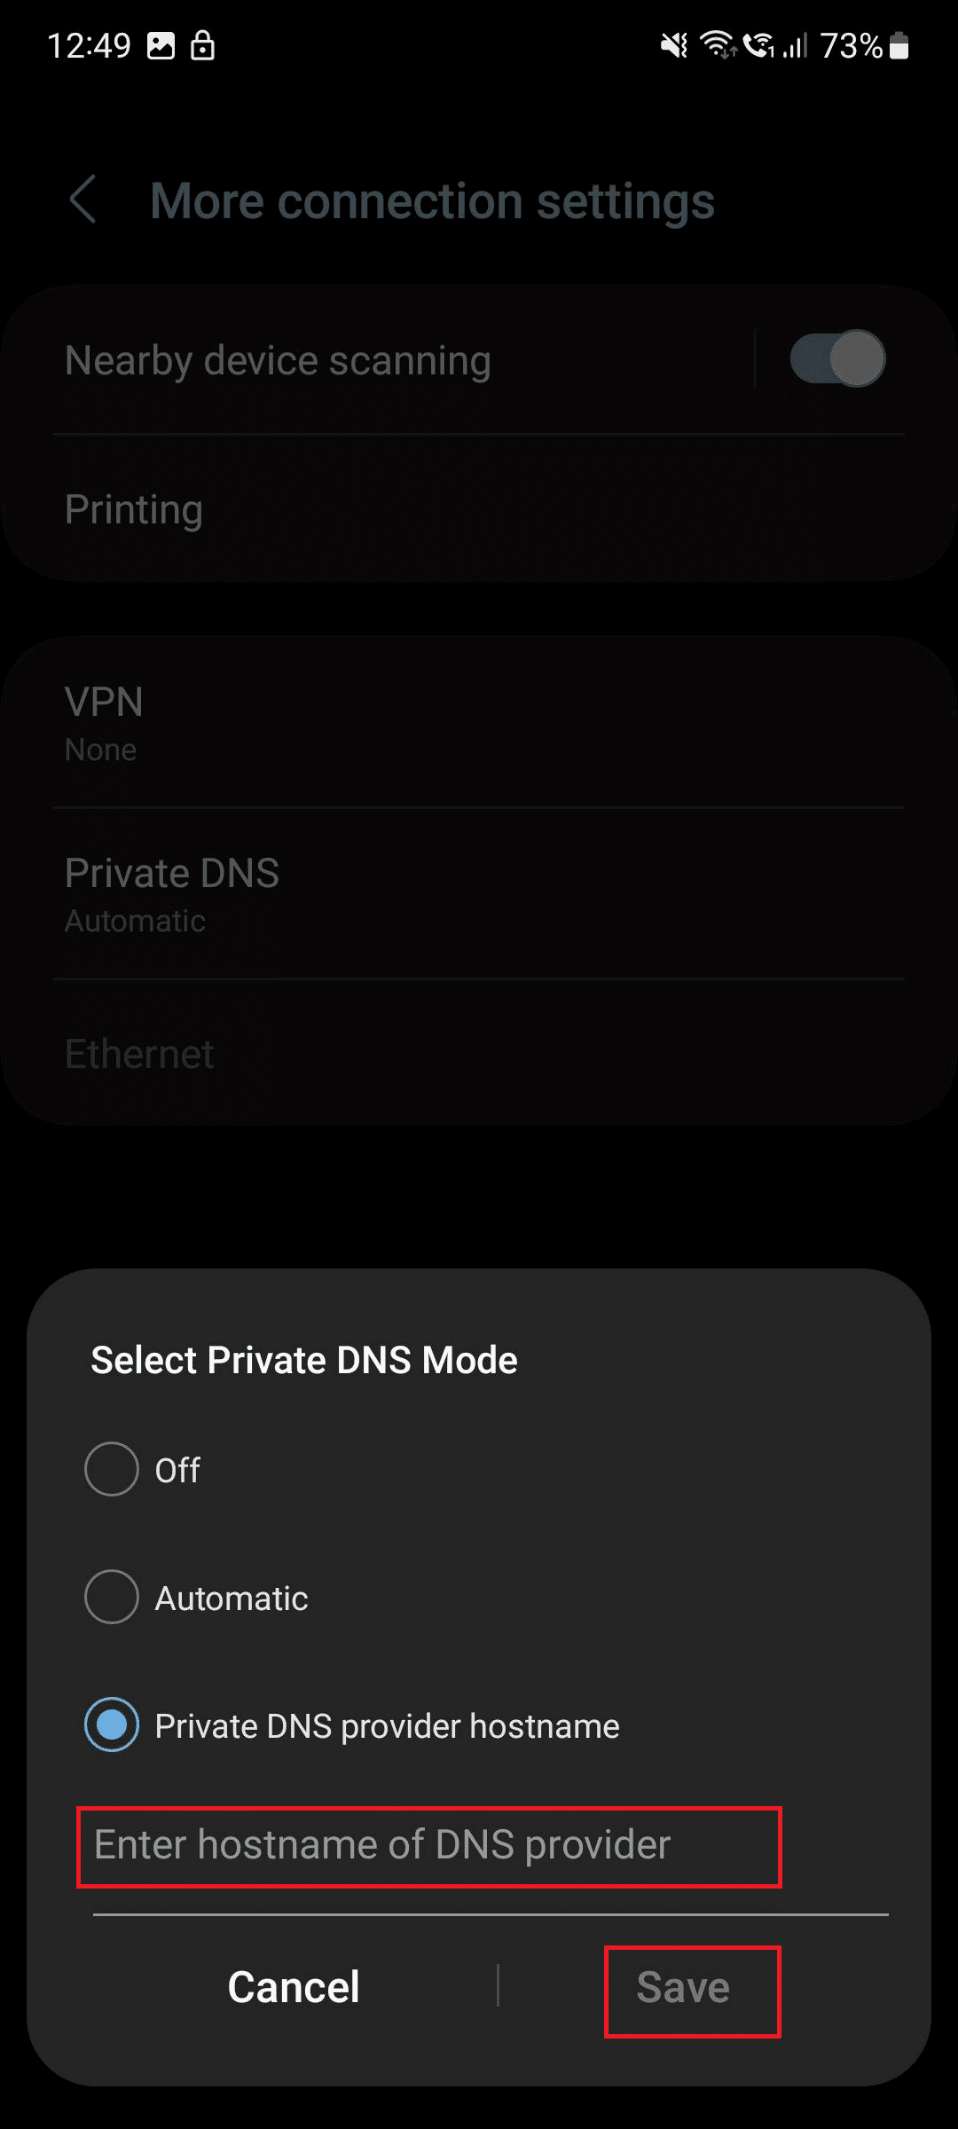
3. Now, tap on More connection settings.

4. Here, tap on Private DNS.

5. Under Private DNS provider name, Enter the DNS server of your host provider and tap on Save.
Option II: On Android 8.1 and Older Versions
Use these steps to change the DNS server on Android 8.1 and older:
1. Launch Settings on your device.

2. Now, tap on Wi-Fi.
3. After that, open the Wi-Fi access point you are connected to and make changes to the IP settings to Static.
4. Change the DNS 1 and DNS 2 addresses for the Wi-Fi connection. You can enter any of the DNS addresses that you want.
Recommended: NextDNS vs Cloudflare: Which is the Faster DNS?
We hope you learned how to clear DNS cache on Android and how to change DNS server on Android. Feel free to reach out to us with your queries and suggestions via the comments section below. Also, let us know what you want to learn about next.


