Imagine that the project you’re working on has over 100 pages, each heading with at least five subheadings. In such situations, even the feature of Find: Ctrl + F or Replace: Ctrl + H doesn’t help much. That is why creating a table of contents becomes crucial. It helps in keeping track of the page numbers and section titles. Today, we will discuss how to add the table of contents in Google Docs and how to edit table of contents in Google Docs.

How to Add Table of Contents in Google Docs
The table of contents makes reading anything a lot easier and simple to understand. When an article is long but has a table of contents, you can tap on the desired topic to get redirected automatically. This helps save time and effort. In addition:
- The table of contents makes the content well-organized and helps to present data in a neat and orderly fashion.
- It makes the text seem presentable and engaging.
- You can skip to a particular section, by tapping/clicking on the desired subheading.
- It is a great way to develop your writing and editing skills.
The greatest advantage of a table of contents is: even if you convert your document to a PDF format, it will still be there. It will guide the readers to the topics of their interest and will jump to the desired text directly.
Note: The steps mentioned in this post were implemented on Safari, but they remain the same, irrespective of the web browser you use.
Method 1: By Selecting Text Styles
One of the easiest ways to add a table of contents is by selecting text styles. This is quite efficient to implement because you can easily create subheadings as well. Here’s how to add table of contents in Google Docs and format the style of your text:
1. Type your document as you usually do. Then, select the text that you want to add to the table of contents.
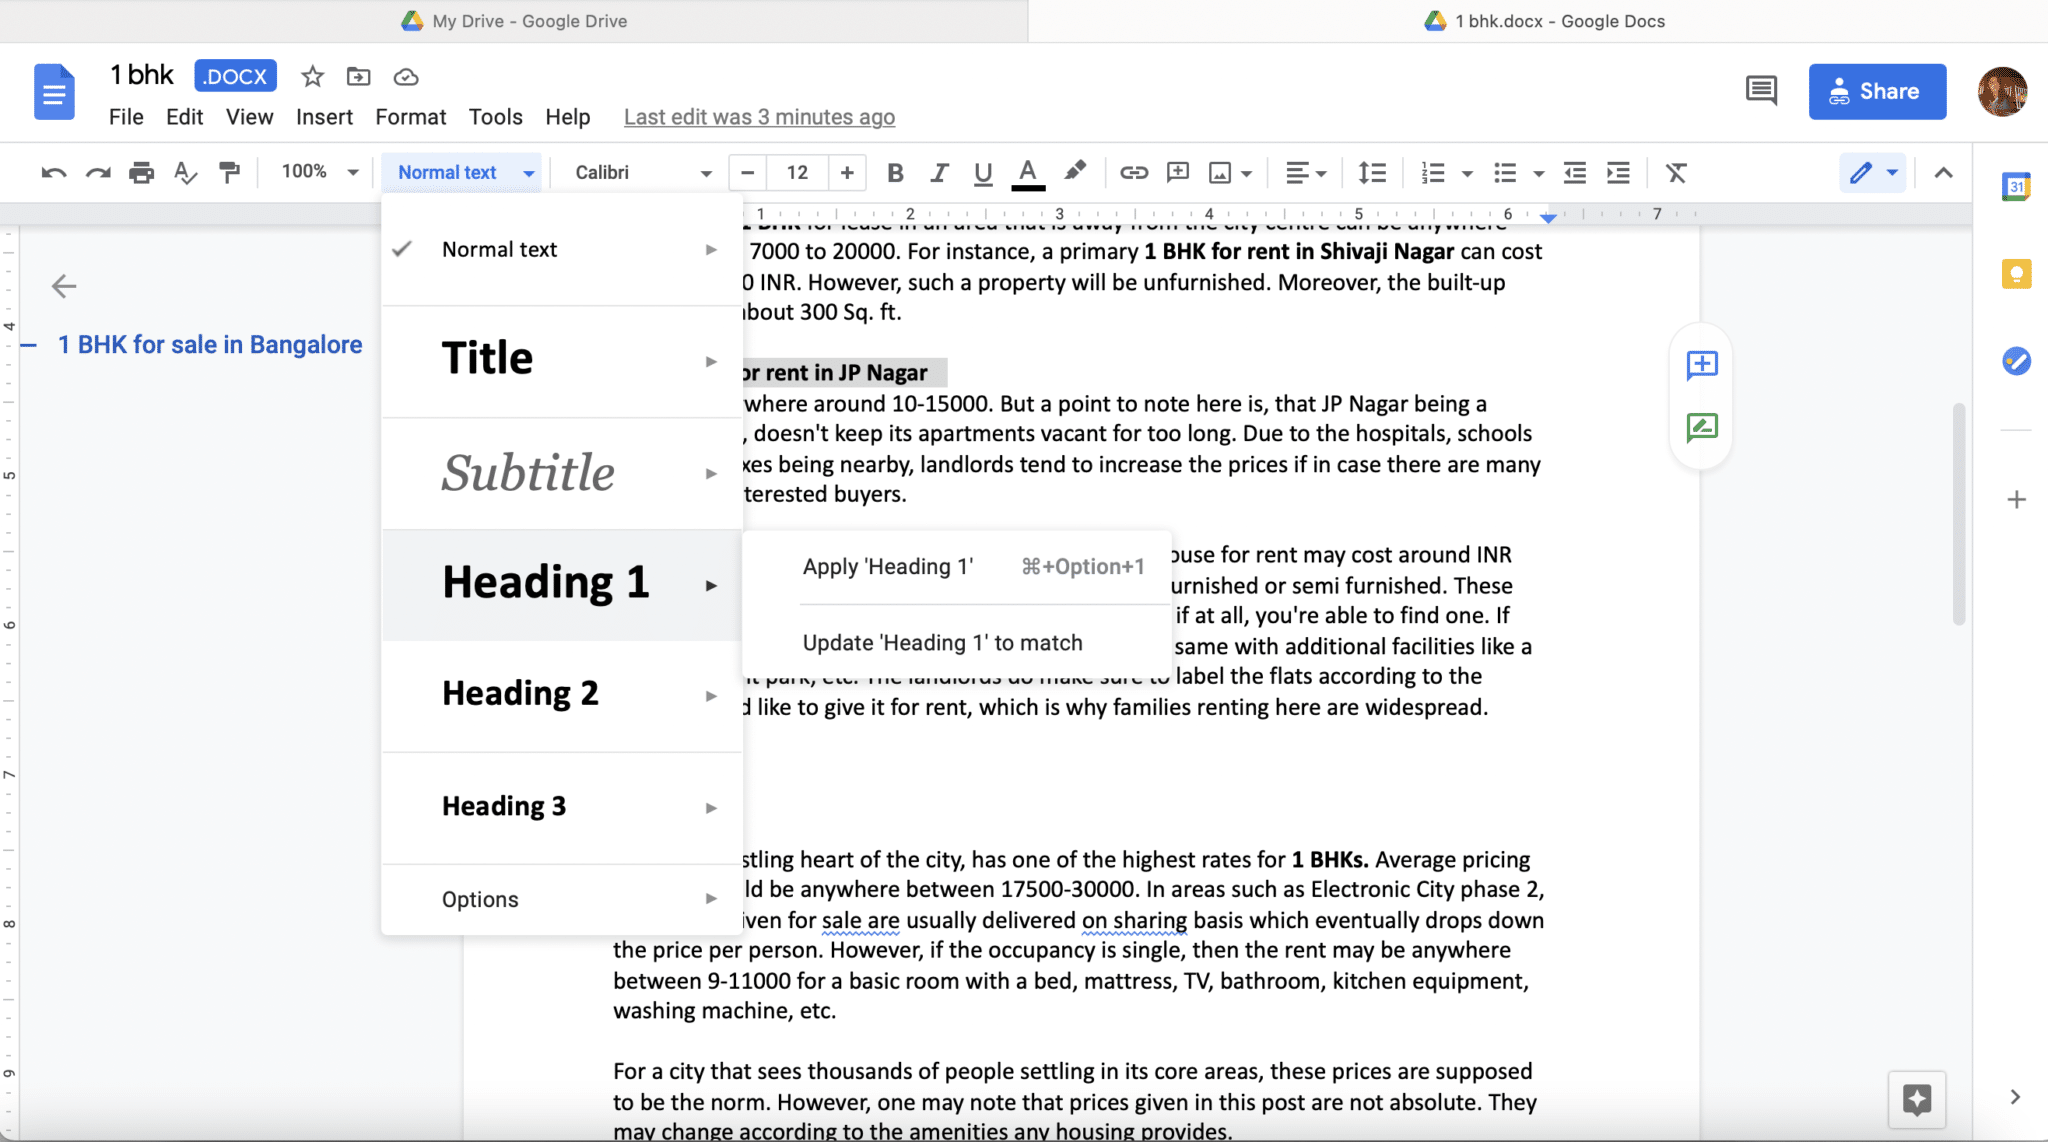
2. In the Toolbar, select the required Heading Style from the Normal Text drop-down menu. The options listed here are: Ttile, Subtitle, Heading 1, Heading 2, and Heading 3.
Note: Heading 1 is usually used for the Main heading followed by Heading 2, which is used for subheadings.
3. From the Toolbar, click on Insert > Table of contents, as illustrated below.
Note: You can choose to create it With blue links or With page numbers, as need be.

4. A well-organized table of contents will be added to the document. You can move this table and position it accordingly.

This is how to make a table of contents in Google Docs with page numbers.
Also Read: 2 Ways to Change Margins in Google Docs
Method 2: By Adding Bookmarks
This method involves bookmarking the titles in the document individually. Here’s how to add table of contents in Google Docs by adding Bookmarks:
1. Create a document Title anywhere in the entire document by selecting the text and then, selecting text style as Title.
2. Select this title and click on Insert > Bookmark, as shown.

3. Repeat the steps mentioned above for Subtitle, Headings, and Subheadings in the document.
4. Once done, click on Insert and select Table of contents, as earlier.
Your table of contents will be added right on top of the selected text/title. Place it in the document as you would like.
How to Edit Table of Contents in Google Docs
Sometimes, multiple revisions might take place in the document and another heading or subheading may get added. This newly added heading or subheading may not show up in the table of contents, by itself. Hence, you should know how to add that particular heading rather than having to create a table of contents from scratch. Here’s how to edit table of contents in Google Docs.
Method 1: Add New Headings/SubHeadings
1. Add additional subheadings or headings and relevant text.
2. Click inside the Table of Contents Box.
3. You will notice a Refresh symbol on the right-hand side. Click on it to update the existing table of contents.
Also Read: 4 Ways to Create Borders in Google Docs
Method 2: Delete Headings/SubHeadings
You can use the same set of instructions to delete a particular heading as well.
1. Edit the document and delete the Heading/subheadings using the Backspace key.
2. Click inside the Table of Contents Box.
3. Lastly, click on the Refresh icon to update the table of contents according to the changes made.
Frequently Asked Questions (FAQs)
Q1. Can you make a table of contents in Google Sheets?
Unfortunately, you cannot create a table of contents directly in Google Sheets. However, you can select a cell individually and create a hyperlink such that it redirects to a particular section when somebody taps on it. Follow the given steps to do so:
- Click on the cell where you want to insert the hyperlink. Then, tap on Insert > Insert Link.
- Alternately, use the keyboard shortcut Ctrl+K to select this option.
- Now a dialogue box will appear with two options: Paste a link, or search and Sheets in this spreadsheet. Select the latter.
- Select the sheet where you would like to create the hyperlink and click on Apply.
Q2. How do I create a table of contents?
You can easily create a table of contents either by selecting appropriate text styles or by adding Bookmarks, by following the steps given in this guide.
Recommended:
- Merge Multiple Google Drive & Google Photos Accounts
- How to Recover Deleted Google Docs
- 7 Ways to Fix Slow Google Maps
- How to Add a Page in Google Docs
We hope this article was helpful and you were able to add table of contents or hanging indents in Google Docs. If you have any queries or suggestions, don’t hesitate to put them down in the comments section.