
BAD_POOL_HEADER with stop error code 0x00000019 is a BSOD (Blue Screen of Death) error which abruptly restarts your system. The main cause of this error is when a process goes into the memory pool but is not able to come out of it, then this Pool Header gets corrupted. There is no particular information about why this error occurs because there are various issues like outdated drivers, applications, corrupted system configuration etc. But don’t worry, here at troubleshooter we have to combine a list of methods which will help you resolve this error.

Fix BAD POOL HEADER in Windows 10
It’s recommended to create a restore point just in case something goes wrong.
Method 1: Run Windows Memory Diagnostic
1. Type memory in the Windows search bar and select “Windows Memory Diagnostic.”
2. In the set of options displayed select Restart now and check for problems.

3. After which Windows will restart to check for possible RAM errors and will hopefully display the possible reasons as for why you get the Blue Screen of Death (BSOD) error message.
4. Reboot your PC and check if the problem is resolved or not.
Method 2: Run CCleaner and Malwarebytes
1. Download and install CCleaner & Malwarebytes.
2. Run Malwarebytes and let it scan your system for harmful files. If malware is found it will automatically remove them.

3. Now run CCleaner and select Custom Clean.
4. Under Custom Clean, select the Windows tab then make sure to checkmark defaults and click Analyze.
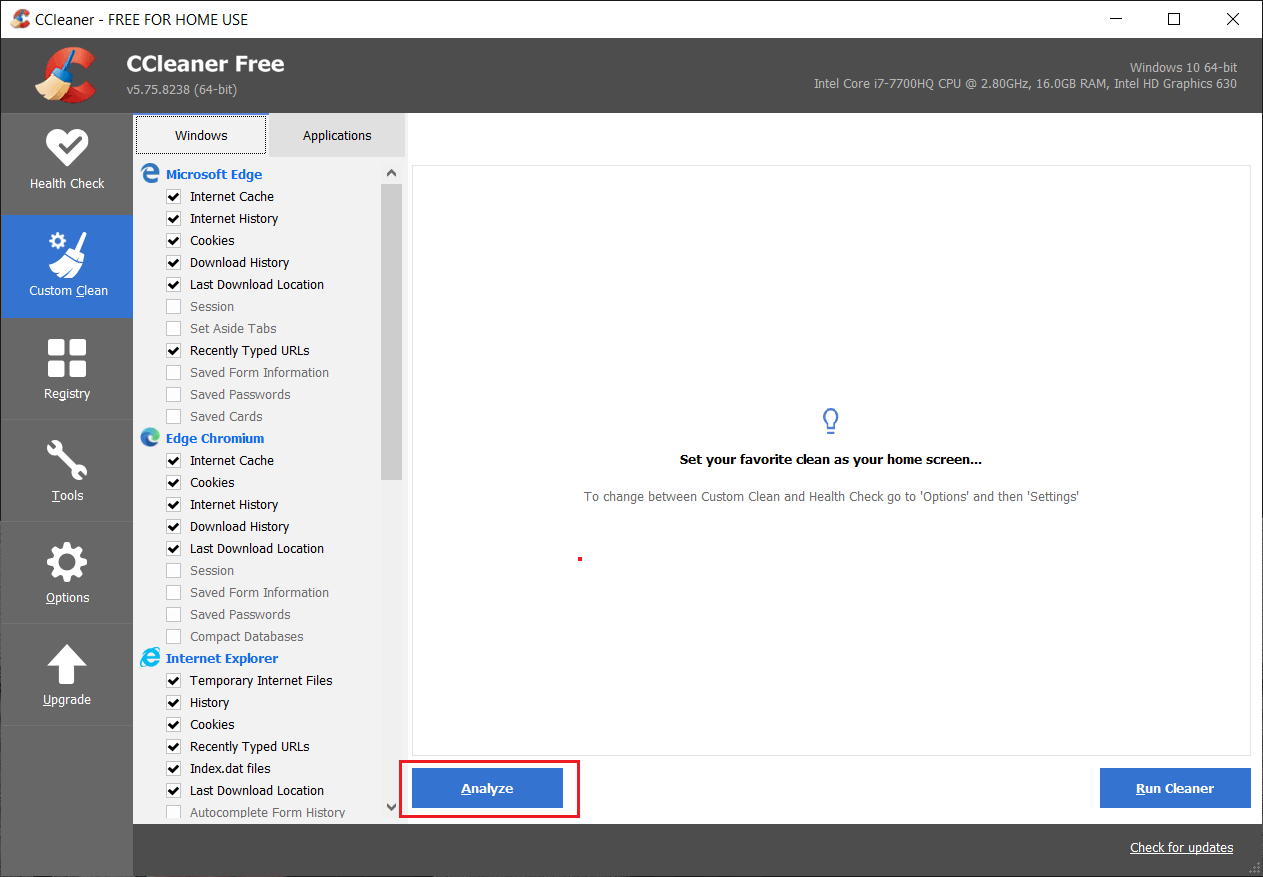
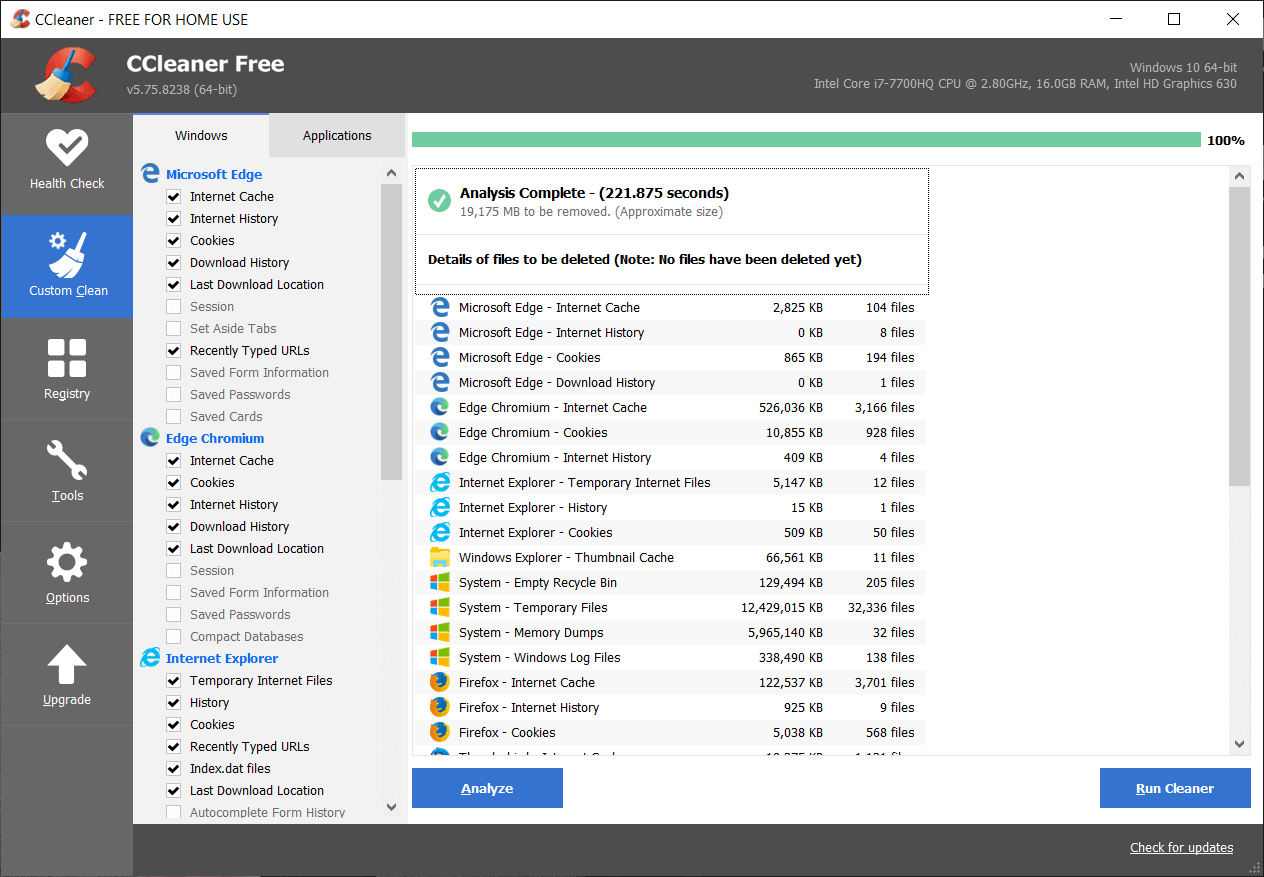
5. Once Analyze is complete, make sure you’re certain to remove the files to be deleted.
6. Finally, click on the Run Cleaner button and let CCleaner run its course.
7. To further clean your system, select the Registry tab, and ensure the following are checked:
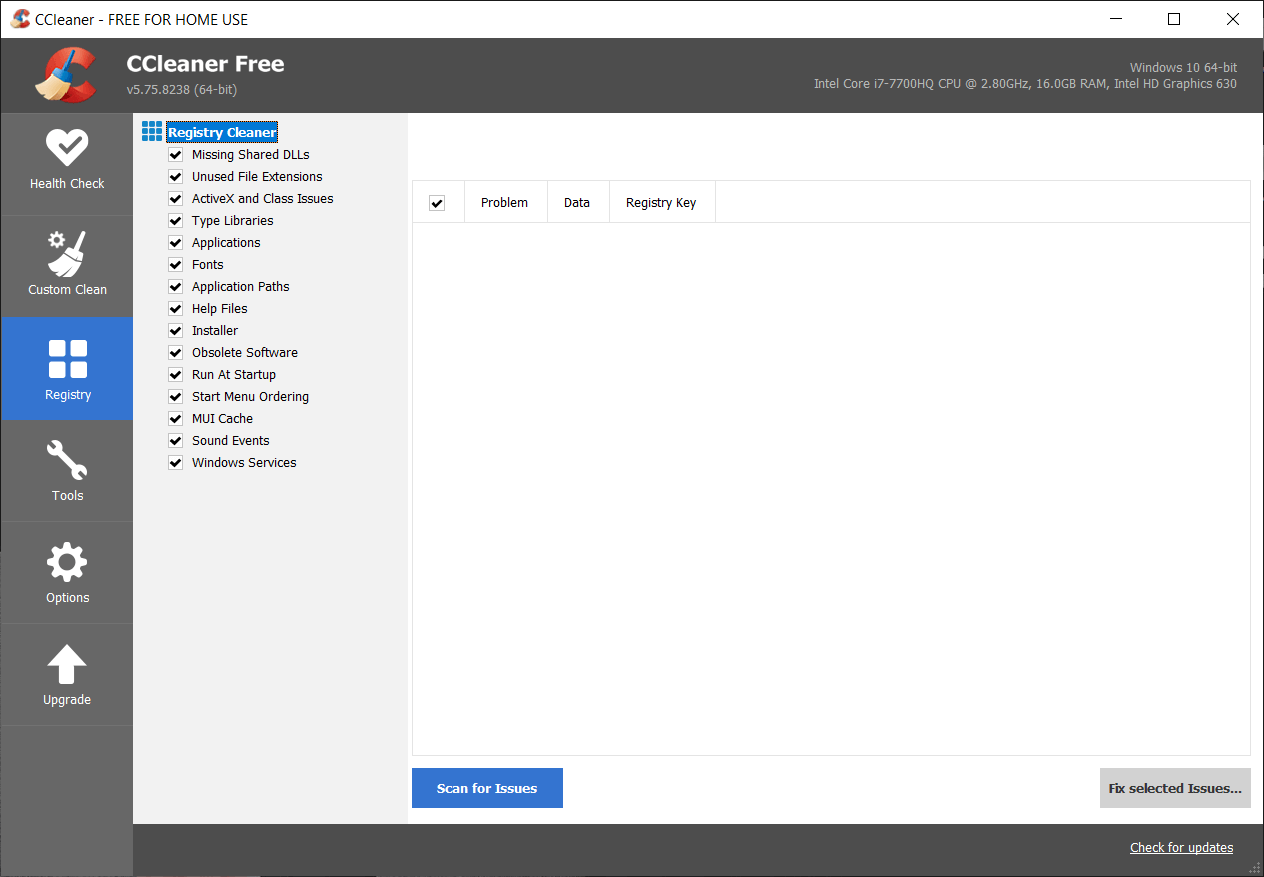
8. Click on the Scan for Issues button and allow CCleaner to scan, then click on the Fix Selected Issues button.
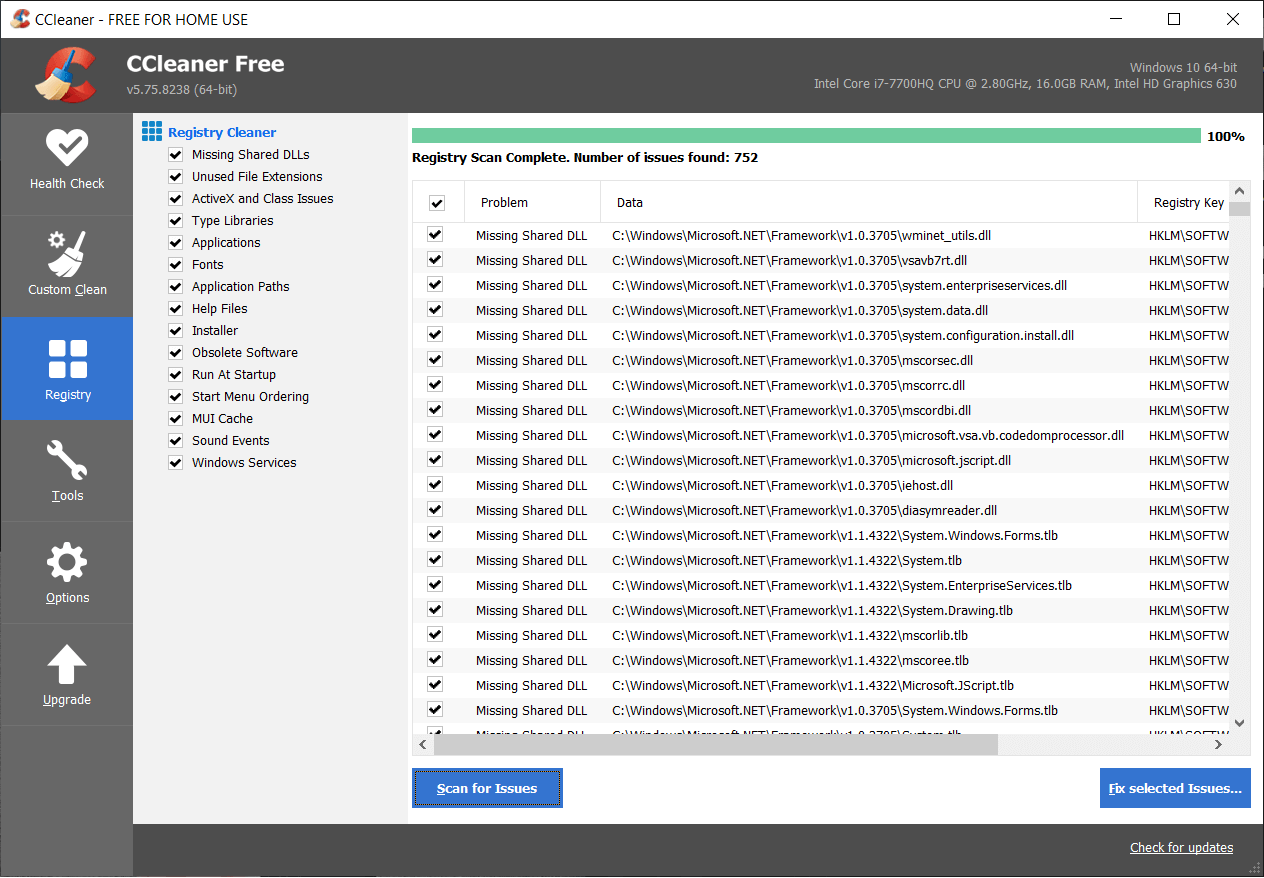
9. When CCleaner asks “Do you want backup changes to the registry?” select Yes.
10. Once your backup has completed, click on the Fix All Selected Issues button.
11. Restart your PC to save changes.
Method 3: Disable Fast Startup
The fast startup combines features of both Cold or full shutdown and Hibernates. When you shut down your PC with a fast startup feature enabled, it closes all the programs and applications running on your PC and also logged out all the users. It acts as a freshly booted Windows. But Windows kernel is loaded and system session is running which alerts device drivers to prepare for hibernation i.e. saves all current applications and programs running on your PC before closing them. Although, Fast Startup is a great feature in Windows 10 as it saves data when you shut down your PC and start Windows comparatively fast. But this could also be one of the reasons why you’re facing the USB Device Descriptor Failure error. Many users reported that disabling the Fast Startup feature has solved this issue on their PC.

Method 4: Run Driver Verifier
This method is only useful if you can log into your Windows normally not in the safe mode. Next, make sure to create a System Restore point.

To run Driver verifier to Fix BAD POOL HEADER in Windows 10, follow this guide.
Method 5: Run Memtestx86
Now run the Memtest86 which is a 3rd party software but it eliminates all the possible exceptions of memory errors as it runs outside of the Windows environment.
Note: Before starting, make sure you have access to another computer as you will need to download and burn the software to the disc or USB flash drive. It’s best to leave the computer overnight when running Memtest as it sure likely to takes some time.
1. Connect a USB flash drive to your system.
2. Download and install Windows Memtest86 Auto-installer for USB Key.
3. Right-click on the image file which you just downloaded and select “Extract here” option.
4. Once extracted, open the folder and run the Memtest86+ USB Installer.
5. Choose you’re plugged in USB drive to burn the MemTest86 software (This will format your USB drive).

6. Once the above process is finished, insert the USB to the PC which is giving the Bad Pool Header Error (BAD_POOL_HEADER).
7. Restart your PC and make sure that boot from the USB flash drive is selected.
8. Memtest86 will begin testing for memory corruption in your system.

9. If you have passed all the test then you can be sure that your memory is working correctly.
10. If some of the steps were unsuccessful then Memtest86 will find memory corruption which means that your BAD_POOL_CALLER blue screen of death error is because of bad/corrupt memory.
11.In order to Fix BAD POOL HEADER in Windows 10, you will need to replace your RAM if bad memory sectors are found.
Method 6: Run Clean boot
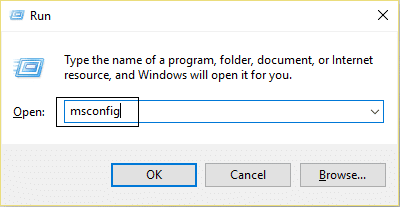
1. Press Windows Key + R then type msconfig and hit enter to System Configuration.
2. On General tab, choose Selective Startup and under it make sure the option “load startup items” is unchecked.
3. Navigate to the Services tab and checkmark the box that says “Hide all Microsoft services.”

4. Next, click Disable all which would disable all the other remaining services.
5. Restart your PC check if the problem persists or not.
6. After you had finish troubleshooting make sure to undo the above steps in order to start your PC normally.
Method 7: Restore System to Earlier Point
Well, sometimes when nothing seems to able to Fix BAD POOL HEADER in Windows 10 then the System Restore comes to our rescue. In order to restore your system to an earlier working point, make sure to run it.
Method 8: Update Drivers
1. Press Windows key + R and type devmgmt.msc in Run dialogue box to open the device manager.

2. Expand Network adapters, then right-click on your Wi-Fi controller(for example Broadcom or Intel) and select Update Drivers.

3. In the Update Driver Software Windows, select “Browse my computer for driver software.”

4. Now select “Let me pick from a list of device drivers on my computer.”

5. Try to update drivers from the listed versions.
6. If the above didn’t work then go to the manufacturer’s website to update drivers: https://downloadcenter.intel.com/
7. Reboot to apply changes.
Method 9: Run Disk Cleanup
1. Boot your windows into safe mode and follow the below steps for each hard disk partition you have(example Drive C: or E:).
2. Go to This PC or My PC and right-click on the drive to select Properties.
3. Now from the Properties window select Disk Cleanup and click clean up system files.

4. Again go the properties windows and select the Tools tab.
5. Next, click on Check under Error-checking.

6. Follow the on-screen instruction to finish error checking.
7. Restart your PC and boot to windows normally and this would Fix BAD POOL HEADER in Windows 10.
Method 10: Miscellaneous
1. Uninstall any VPN software.
2. Remove your Bit Defender/Antivirus/Malwarebytes software (Don’t use two antivirus protections).
3. Reinstall your wireless card drivers.
4. Uninstall display adapters.
5. Update your PC.
That’s it, you have successfully Fix BAD POOL HEADER in Windows 10 but if you still have any queries regarding this guide then feel free to ask them in the comment’s section.


In have installed and are currently running Memtest86. This program has been running for the last 30 hours. How long should I expect this to continue to run? My computer has 12G of memory. So far 10 passes have been made. How many passes before it will finish?
Memtest86 doesn’t give any information on it’s current status and when it will complete the memory test.
If you have been running Memtest for last 30 hours and have gone through 10 passes then it’s enough, close Memtest as there is nothing wrong with your memory. Look for other issues and if you need help with anything let me know.