
What is DNS and how does it work? DNS stands for Domain Name System or Domain Name Server or Domain Name Service. DNS is the backbone of modern-day networking. In today’s world, we are surrounded by a huge network of computers. The Internet is a network of millions of computers which are connected to one another in some or other ways. This network is very helpful for efficient communication and transmission of the information. Every computer communicates with another computer over an IP address. This IP address is a unique number that is assigned to everything which is present in the network.
Every device whether it is a mobile phone, a computer system or a laptop each has its own unique IP address which is used to connect with that device in the network. Similarly, when we surf the internet, each and every website has its own unique IP address which is assigned to it to be uniquely identified. We see the name of websites like Google.com, Facebook.com but they are just masked which are hiding these unique IP addresses behind them. As humans, we have the tendency to remember the names more efficiently as compared to numbers that is the reason why each website has a name that is hiding the IP address of the website behind them.

Now, what DNS server do is that it brings the IP address of the website you requested to your system so that your system can connect to the website. As a user, we just type the name of the website we like to visit and it is the responsibility of the DNS server to fetch out the IP address corresponding to that website name so that we can communicate with that website on our system. When our system gets the required IP address it sends the request to the ISP regarding that IP address and then the rest of the procedure follows.
The above process happens in milliseconds and this is the reason we don’t usually notice this process. But if the DNS server that we are using is slowing down your internet or they aren’t reliable then you can easily change the DNS servers on Windows 10. Any problem in the DNS server or changing the DNS server can be done with the help of these methods.
3 Ways to change DNS settings on Windows 10
Make sure to create a restore point just in case something goes wrong.
Method 1: Change DNS Settings by configuring IPv4 settings in Control Panel
1.Open the Start menu by clicking on the start button in the bottom left corner of the screen on the taskbar or press the Windows Key.
2.Type Control Panel and hit Enter to open it.

3.Click on Network and Internet in the Control Panel.

4.Click on Network and Sharing Center in Network and Internet.

5.On the upper left side of the Network and Sharing Center click on Change Adapter Settings.

6.A Network Connections window will open, from there select the connection that is connected to the internet.
7.Right-click on that connection and select Properties.

8.Under the heading “This connection uses the following items” select Internet Protocol Version 4 (TCP/IPv4) and click on the Properties button.

9.In IPv4 Properties window, checkmark “Use the following DNS server addresses“.

10.Type the preferred and alternate DNS servers.
11.If you want to add a public DNS server then you can use Google public DNS server:
Preferred DNS Server: 8.8.8.8
Alternate DNS Server box: 8.8.4.4

12.In case you want to use OpenDNS then use the following:
Preferred DNS Server: 208.67.222.222
Alternate DNS Server box: 208.67.220.220
13.In case you want to add more than two DNS servers then click on Advanced.

14.In the Advanced TCP/IP properties window switch to the DNS tab.
15.Click on the Add button and you can add all the DNS server addresses you want.


16.The priority of the DNS servers that you will add will be given from top to bottom.

17.Finally, click OK then again click OK for all the open windows to save changes.
18.Select OK to apply changes.
This is how you can change DNS settings by configuring IPV4 settings via the control panel.
Method 2: Change DNS Servers using Windows 10 Settings
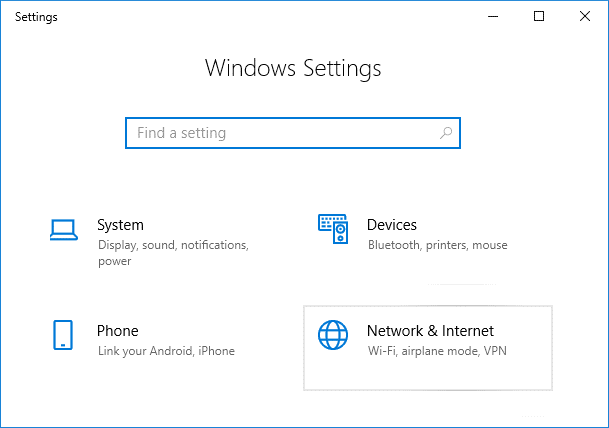
1.Press Windows Key + I to open Settings then click on Network & Internet.
2.From the left-hand menu, click on WiFi or Ethernet depending on your connection.
3.Now click on your connected network connection i.e. WiFi or Ethernet.

4.Next, scroll down until you see the IP settings section, click on the Edit button under it.

5.Select ‘Manual’ from the drop-down menu and toggle the IPv4 switch to ON.

6.Type your “Preferred DNS” and “Alternate DNS” addresses.
7.Once done, click on the Save button.
Method 3: Change DNS IP Settings using Command Prompt
As we all know that every instruction which you perform manually can also be performed with the help of Command Prompt. You can give every instruction to Windows using cmd. So, in order to deal with DNS settings, the command prompt can also be helpful. To change the DNS settings on Windows 10 through the command prompt, follow these steps:
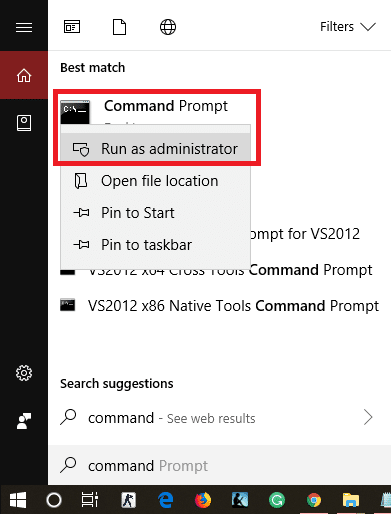
1.Open the Start menu by clicking on the start button in the bottom left corner of the screen on the taskbar or press the Windows Key.
2.Type Command Prompt, then right-click on it and Run as Administrator.
3.Type wmic nic get NetConnectionID in Command Prompt to get the names of Network adapters.

4.To change the network settings type netsh.
5.To add the primary DNS IP address, type the following command & hit Enter:
interface ip set dns name= “Adapter-Name” source= “static” address= “Y.Y.Y.Y”
Note: Remember to replace the adapter name as the name of the network adapter you have viewed in step 3 and change X.X.X.X with the DNS server address that you want to use, for example, in case of Google Public DNS instead of X.X.X.X. use 8.8.8.8.

5.To add an alternative DNS IP address to your system type the following command & hit Enter:
interface ip add dns name= “Adapter-Name” addr= “Y.Y.Y.Y” index=2.
Note: Remember to put the adapter name as the name of the network adapter you have and viewed in step 4 and change Y.Y.Y.Y with the secondary DNS server address that you want to use, for example, in case of Google Public DNS instead of Y.Y.Y.Y use 8.8.4.4.

6.This is how you can change the DNS settings in Windows 10 with the help of the command prompt.
These were three methods to change the DNS settings on Windows 10. Many third-party applications such as QuickSetDNS & Public DNS Server Tool are useful to change the DNS settings. Do not change these settings when your computer is at the workplace as the change in these settings can cause connectivity problems.
As the DNS servers provided by the ISP’s are quite slow so you can use the public DNS servers that are fast and more responsive. Some of the good public DNS servers are offered by Google and the rest you can check out here.
Recommended:
- Fix Faulty Hardware corrupted page error on Windows 10
- How to install Internet Explorer on Windows 10
- Fix Printer Driver is unavailable on Windows 10
- Fix Logitech Wireless Mouse Not Working
I hope the above steps were helpful and now you can easily change DNS settings on Windows 10 but if you still have any questions regarding this post then feel free to ask them in the comment section.


