
OneDrive is Microsoft’s cloud storage service. This is the cloud service where the users can store their files. For the users, there is some amount of space which is given free, but for more space, the users need to pay. However, this feature might be really useful, but some users might want to disabled OneDrive and save some memory & battery life. For most of the Windows users, OneDrive is merely a distraction, and it just bugs users with an unnecessary prompt for Sign in and whatnot. The most notable issue is the OneDrive icon in the File Explorer which the users want to somehow hide or remove completely from their system.

Now the problem is Windows 10 doesn’t include an option to hide or remove OneDrive from your system, and that’s why we have put together this article which will show you how to remove, hide or uninstall OneDrive completely from your PC. Disabling one drive in windows 10 is fairly a simple process. There are several methods to disable the OneDrive on Windows 10, and they are discussed here.
Disable OneDrive on Windows 10 PC
Make sure to create a restore point just in case something goes wrong.
Method 1: Uninstall OneDrive in Windows 10
OneDrive always sends occasional notifications to the users asking about uploading the files to the one drive. This can get irritating for some users, and the lack of OneDrive space or OneDrive Error 0x8007016a might take users to the point where they want to uninstall OneDrive. Uninstalling OneDrive is a very simple process, so to uninstall one drive follow these steps.
1. Click on the Start or press the Windows Key.
2. Type Apps & features then click on the same in the best match list.

3. Look for the search list and type Microsoft OneDrive in there.

4. Click on Microsoft One Drive.

5. Click on Uninstall, and it will ask for your confirmation.
6. Click on it, and the OneDrive will be uninstalled.
This is how you can easily uninstall Microsoft OneDrive in Windows 10, and now it won’t bother with you any prompts anymore.
Method 2: Delete the OneDrive folder Using Registry
To remove the OneDrive folder from your computer, you have to go into the Windows Registry and do it from there. Also, keep in mind that a registry is a powerful tool and doing unnecessary changes or playing with it can cause serious damage to your operating system. Please back up your Registry just in case something goes wrong then you will have this backup to restore your system. To remove the OneDrive folder, follow the instructions stated below and you will be good to go.
1. Press Windows Key + R then type regedit and hit Enter to open Registry Editor.

2. Navigate to the following registry key:
HKEY_CLASSES_ROOT\CLSID\{018D5C66-4533-4307-9B53-224DE2ED1FE6}
3. Now select the {018D5C66-4533-4307-9B53-224DE2ED1FE6} key and then from the right window pane double click on System.IsPinnedToNameSpaceTree DWORD.

4. Change the DWORD value data from 1 to 0 and click OK.

5. Close the Registry Editor and Reboot your PC to save changes.
Method 3: Use Local Group Policy Editor to Disable OneDrive
If you are using Microsoft Windows 10 Professional, Enterprise, or Education Edition and want to get rid of Onedrive, you can use the local group policy editor. It is also a powerful tool, so use it wisely and only follow the instructions stated below to disable the Microsoft Onedrive.
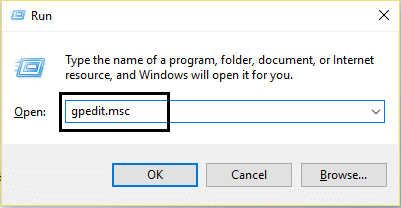
1. Press Windows Key + R then type gpedit.msc and hit Enter to open Group Policy Editor.
2. There will be two panes, the left pane and the right pane.
3. From the left pane, navigate to the following path in the gpedit window:
Computer Configuration > Administrative Templates > Windows Components > OneDrive

4. In the right pane, click on Prevent the usage of OneDrive for file storage.
5. Click on Enabled and apply the changes.

6. This will completely hide OneDrive from File Explorer and users won’t access it anymore.
From now on you will see empty OneDrive folder. If you want to revert this setting, then come to the same settings and click on Not Configured. This will make OneDrive work as usual. This method saves the OneDrive from getting uninstalled and also saves you from the unwanted hassle. If after some time you want to use the OneDrive, then you can revert and start using OneDrive again without any issue.
Method 4: Disable OneDrive by Unlinking your account
If you want that OneDrive should remain in your system but you don’t want to use it right now and want to disable only it’s a function then follow these instructions.
1. Look for the OneDrive icon in the taskbar.
![]()
2. Right-click on the icon and select Settings.

3. A new window will pop up with multiple tabs.
4. Switch to the Account tab then click on Unlink this PC link.

5. A confirmation message will be displayed, so click on “Unlink account” button to continue.

Method 5: Uninstall OneDrive using Command Prompt (CMD)
To uninstall OneDrive from Windows 10 follow these steps.
1. Click on the Start or press the Windows key.
2. Type CMD and right-click on it and select Run as Administrator.

3. To Uninstall OneDrive from Windows 10:
For 32-bit system type: %systemroot%\System32\OneDriveSetup.exe/uninstall
For 64-bit system type: %systemroot%\System64\OneDriveSetup.exe/uninstall

4. This will completely remove OneDrive from the system.
5. But if in future, you want to install OneDrive again then open Command Prompt and type the following command:
For 32-bit Windows type: %systemroot%\System32\OneDriveSetup.exe
For 64-bit Windows type: %systemroot%\System64\OneDriveSetup.exe
Like this, you can uninstall and can also install the OneDrive application.
Recommended:
- Fix Cursor Jumps or moves randomly in Windows 10
- Set up Yahoo email account in Windows 10 Mail App
- How to Check Your CPU Temperature in Windows 10
- Print Screen Not Working? 7 Ways to Fix it!
I hope this article was helpful and now you can easily Disable OneDrive on Windows 10 PC, but if you still have any questions regarding this tutorial then feel free to ask them in the comment’s section.


