In today’s hyper-connected world, internet speed matters more than ever. Whether you’re gaming, streaming, or running a smart home, we are always searching for a broadband plan that balances speed and affordability. Upgrading your internet, but confused by all the jargon? That’s where terms like Gigabit Lite come into play. Today, we will break down exactly what it is and how you can use it!
What is Gigabit Lite?
Gigabit Lite is an energy-efficient Ethernet (EEE) technology popular in mid-tier broadband plans. It reduces power consumption by enabling your network adapter to run at a slower speed when linked to Gigabit Ethernet networks. This makes it known to deliver impressive speeds, typically offering 100–500 Mbps, depending on your provider. It’s a cost-effective middle ground for users who want fast, reliable internet without paying for ultra-high-tier plans. Whether you’re upgrading from a basic broadband or seeking smoother performance, Gigabit Lite might just strike the perfect balance between speed and savings.
How to Enable Gigabit Lite
If you wish to bring your speed down to save electricity, here’s how you can enable or disable Gigabit Lite:
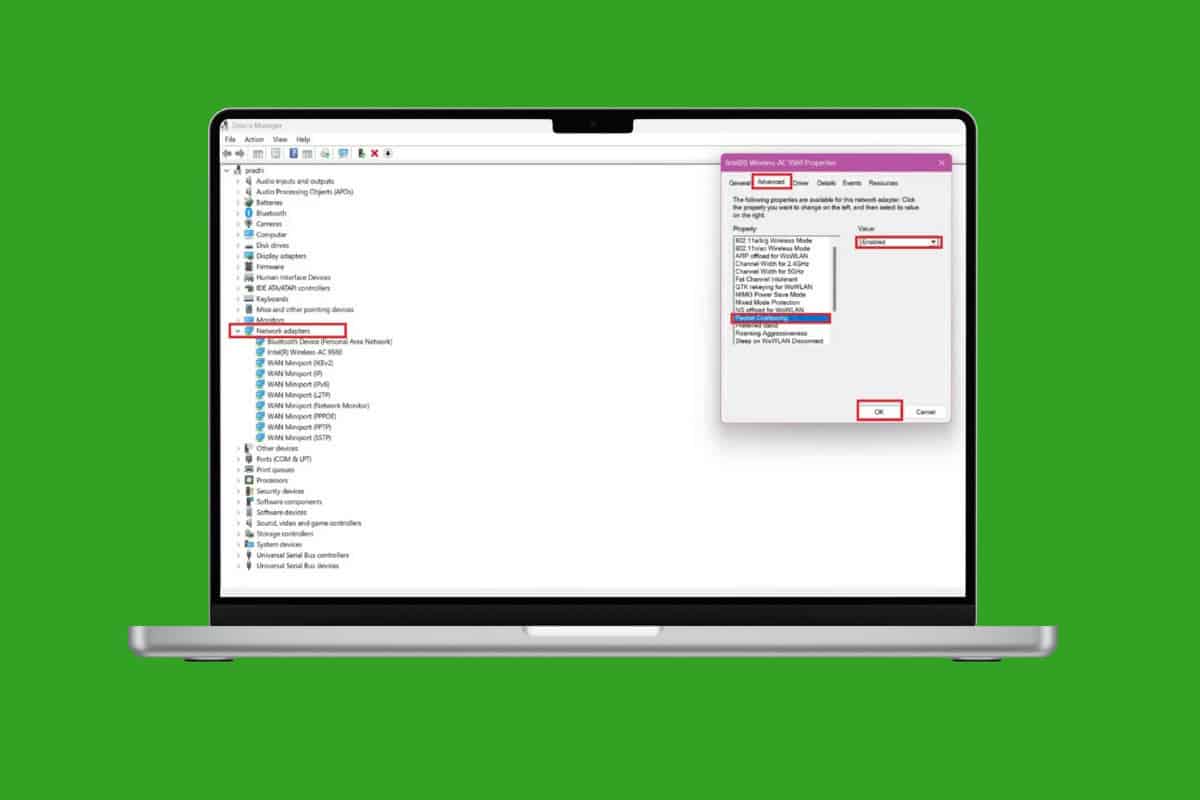
- Click on the search icon and type in Device Manager.
- Open the application and click on the down arrow under Network adapters.
- Right-click your Ethernet adapter and select Properties.
- Click on Advanced from the top ribbon.
- Select the settings related to Gigabit Lite, Auto-Negotiation, or Speed & Duplex, depending on your adapter.
- Then, click on the Value box and select Enabled or Disabled.
- Click on Speed & Duplex and select Auto-Negotiation or force it to 500 Mbps/Full Duplex if you do not have the option.
- Select OK.

This way, it can be tweaked according to your needs.
Method 2: Via Command Prompt
Users can also do the same by using specific commands on their Windows desktop:
Note: If Gigabit Lite is not explicitly enabled or disabled through the command prompt, other settings may be impacting the connection.
- Open the command prompt.
- Type in netsh int tcp set global autotuninglevel=disabled to disable the auto-tuning level.
- Type in netsh int tcp set global autotuninglevel=normal to re-enable it.
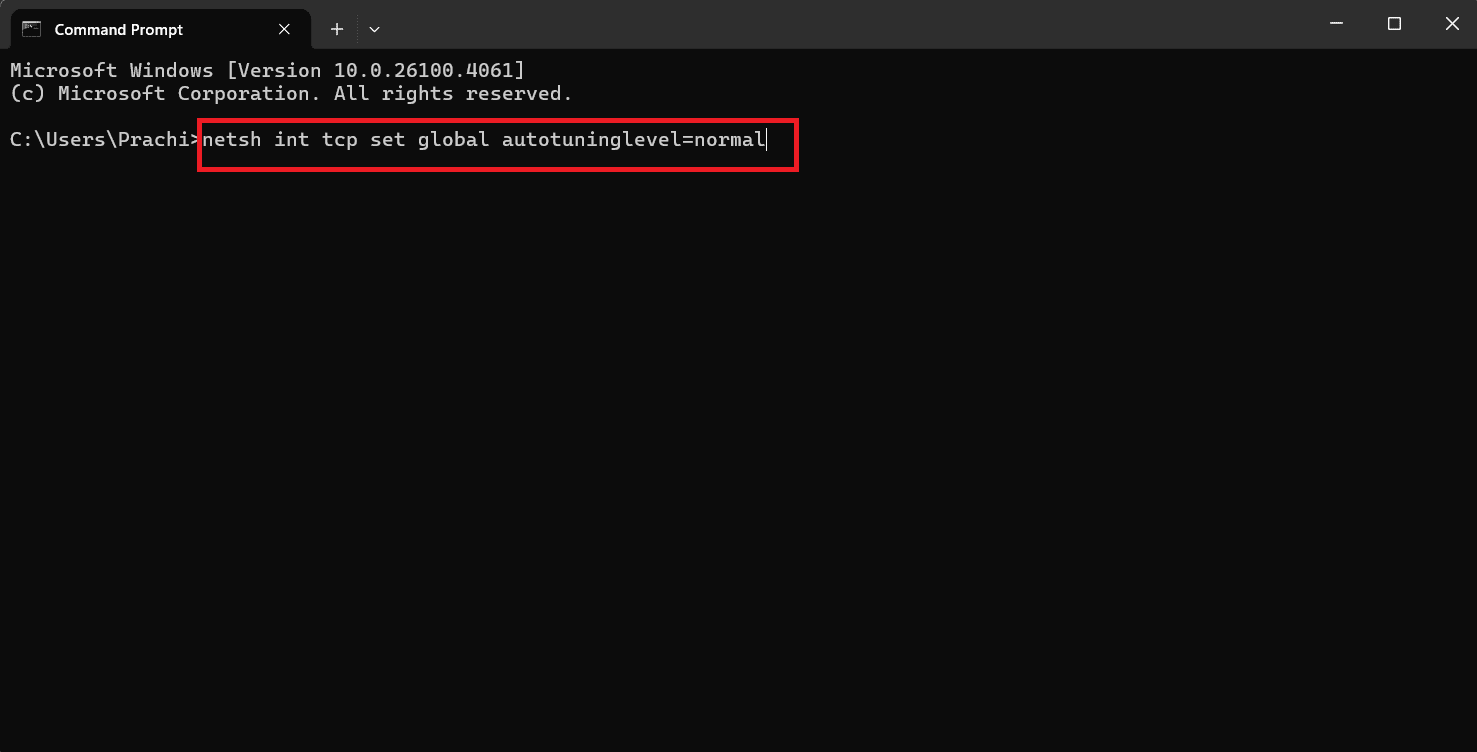
Now you can change the auto-tuning level.
Also Read: Wi-Fi 7 vs 6E: Access Point, Range, and Latency Comparison
Now you will no longer have a difficult time figuring out what gigabit lite is and how to enable it, after following this guide. For more helpful tips and tricks, stay tuned, and feel free to share your suggestions in the comments below.