
Whether you’re a coder, designer, or gamer, having multiple monitors changes how you work and increases productivity. But when you plug in that extra display and nothing happens, you’re left staring at a blank second screen. It’s one of those tech moments that can turn a simple setup into a frustrating puzzle. That’s when you realize you need to know how to download and install DisplayLink driver for Windows 10 and 11 to get everything working smoothly. So, let’s show you the way!
How to Download & Install DisplayLink Driver for Windows 10 and 11
DisplayLink drivers aren’t automatically included with Windows like regular display drivers, so knowing how they work can be difficult to figure out.
- Visit the official website of DisplayLink.
- Scroll down and click on Windows.
- Click on Download under Latest Official Drivers.
- Select Accept.
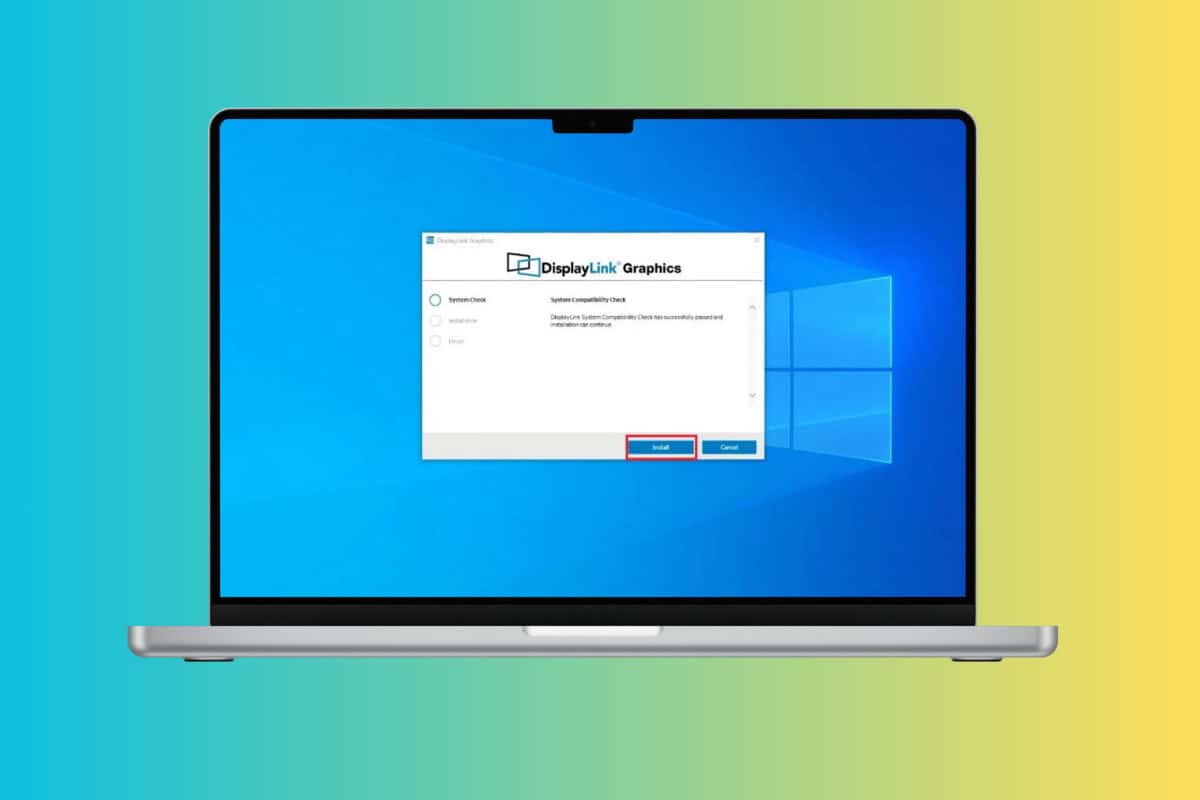
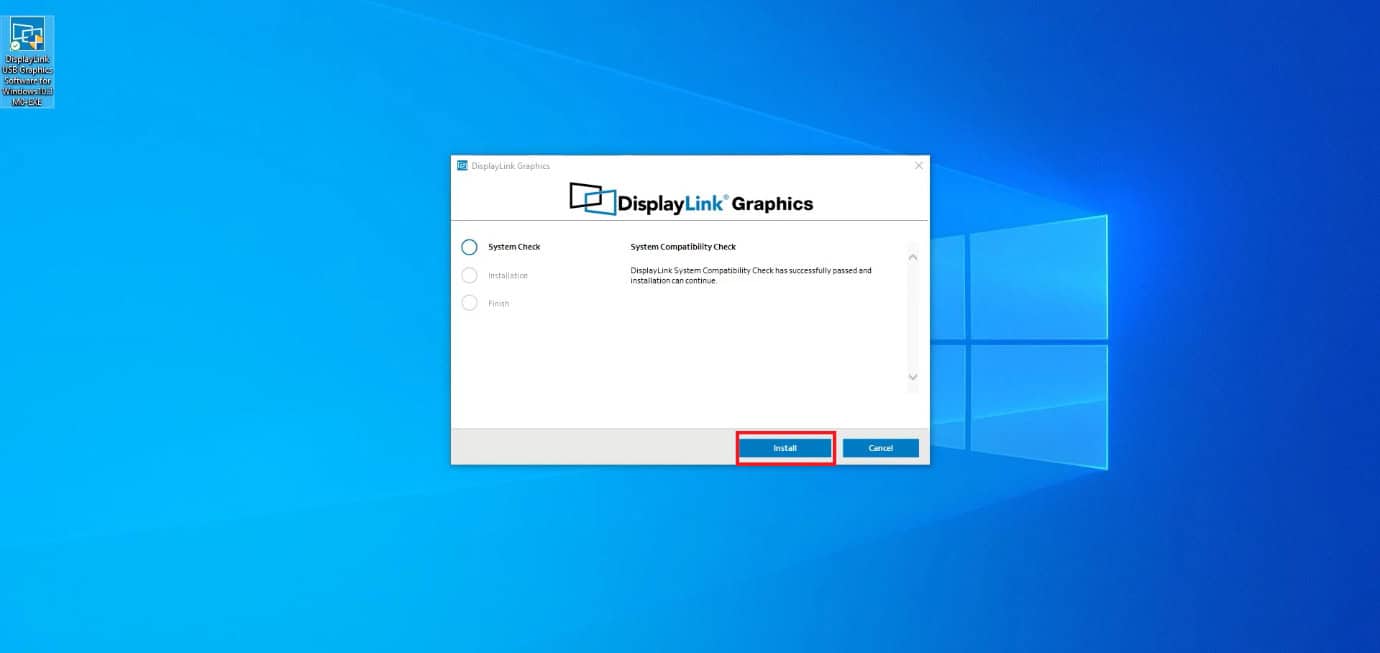
- Now, right-click on the DisplayLink and select Run as Administrator.
- Click on Install after the software has completed its system compatibility check.
This way, you can easily use the DisplayLink software on your desktop.
How to Enable DisplayLink on My Monitor
Now that you have the software on your desktop, you may be wondering about the next steps:
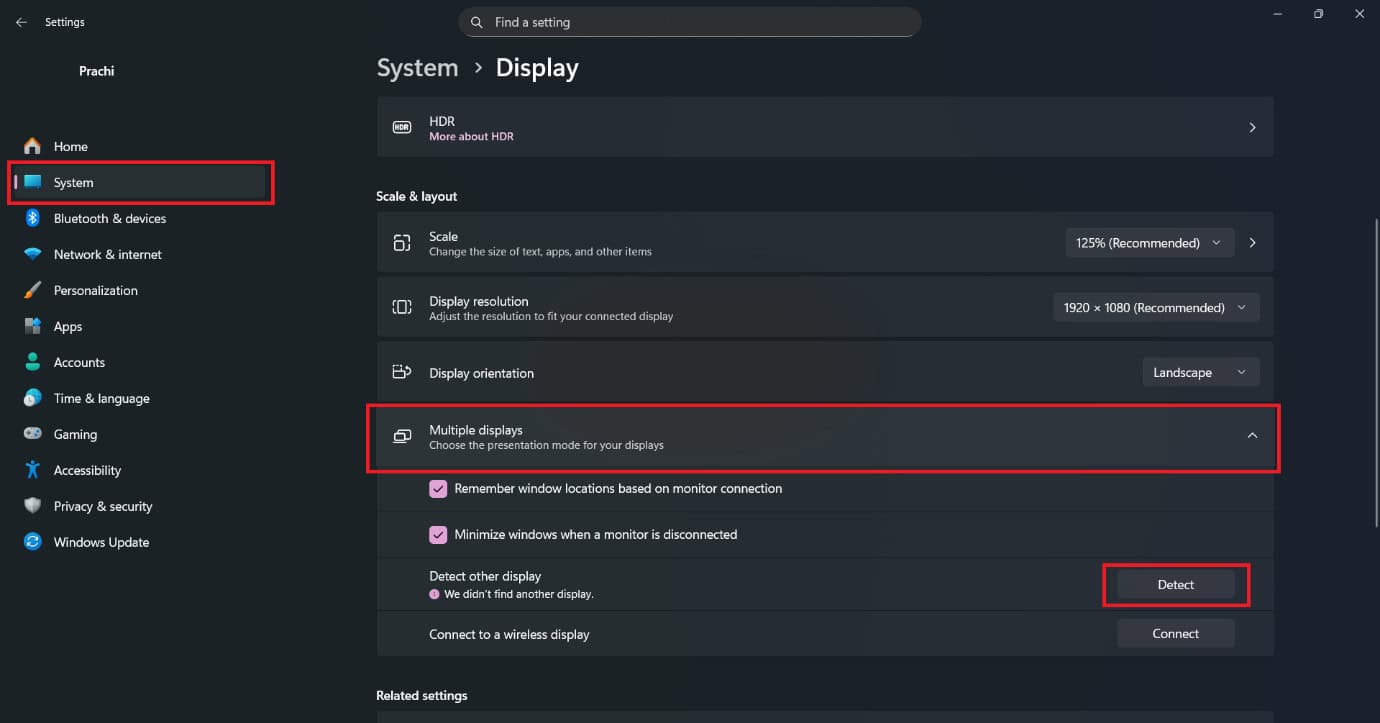
- Open Settings and click on System.
- Select Display.
- Scroll down and click on Multiple display under Scale & layout.
- Click on Detect.
- Now, select Extend desktop to this display.
- Click on Keep changes.
Now your monitor will be connected to your desktop and will be recognised by the software.
Also Read: 12 Best Free SCP for Windows
Now you will no longer have a difficult time figuring out how to download and install DisplayLink driver for Windows 10 and after following this guide. For more helpful tips and tricks, stay tuned, and feel free to share your suggestions in the comments below.


