
Windows often show little reminders or alerts while you’re working, but not all of them are easy to understand. One common notification that confuses users is the Let’s cross this one off your list alert message, which users need to always fix. You click around trying to make it disappear, but nothing seems to work the way it should. The frustrating part is that this message can pop up in different apps and contexts, so today let’s show you the fix!
How to Fix Let’s Cross This One Off Your List Alert Message
From clearing app data to checking notification settings, these solutions target the most common reasons why this message keeps appearing and won’t go away.
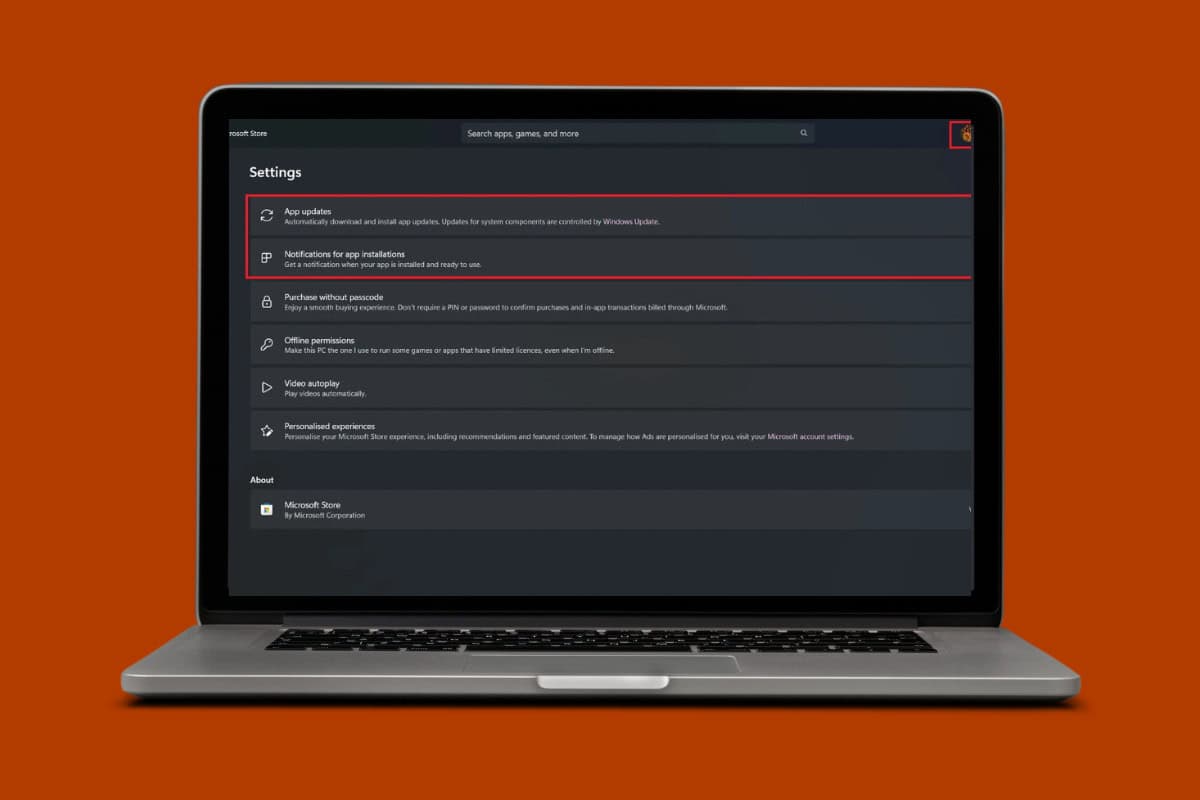
Method 1: Disable Windows Store App Alerts
This usually happens if your game updates are enabled in the Windows Store.
- Open Microsoft Store and click on your profile in the top right corner.
- Select Settings.
- Turn the toggle off for App updates.
- Then, turn the toggle off for Notification for app installations.
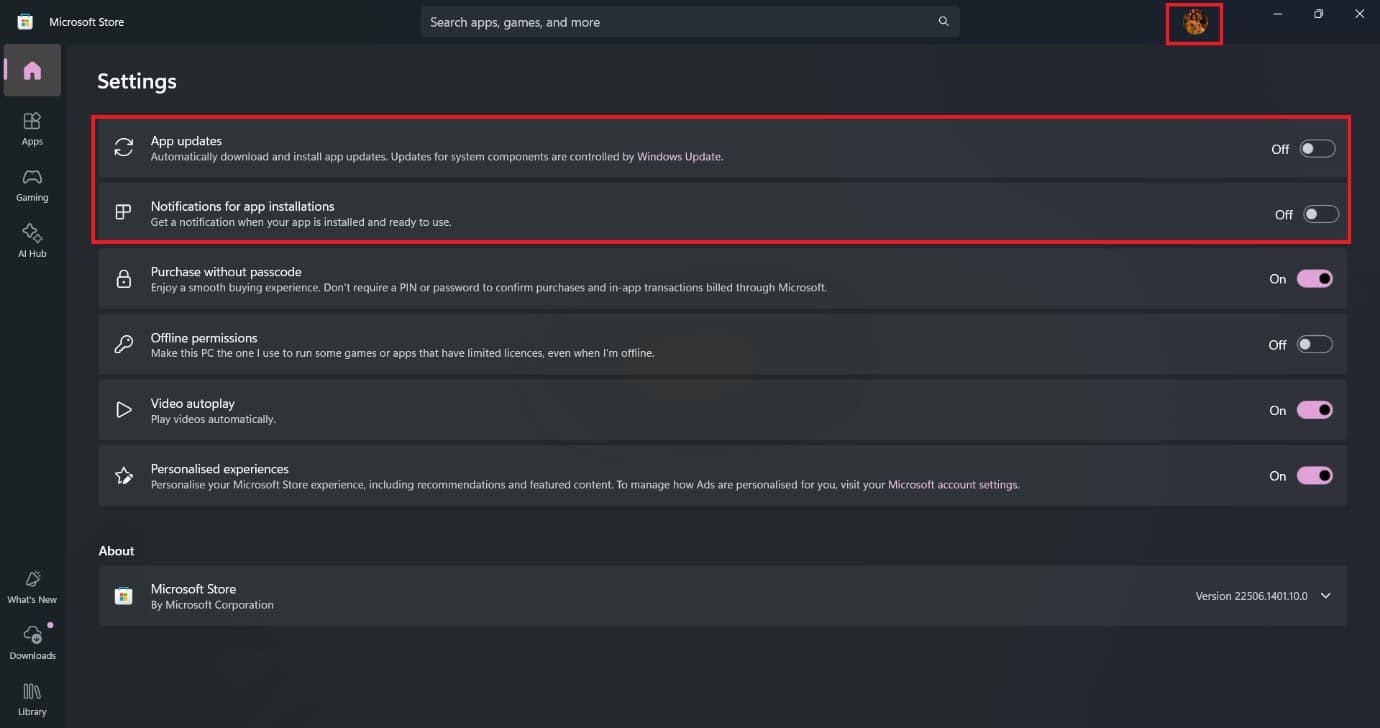
You will not receive the notification any longer.
Method 2: Customize App Filtering Notification
If you notice certain apps always popping up with the Let’s cross this one off your list alert, then you can filter app notifications.
- Open Settings and click on System from the left menu.
- Click on Notifications.
- Now, turn the toggle off for any app of your choice.
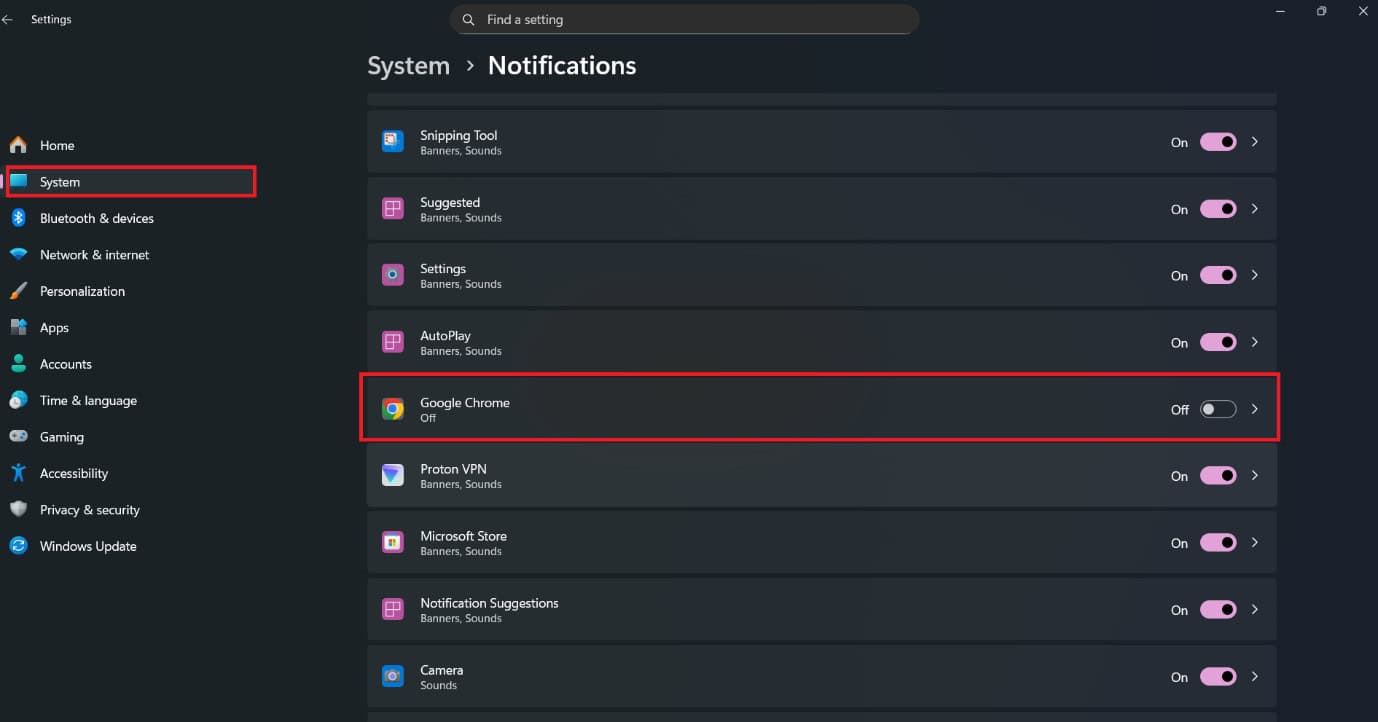
Now you can filter out any apps sending you unnecessary alerts.
Method 3: Disable and Block Windows Updates
You can postpone a significant alert for Windows Update, which also sent the Let’s cross this off your list text.
- Open Settings and click on Windows Update from the left menu.
- Scroll down and click on Advanced options.
- Now, turn the toggle off for Receive updates for other Microsoft products.
- In Windows 10 desktop, click on the box under A feature update includes new capabilities and improvements. It can be deferred for this many days.
- Select 365 days.

This way, you won’t receive alerts.
Method 4: Block Windows 10 Updates
You can also disable updates in Windows 10 desktop:
- Open Settings and click on Network & Internet.
- Click on Status from the left menu.
- Select Change connection properties.
- Now, turn the toggle on for Set as metered connection.
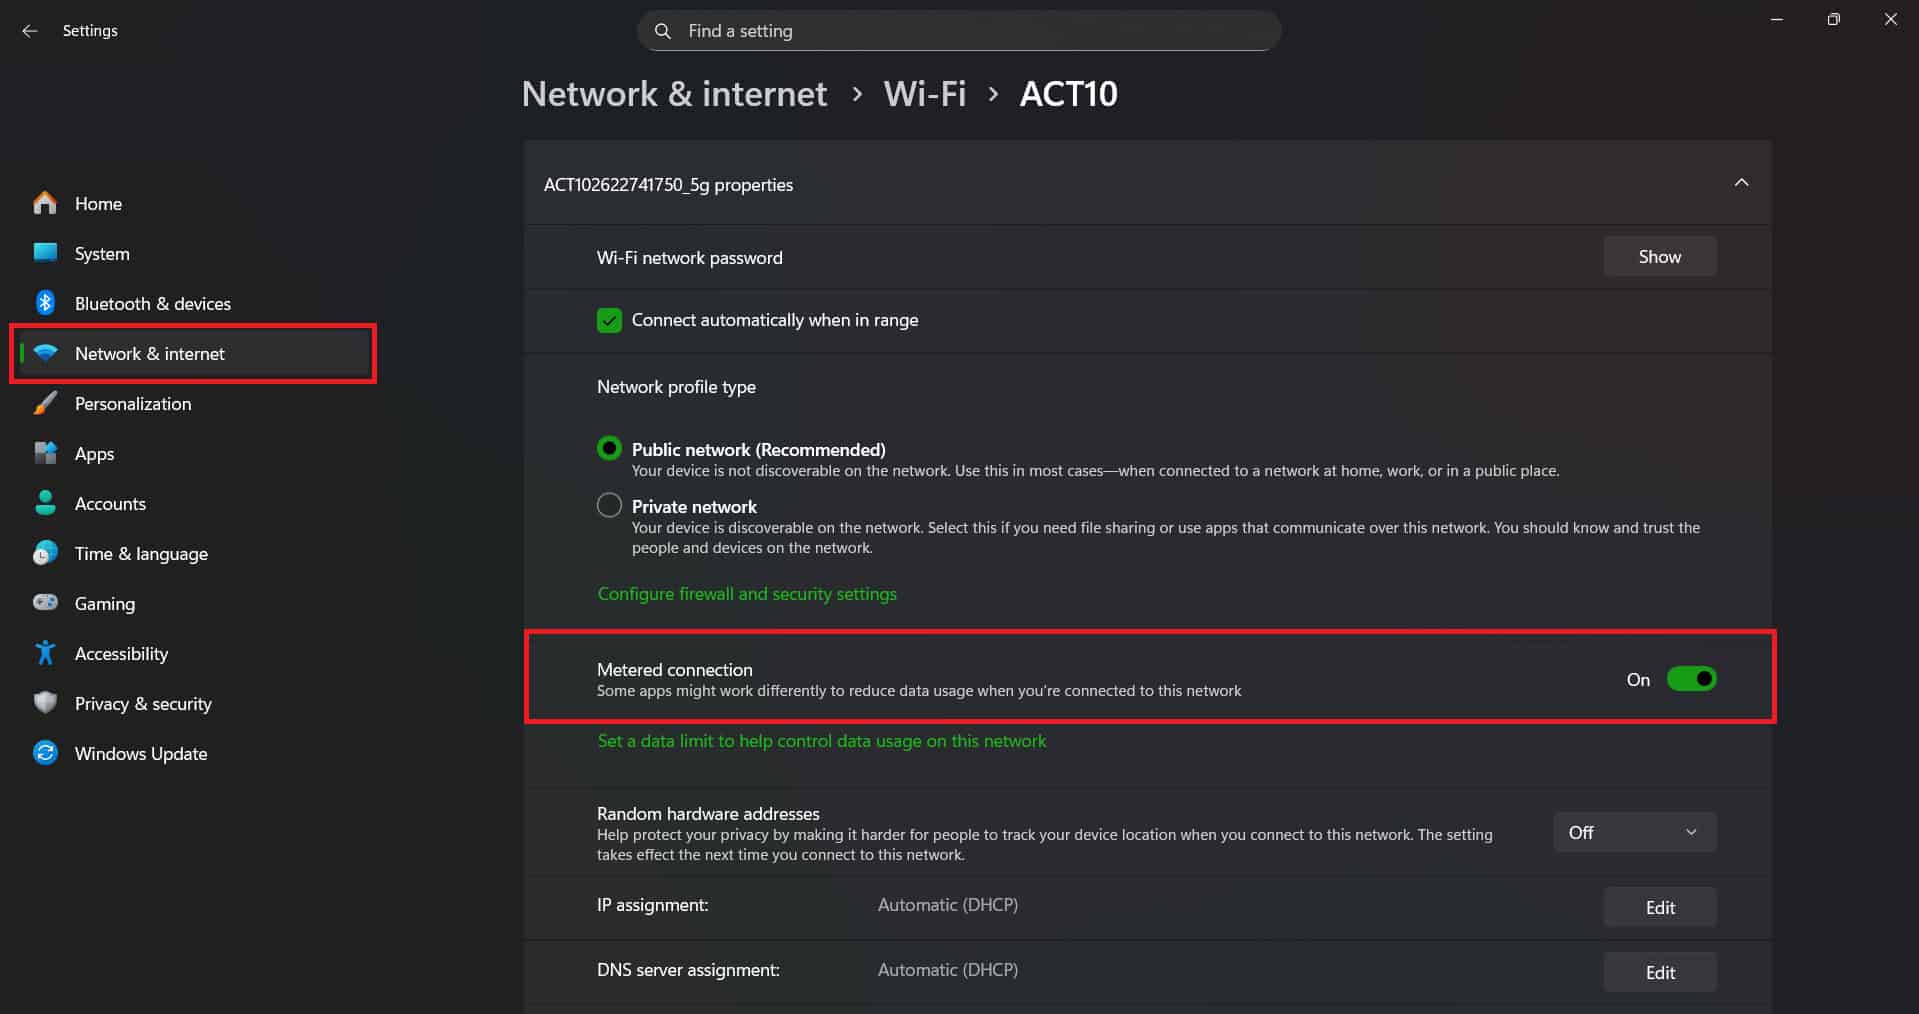
This may solve your issue.
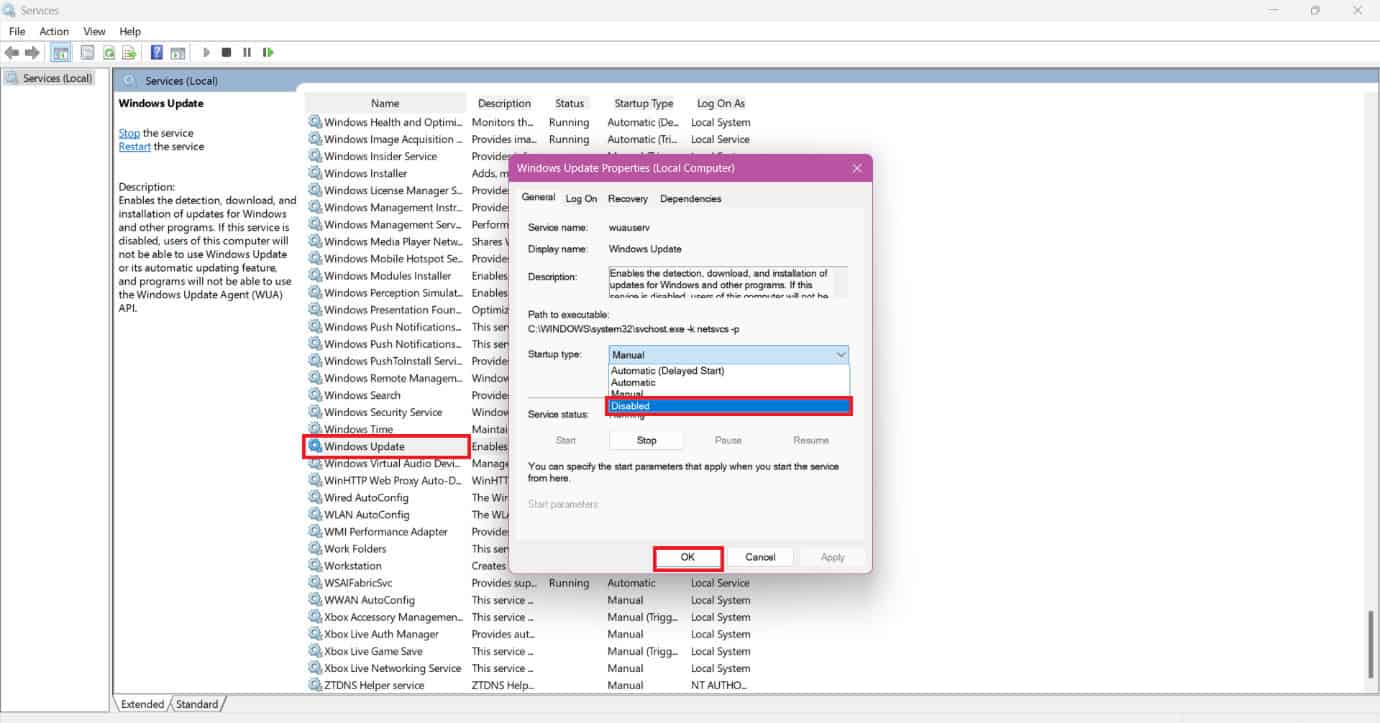
Method 5: Disable Windows Update Service
Lastly, you can disable the Windows Update service altogether.
- Press the Windows and R keys to open the Run dialog.
- Type in services.msc and hit Enter.
- Double-click on Windows Update.
- Click on General from the top ribbon.
- Then, click on the Startup Type.
- Now, select Disable and click on OK.
- Restart your desktop.
See if your problem is fixed.
Also Read: Top 400+ Most Useful Keyboard Shortcuts Lists Everyone Should Know
Now you will no longer have a difficult time figuring out how to fix Let’s cross this one off your list alert after following this guide. For more helpful tips and tricks, stay tuned, and feel free to share your suggestions in the comments below.


