Imagine urgently opening your laptop for some work only to be welcomed by no signals. What was meant to make our lives easier only ends up being the problem. Unfortunately, many Acer users have been facing this problem. So, let’s show you the fix to your Acer Monitor showing the no issue signal and get rid of this problem once and for all!
Ways to Fix an Acer Monitor Showing No Signal Issue
Don’t let your monitor glitch cause your work to stop midway. Try out these solutions right away.
Method 1: Restart Your Computer
Start with a simple reboot. Restarting clears temporary glitches and refreshes the hardware connection between your computer and the monitor.
Method 2: Detach and Reattach the Cable Wires
Unplug both ends of your HDMI, VGA, or DisplayPort cable, then plug them back in firmly. A loose or bent connector can easily cause a “No Signal” error. Try using an alternative port if your monitor or PC offers multiple options.
Method 3: Check Memory Modules
Sometimes, improperly seated RAM modules can prevent your system from booting correctly.
- Turn off your PC.
- Open the case and carefully reinsert the RAM sticks.
Boot again to see if the display responds.
Method 4: Check Power Supply to the GPU and the Motherboard
Make sure your graphics card and motherboard are both getting power. A disconnected or weak PSU cable can stop the GPU from sending a signal to your monitor. Reconnect any loose power cables and ensure the PSU is working properly.
Method 5: Change Display Cable
If your cable is damaged or outdated, replace it with a new one. Faulty cables are a very common cause of display issues. Choose a certified, good-quality cable that matches your monitor’s connection type.
Method 6: Adjust Monitor Input Settings
Your monitor might be set to the wrong input source.
- Press the menu button on the Acer monitor twice to open the menu option.
- Press the down button and select System from the left menu.
- Press Input.
- Select the correct input setting of your choice.

This ensures it’s receiving the signal from the right port.
Method 7: Disable Sleep Mode
Your monitor or computer might also be stuck in sleep mode.
- Open Settings and click on System from the left menu.
- Click on Power & battery.
- Select Screen, sleep & hibernate timeouts.
- Under the Plugged in and On battery options, select the shortest duration.
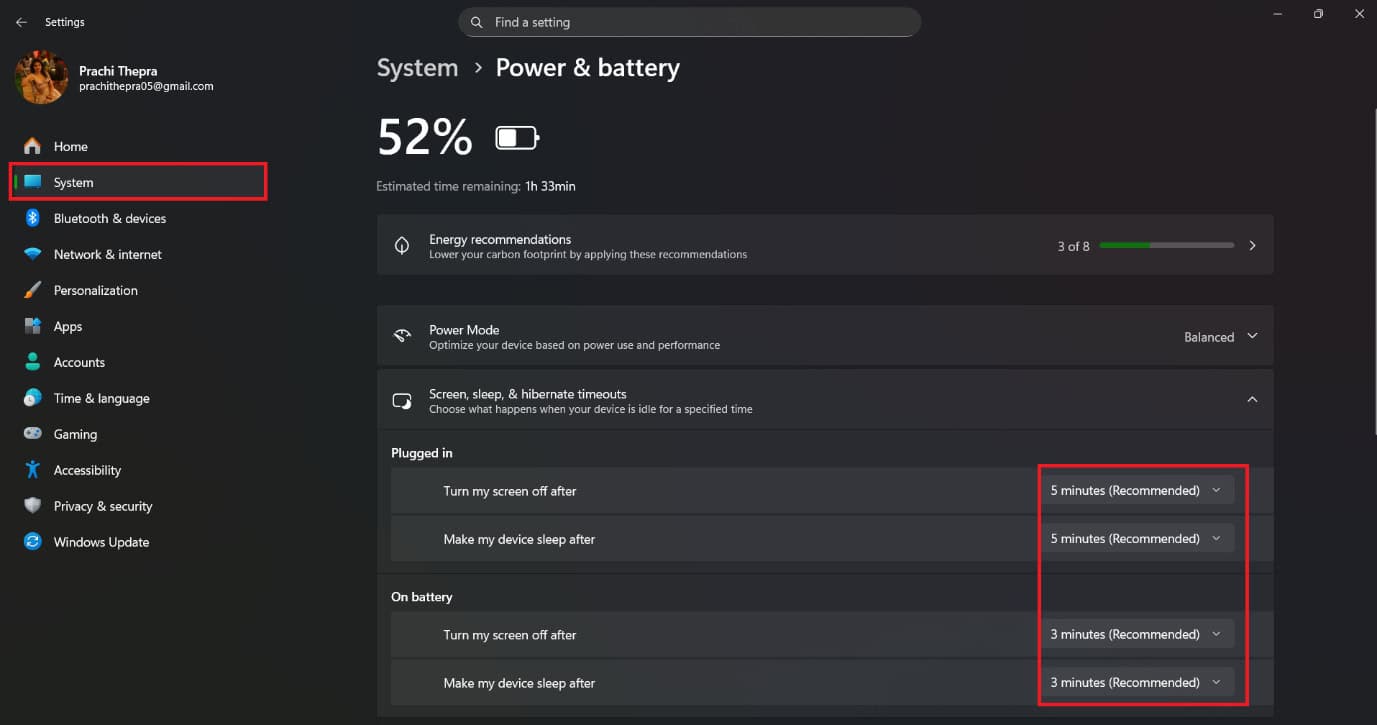
This helps prevent the screen from going black unexpectedly.
Method 8: Select Correct Monitor
If you’re using multiple displays, your computer might be sending the signal to another screen.
- Press the Windows and P keys simultaneously.
- Then, select PC screen only.
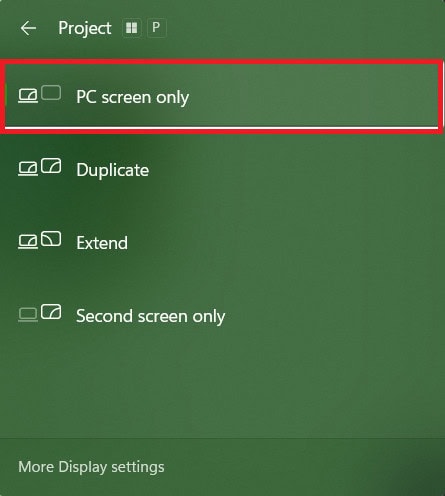
Check if your problem is fixed.
Method 9: Update System’s OS
Outdated system software can sometimes interfere with display communication.
- Open Settings and click on Windows Update from the left menu
- Click on Install.
- Then, select Restart.
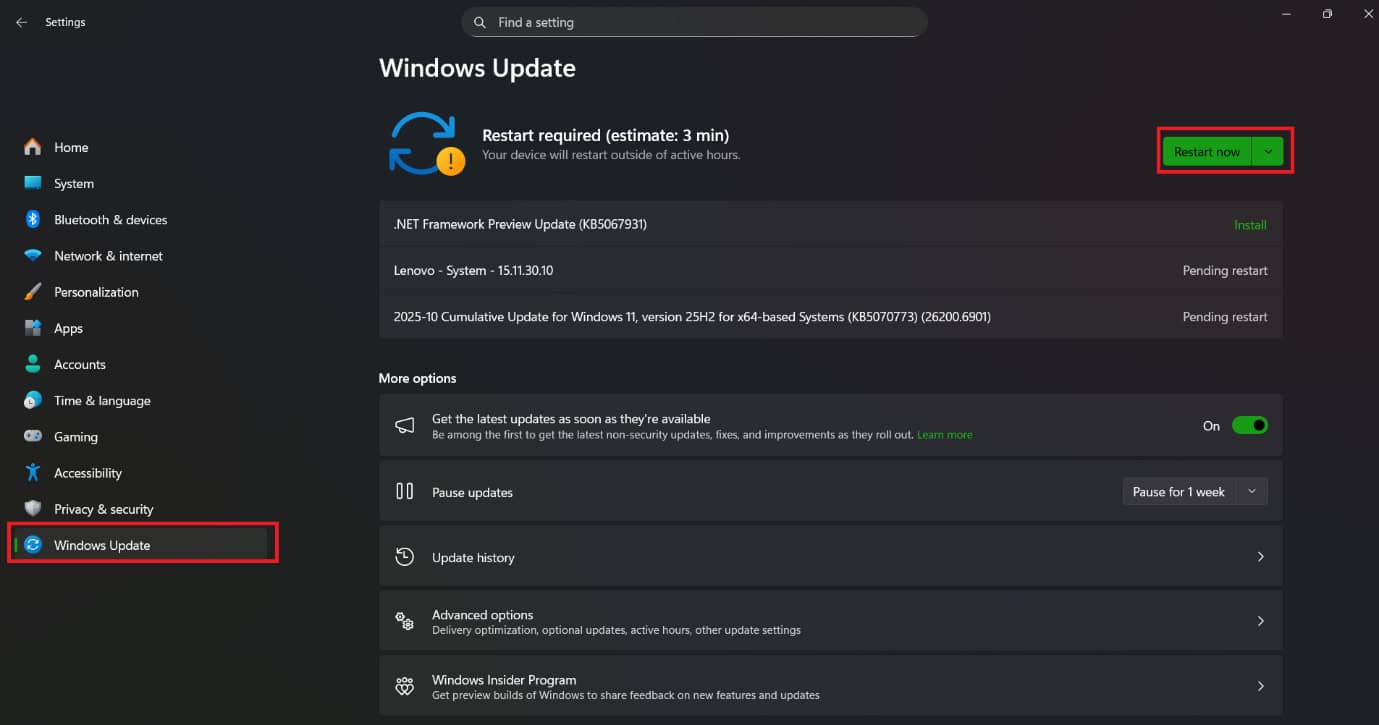
Your screen should open with fresh updates.
Method 10: Change Resolution and Refresh Rate
If your PC is set to a resolution or refresh rate higher than your monitor supports, it may show No Signal.
- Open Settings and click on System.
- Select Display.
- Click on Resolution and select the recommended display.
- Then, scroll down and click on Advanced options.
- Click on Refresh rate and select the recommended option.
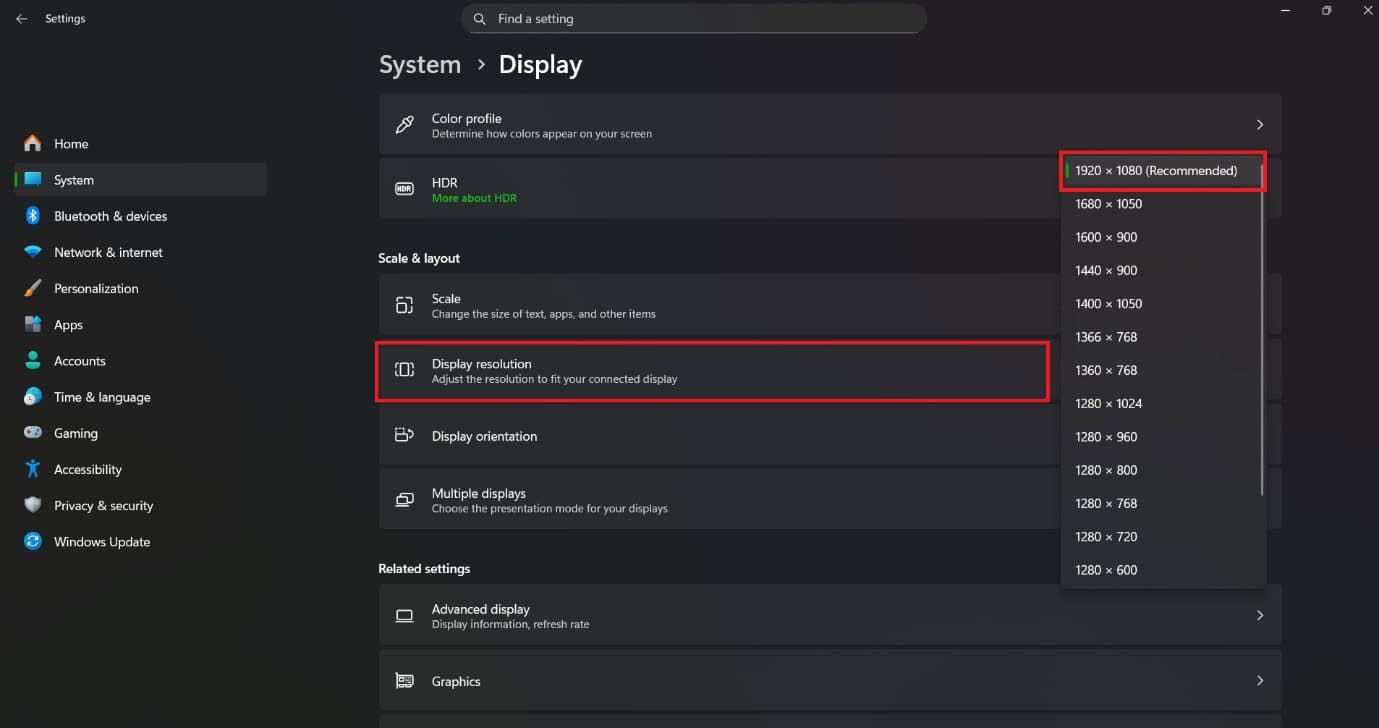
This should resolve your issue.
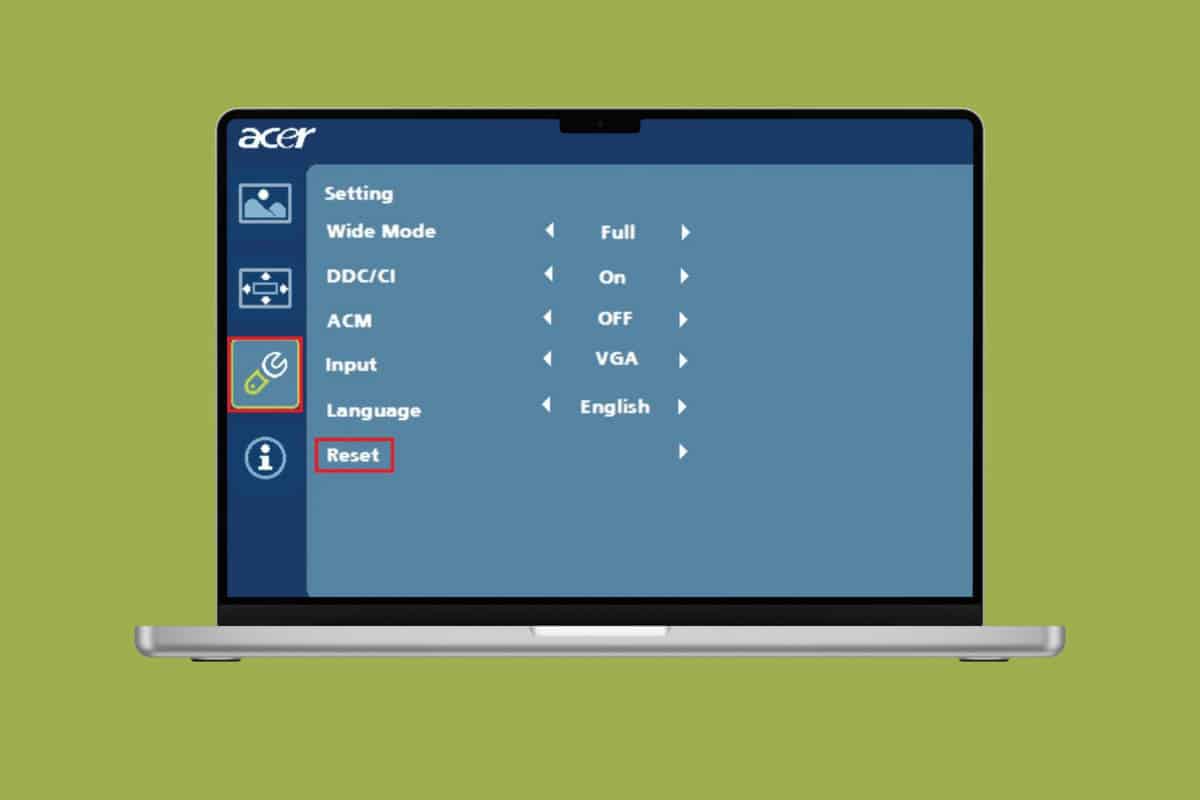
Method 11: Factory Reset Monitor
Use your monitor’s on-screen menu to restore it to factory settings.
- Press the menu button on the Acer monitor twice to open the menu option.
- Press the down button and select Setting from the left menu.
- Press Reset.
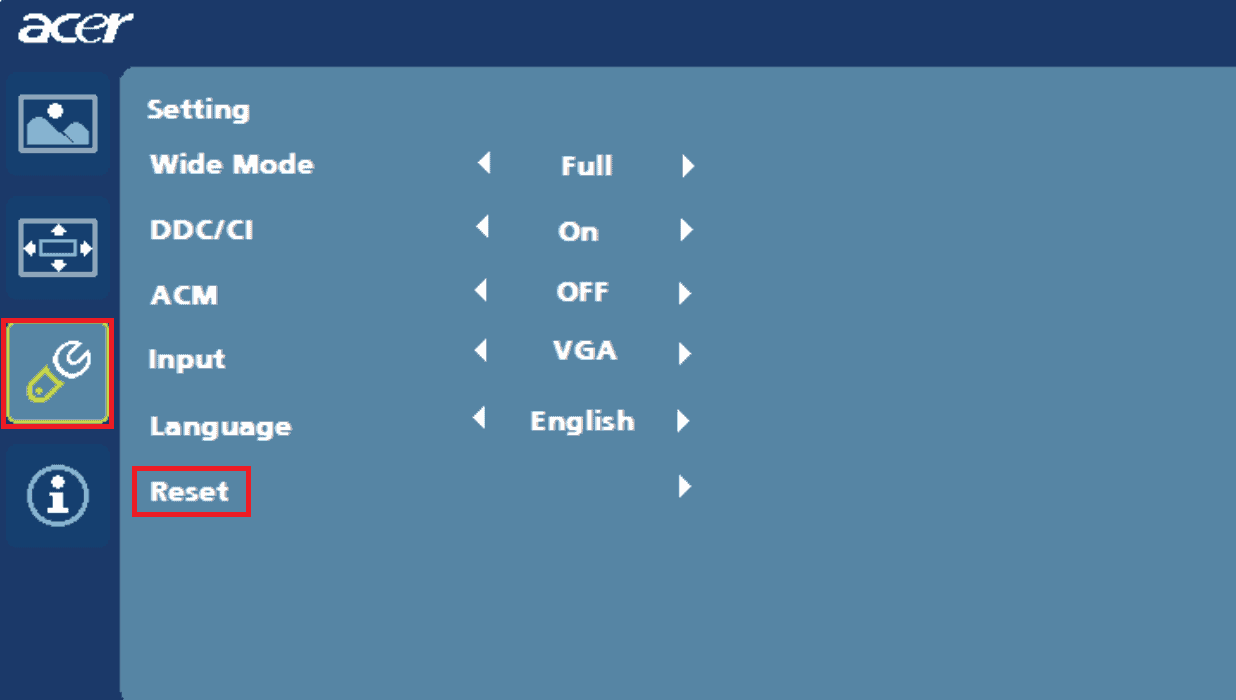
This removes any incorrect input, brightness, or sync settings that might be causing the display issue.
Method 12: Update or Reinstall Graphics Drivers
Faulty or outdated drivers can stop your GPU from outputting properly.
- Open Control Panel and click on Device Manager.
- Select Display Adapters from the left menu.
- Click on the display software.
- Then, click on Driver from the top ribbon.
- Now, select Update Driver.
- Click on OK.
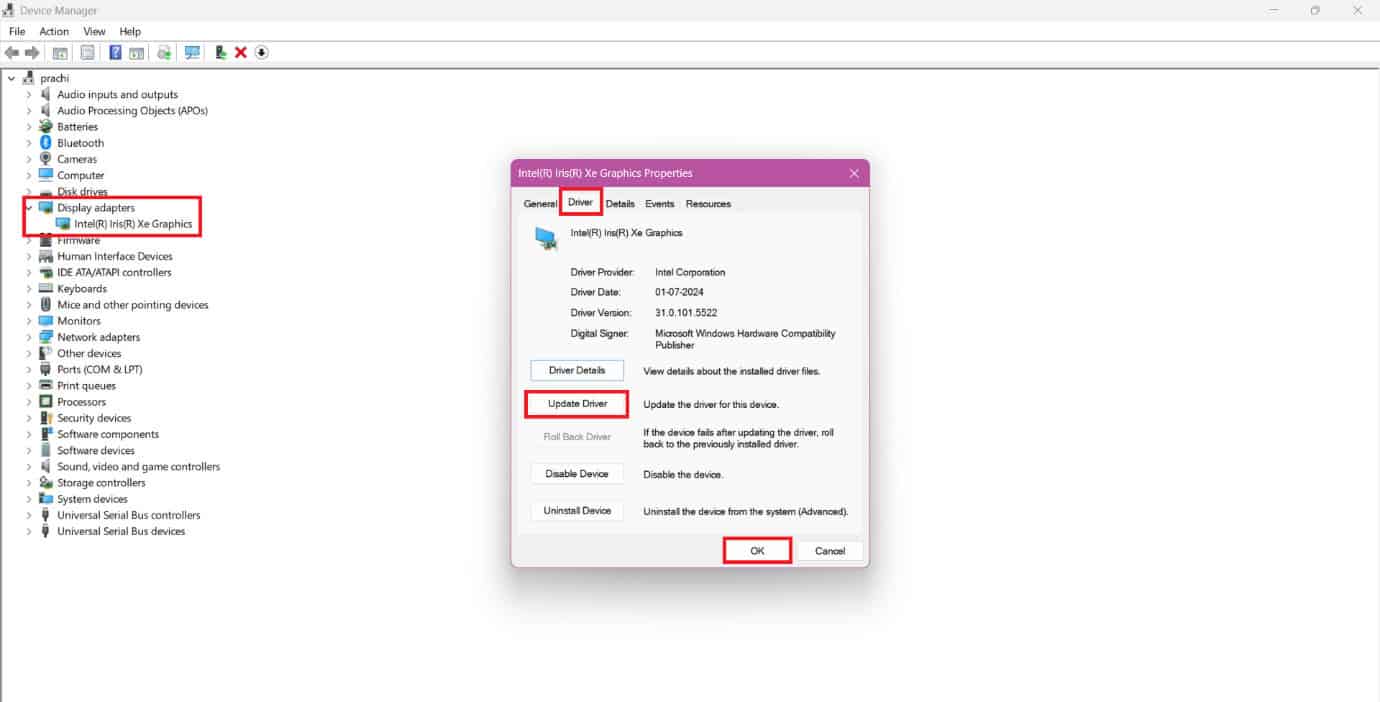
Your problem should be solved.
Method 13: Test with Another Device or Monitor
Connect another monitor or device (such as a laptop or console) to see if the issue is with your Acer monitor or the PC. This helps you pinpoint whether it’s a hardware or signal problem.
Method 14: Disable HDCP in the Graphics Control Panel
Some older monitors have compatibility issues with HDCP.
- Open the AMD graphics control panel.
- Click on Display.
- Select Specs.
- Select Override and find the HDCP Support option.
- Turn the toggle off for HDCP Support in the AMD Settings.
- Turn the toggle off for HDCP support.
- Restart your computer.
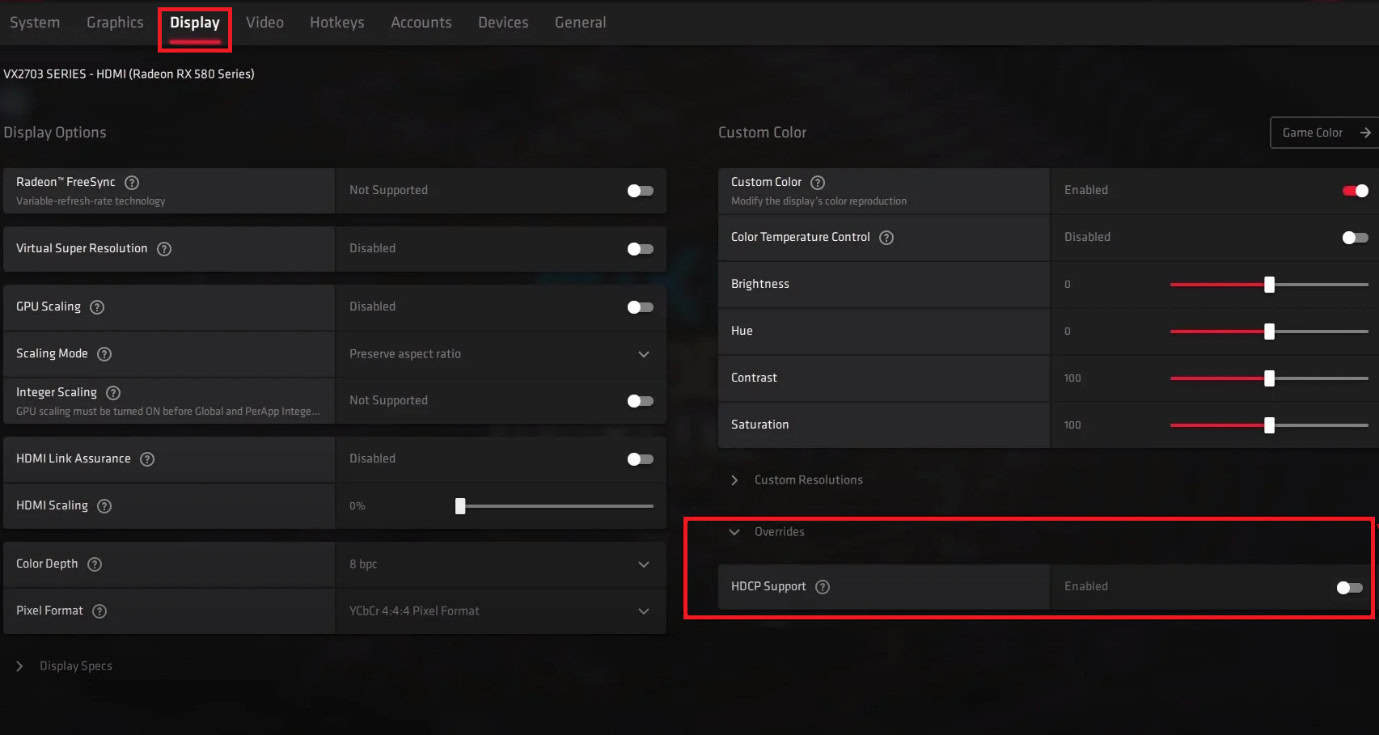
This can fix signal handshake problems between your system and monitor.
Method 15: Reset BIOS or System Display Settings
Outdated BIOS firmware can sometimes cause display glitches like green lines on your laptop screen. Visit your laptop manufacturer’s support page, download the latest BIOS update, and follow the instructions carefully. If you are not sure about the steps, take a look at What is BIOS and How to Update BIOS.
Method 16: System Restore
If the issue started recently, perform a System Restore to roll back your computer to a point when the display worked properly.
- Open Settings > System.
- Click on Recovery.
- Select Restart now under Advanced startup.
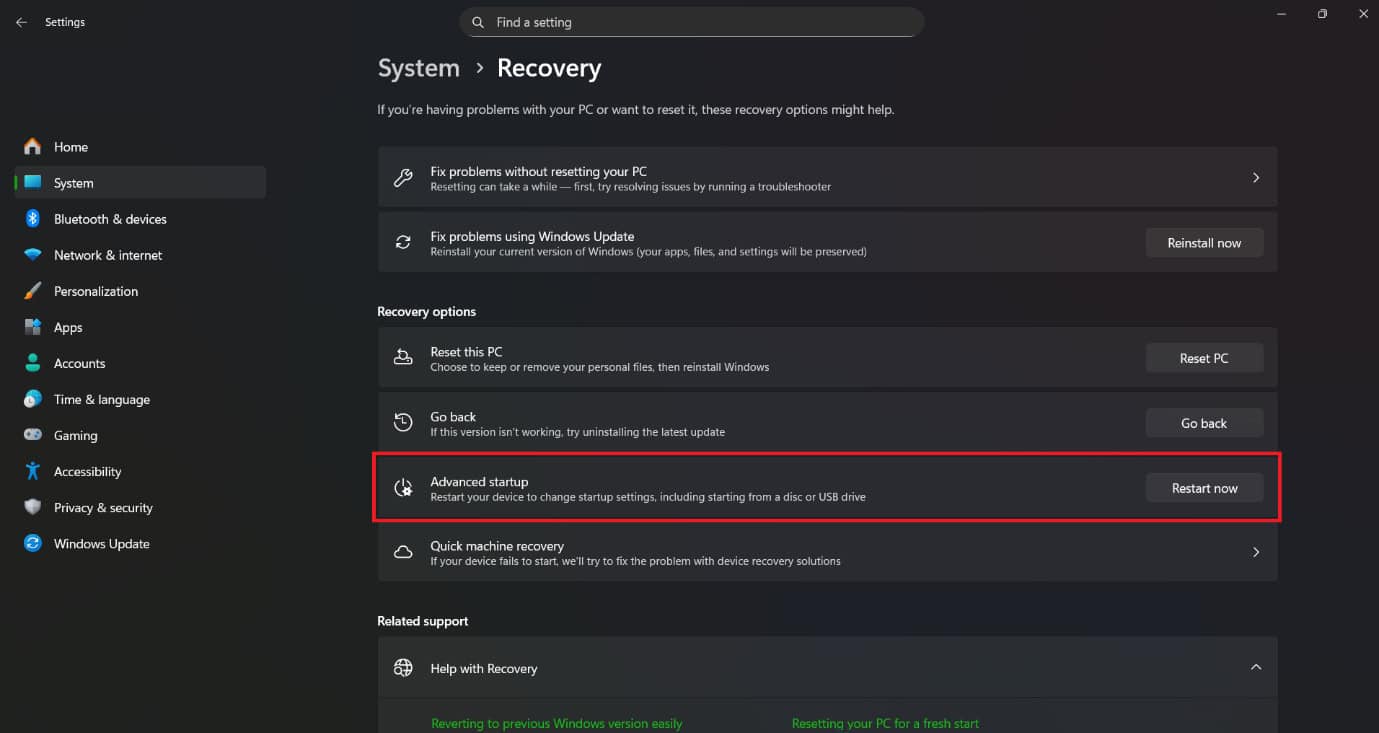
Your issue should be solved.
Method 17: Contact Acer Support
If nothing else works, reach out to Acer Support for professional help. The issue could be a faulty display panel, power board, or internal connection that needs repair or replacement.
Also Read: How to Update Your Lenovo Laptop
Now you will no longer have a difficult time figuring out how to fix to your Acer Monitor showing the no issue signal after following this guide. For more helpful tips and tricks, stay tuned, and feel free to share your suggestions in the comments below.